Snacks
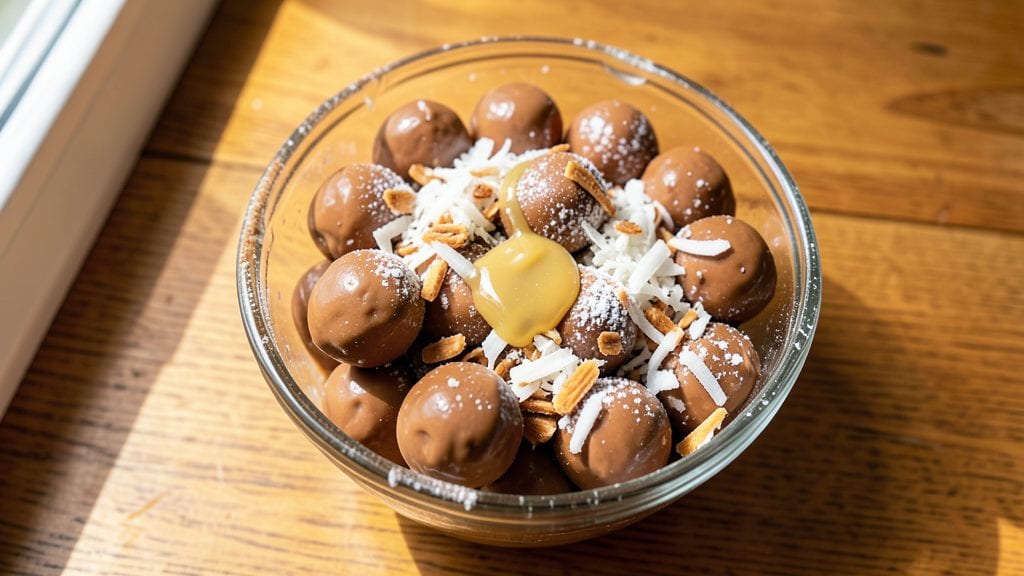
Grandma’s old-fashioned peanut butter balls recipe no bake delivers that cherished childhood flavor—creamy peanut butter centers wrapped in crisp coconut, all made without ever turning on the oven. I first made these after finding my grandmother’s handwritten recipe tucked in a kitchen drawer, and they’ve been a family favorite ever since. The secret lies in precise measurements and proper chilling, which ensures those melty centers stay intact while the coating stays delightfully crunchy.
This classic no-bake dessert requires just five simple ingredients: creamy peanut butter, powdered sugar, butter, and shredded coconut, plus a pinch of vanilla for warmth. The process is straightforward—mix, roll, coat, and chill—but the results are anything but ordinary.
Each bite delivers that rich, nutty peanut butter flavor encased in a sweet, coconutty shell that cracks just enough to reveal the gooey center underneath.
What makes these peanut butter balls truly special is their versatility. While the traditional version uses coconut, you can easily swap it for chocolate or crushed nuts for a different texture.
They’re perfect for holiday gifts, potlucks, or a quick homemade treat when you’re craving something sweet without the fuss of baking. With just 15 minutes of prep and 1 hour of chilling, you’ll have a batch ready to enjoy—or share.
Store them in an airtight container for up to two weeks, if they last that long. These peanut butter balls are the kind of recipe that feels like a warm hug—simple, comforting, and impossible to resist. Let’s get started on making them!
Ingredients for grandma's old fashioned peanut butter balls recipe no bake
Five simple ingredients transform into nostalgic childhood treats without ever heating the kitchen.
| Ingredient | Amount | Notes |
|---|---|---|
| Creamy Peanut Butter 🥜 | 1 cup | Natural, no added sugar preferred |
| Powdered Sugar 🍚 | 2 cups | Sifted for smooth texture |
| Unsalted Butter 🧈 | ½ cup | Softened but not melted |
| Vanilla Extract 🌸 | 1 tsp | Pure vanilla preferred |
| Shredded Sweetened Coconut 🥥 | 3 cups | Unsweetened works too |
| Salt 🧂 | ¼ tsp | Fine sea salt preferred |
The peanut butter is the heart of these—natural, no-sugar-added is best, but whatever you’ve got works. Jif Creamy or Skippy are reliable pantry staples, but store brands are fine too. Butter should be soft but not melted—microwave 10 seconds if it’s too firm. Vanilla extract matters here: pure vanilla adds depth, but imitation will still work in a pinch. The powdered sugar? Domino or Clabber Girl are fine, but sift it first for the smoothest texture. Coconut? Sweetened is traditional, but unsweetened works if you prefer less sugar.
No coconut? Crushed graham crackers or chopped nuts make a great substitute—they’ll add a different texture but still taste amazing. Short on vanilla? A pinch of cinnamon adds warmth. The butter can be swapped for vegetable shortening if you’re avoiding dairy. For extra richness, add 1 tbsp of honey to the peanut butter mix. These hold up well in hot weather, but if your kitchen’s warm, chill the dough for 30 extra minutes before rolling.
Once rolled, these need at least 1 hour in the fridge to set properly—the longer they chill, the firmer the centers stay. Store in an airtight container for up to 2 weeks, though they’ll likely disappear faster. Freeze extras for up to 3 months—just thaw at room temp before serving. The coconut coating stays crispy if you keep them sealed, but the centers will soften slightly after a few days. Double the batch—they’re impossible to resist.
Why You'll Love This Recipe
- No Mixing Needed: I’ll be real—this recipe is three ingredients plus rolling. Just scoop, roll, and chill. No sticky mess, no oven, no waiting for dough to rest. My kids think I’m a magician.
- Sweet-Salty Magic: That creamy peanut butter, powdered sugar crunch, and toasted coconut? It’s like a hug in every bite. The vanilla ties it all together—warm, nostalgic, and just sweet enough without being cloying.
- Party in a Jar: Honestly, these are my go-to for holiday gifts, teacher appreciation, or just because. Toss them in a jar with a ribbon, and boom—you’ve got a crowd-pleaser that costs pennies to make.
- Lasts All Week: Between us, I make a double batch and keep them in the fridge. They stay fresh for days (yes, even with coconut), so I’m always covered for snacks, lunchboxes, or when I forget to plan ahead. Zero waste.
Step-by-step instructions for grandma's old-fashioned no-bake peanut butter balls
This classic recipe delivers perfect texture every time—creamy peanut butter centers with a satisfying crunchy coconut shell.
Mix the Peanut Butter Filling
In a medium bowl, combine the 1 cup creamy peanut butter, 0.5 cup unsalted butter, and 0.25 tsp salt. Use a hand mixer or wooden spoon to beat until completely smooth and creamy—you should see no streaks of butter remaining. The mixture should be thick but still spreadable.
Next, gradually add the 2 cups powdered sugar while mixing continuously. This prevents clumping and ensures an even, smooth texture. Add the 1 tsp vanilla extract and mix for another 30 seconds. The filling should now be thick, glossy, and ready to roll into balls. If it feels too sticky, add 1-2 more tablespoons of powdered sugar to achieve the perfect consistency.
Shape the Peanut Butter Balls
Using a cookie scoop or tablespoon, portion out the peanut butter mixture into 1-inch balls. I like to use a slightly wet hand to help shape them—this prevents sticking to your fingers. Place each ball onto a parchment-lined baking sheet or plate, spacing them about 1 inch apart.
You should end up with about 16 balls total (about 4 servings). If your mixture feels too soft to handle, chill it in the refrigerator for 10-15 minutes before shaping. This makes them easier to roll and prevents them from flattening when coated.
Coat with Shredded Coconut
In a shallow dish or pie plate, spread out the 3 cups shredded sweetened coconut evenly. This will be your coating station. Working with one ball at a time, roll each peanut butter ball gently but firmly in the coconut until completely and evenly coated.
Press the coconut lightly into the surface of each ball to help it adhere better. The coating should be about ¼-inch thick all around. If you have leftover coconut, simply roll the balls again until fully covered. Place each coated ball back on the prepared baking sheet.
Chill and Set
Refrigerate the coated peanut butter balls for at least 1 hour, or until completely firm. This chilling step is crucial—it allows the peanut butter center to set properly while keeping the coconut coating crunchy. The balls should hold their shape when gently pressed.
For best results, I recommend chilling them overnight. The longer they set, the firmer they become, making them easier to handle and serve. Once set, store them in an airtight container in the refrigerator for up to 2 weeks, or freeze for up to 3 months.
Serve and Enjoy
Serve the peanut butter balls at room temperature for the best texture contrast—creamy centers with a satisfying crunch. These make perfect gifts, holiday treats, or a quick dessert. For a festive touch, sprinkle with extra coconut or drizzle with melted chocolate before serving.
Each bite should deliver that nostalgic combination of rich peanut butter and sweet coconut. If you prefer a different texture, you can substitute the coconut with chopped nuts or a sprinkle of powdered sugar for a dusted version. The possibilities are endless with this classic recipe!
Pro Tips For Making Grandma'S Old Fashioned Peanut Butter Balls Recipe No Bake
- Chill the Dough: After mixing, pop the whole batch in the fridge for 20 minutes—yes, even if you’re eager to roll. The cold dough holds shape better, sticks less to your hands, and rolls into cleaner balls. I learned this the hard way when my first batch turned into a peanut butter disaster on the counter.
- Use Real Butter: Skip the margarine or "butter-flavored" spreads—this isn’t the time for shortcuts. Unsalted butter adds richness and helps bind the dough better than anything else. If you’re worried about salt, taste the butter first; you can always adjust the recipe’s powdered sugar later.
- Toast the Coconut: Spread the shredded coconut on a baking sheet and toast it for 5 minutes at 325°F until golden and fragrant. It’s a little extra work, but the flavor jumps from "sweet" to "tropical vacation" in seconds. (And no, the microwave version doesn’t cut it.)
- Roll Small, Even Balls: Aim for 1-inch balls—any bigger and they’ll flatten when baking (or not, since this is no-bake, but they’ll still look messy). Use a kitchen scale or measuring spoons for consistency, especially if you’re making these for gifts. Uneven sizes = uneven baking time = sad, lopsided treats.
Serving suggestions for leftovers
Holiday Gift Packaging
These peanut butter balls make thoughtful, nostalgic gifts that feel personal and homemade. Package them in clear cellophane bags tied with a red ribbon for a classic look, or use mini mason jars layered with coconut flakes for a rustic touch.
I love adding a handwritten tag with the recipe—it’s a sweet keepsake! For extra flair, sprinkle crushed peppermint or cinnamon sugar on top before gifting. 🎄
Festive Serving Ideas
For holiday gatherings, arrange the balls on a tiered serving tray with fresh cranberries and pinecones for a festive centerpiece. Serve alongside warm apple cider or peppermint tea to complement the peanut butter’s richness.
During summer picnics, pack them in a woven picnic basket with chocolate-dipped strawberries for a sweet-and-salty contrast. 🍂
Dessert Board Pairings
Create a no-bake dessert board by pairing peanut butter balls with dark chocolate squares, sliced bananas, and honeycomb. Add a drizzle of melted caramel or peanut butter for extra decadence.
For a tropical twist, include toasted coconut macaroons and mango slices. This makes an impressive spread for parties without requiring any baking. 🍫
Kid-Friendly Serving
Kids love these as after-school snacks or birthday party treats. Serve them in mini muffin liners or colorful paper cups for easy grab-and-go fun. Pair with milk or chocolate milk for a classic combo.
For a fun twist, let kids decorate their own balls with sprinkles or mini M&Ms before chilling. It’s a mess-free activity they’ll adore! 🎉
Breakfast or Brunch
Start your day sweet with these as a make-ahead breakfast! Serve them alongside yogurt parfaits or fresh fruit for a balanced morning treat. For a savory-sweet combo, pair with scallion pancakes or biscuits and gravy at a Southern-style brunch.
The coconut adds a tropical vibe that brightens any meal. ☀️
Party Platter Staple
These are a must-have for potlucks and dessert tables—they’re easy to transport and always disappear fast. Arrange them on a wooden board with chocolate-dipped pretzels and nuts for a mix of textures.
For a holiday twist, add cranberry sauce or peanut butter-filled pretzels to the platter. Guests will love the no-fuss, crowd-pleasing appeal! 🥂
Nutrition facts
Frequently asked questions
Why do I need to chill the peanut butter balls before coating?
Chilling the balls for 10-15 minutes before coating prevents them from flattening when rolled in coconut. The cold temperature firms up the peanut butter mixture, making it easier to handle and ensuring a clean, even coating. This step is especially important if your kitchen is warm or if your peanut butter mixture feels too soft.
Can I substitute the coconut coating with something else?
For a chocolate version, melt 1 cup of chocolate chips and dip each ball, then let set on parchment paper. You can also use crushed graham crackers, chopped nuts, or even powdered sugar for a dusted finish. Just ensure your substitute is finely ground for even coverage.
How do I fix peanut butter balls that are too sticky?
If your mixture feels too sticky, add 1-2 tablespoons of powdered sugar at a time until it reaches a workable consistency. For extra firmness, chill the dough for 30 extra minutes before rolling. If the balls still stick after coating, lightly dust your hands with powdered sugar while shaping.
Are these peanut butter balls gluten-free?
The traditional recipe is naturally gluten-free, but always check your coconut and other ingredients for cross-contamination warnings. For added safety, use certified gluten-free coconut flakes. If you're avoiding dairy, substitute the butter with vegetable shortening or coconut oil.
How long will homemade peanut butter balls keep?
Store them in an airtight container in the refrigerator for up to 2 weeks, or freeze for 3 months for longer storage. The coconut coating stays crispy when sealed, though the centers may soften slightly over time. For best texture, serve at room temperature.