Side Dishes
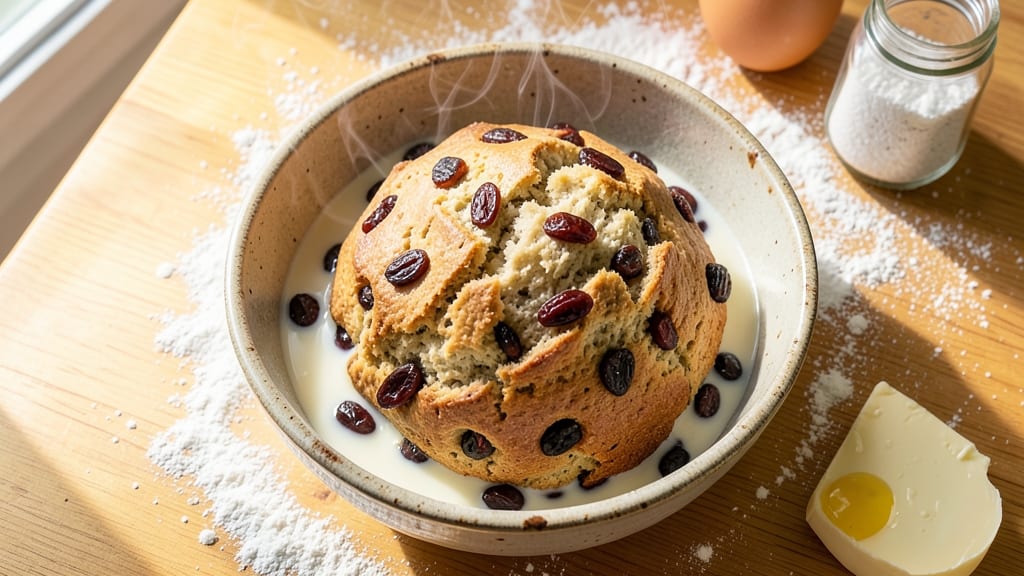
Grandma's raisin bread recipe brings back the comforting aroma of a home kitchen where warm spices and sweet plump raisins create a loaf that feels like a hug in every slice.
The secret to this classic recipe lies in soaking the raisins in rum or citrus zest, which transforms them from ordinary to extraordinary—adding depth and moisture that keeps every bite tender.
I've perfected this method over years of baking, ensuring the raisins are evenly distributed and the crust stays golden without overpowering the soft, spiced interior.
This recipe delivers a foolproof technique that combines traditional methods with simple ingredients you likely already have in your pantry. The dough requires just 30 minutes of active time, followed by a leisurely 1- to 2-hour rise, making it ideal for a cozy weekend project.
The warm spices—cinnamon, nutmeg, and allspice—create a fragrant experience that fills your home with nostalgia, while the buttery richness ensures each slice is worth savoring.
By the time you pull this loaf from the oven, you'll have a perfectly moist bread with a tender crumb and a crust that's just crisp enough to hold its shape.
The raisins, now infused with flavor from their soak, burst with sweetness in every bite, balanced by the warm spices that linger on your tongue. This bread is ideal for breakfast toast, afternoon snacks, or as a sweet companion to cheese and charcuterie boards.
For those who love tradition, this recipe includes the classic rum soak, but I've also included a citrus zest variation that works beautifully for those who prefer a non-alcoholic option.
The dough's simplicity makes it beginner-friendly, while the rich flavor ensures even experienced bakers will want to make it again and again. Let's get started on creating a loaf that tastes like home.
Ingredients for grandma's raisin bread
Simple pantry staples transform into nostalgic raisin bread with tender crumb and fragrant spices.
| Ingredient | Amount | Notes |
|---|---|---|
| All-Purpose Flour 🌾 | 4 cups | Spooned and leveled, not scooped |
| Granulated Sugar 🍚 | ¾ cup | White or light brown |
| Unsalted Butter 🧈 | ½ cup | Cold, cubed, full-fat preferred |
| Large Eggs 🥚 | 2 whole | Room temperature for best mixing |
| Active Dry Yeast 🍞 | 2 ¼ tsp | Fresh or from a jar, not expired |
| Warm Milk 🥛 | 1 cup | 110°F, whole milk preferred |
| Plump Raisins 🍇 | 1 ½ cups | Golden or dark, not dried |
| Dark Rum 🍹 | ¼ cup | Or substitute lemon/orange zest |
| Ground Cinnamon 🌿 | 1 ½ tsp | Freshly ground for best flavor |
| Ground Nutmeg 🌿 | ½ tsp | Freshly grated preferred |
| Ground Allspice 🌶️ | ½ tsp | Warm, aromatic spice |
| Salt 🧂 | 1 tsp | Kosher or sea salt |
| Granulated Sugar 🍚 | ¼ cup | For sprinkling on top |
The raisins are the heart of this bread, so don't skimp. Golden raisins work best—they stay plump and sweet, but dark raisins add depth if you prefer. For the rum soak, Kahlúa or Captain Morgan are my go-tos, but lemon or orange zest works perfectly for a non-alcoholic version. If you're using zest, mix it with a splash of warm water to mimic the moisture from the rum. The yeast is non-negotiable here—check the expiration date and use it within a few months for best results. For the butter, Land O'Lakes or Plugrá are reliable brands that stay cold longer during mixing.
No rum? Orange juice concentrate or even apple cider can work in a pinch, but the flavor will be subtly different. The spices should be fresh—if your cinnamon smells like dust, toss it. Penzeys or McCormick are great for quality spices, but the bulk bins at Whole Foods or Trader Joe's are budget-friendly. For the milk, whole milk gives the best texture, but 2% works fine. The eggs should be at room temperature—cold eggs can make the dough tough. If you're in a rush, microwave them for 20 seconds to warm them up.
This dough is forgiving, but don't overmix—just until combined. The raisins will soak up the rum or citrus for about 15 minutes before mixing, so plan ahead. Once shaped, the bread keeps well in an airtight container at room temperature for 3 days, or you can freeze it for up to 3 months. For reheating, wrap slices in foil and warm in a 350°F oven for 5 minutes. The crust stays fresh for a few days if you store it wrapped in a clean kitchen towel.
Why You'll Love This Recipe
- No-Fuss Mix-In: I swear by the five-minute prep—just toss the raisins into warm butter and sugar while the yeast gets busy. No fancy techniques, no measuring cups out of control. Honestly, my lazy Sundays thank me for this.
- Sweet-Buttery Magic: That first bite? Warm, pillowy crumb with bursts of chewy raisins soaked in buttery richness. The sugar caramelizes just enough to make it taste like a bakery secret, not a weekday loaf.
- Breakfast to Dessert: Slice it toasted with butter for morning, drizzle with honey for an afternoon pick-me-up, or serve with ice cream—yes, really. It’s my go-to for when I need one thing to do double duty.
- Lasts All Week: A single loaf feeds my family for days, and it actually gets better the next day. Freezes like a dream too, so I bake one batch and never think about bread again until it’s gone. Budget win.
Step-by-step instructions for grandma's raisin bread
Let's create this comforting, spiced raisin bread that's perfect for breakfast or dessert.
Activate the Yeast and Prepare the Raisins
In a small bowl, combine the 1 cup warm milk (about 110°F) with the 2.25 teaspoons active dry yeast. Let it sit for 5-10 minutes until it becomes frothy and bubbly—this confirms your yeast is alive and ready to work. If it doesn't bubble, start over with fresh yeast.
While that works, place the 1.5 cups plump raisins in a small bowl. Pour the 0.25 cup dark rum over them and let them soak for 10 minutes. This step plumps up the raisins and infuses them with warm, boozy flavor. If you're substituting with citrus zest, mix it with 2 tablespoons water instead of rum.
Mix the Dough Ingredients
In a large mixing bowl, combine the 4 cups all-purpose flour, 0.75 cup granulated sugar, 1.5 teaspoons ground cinnamon, 0.5 teaspoon ground nutmeg, 0.5 teaspoon ground allspice, and 1 teaspoon salt. Whisk everything together to distribute the spices evenly—you'll smell that wonderful warm spice blend filling the kitchen.
Make a well in the center and add the 2 whole large eggs (at room temperature) and the 0.5 cup unsalted butter (cold and cubed). Using a wooden spoon or your hands, mix until the butter is mostly incorporated and you have a shaggy dough. The butter should be broken down but still visible in chunks.
Combine and Knead the Dough
Add the yeast-milk mixture and the soaked raisins to the bowl. Mix with a wooden spoon until everything comes together, then turn it out onto a lightly floured surface. Knead the dough for 8-10 minutes until it becomes smooth and elastic. You'll know it's ready when it springs back slightly when pressed.
Here's the thing—don't rush the kneading. This develops the gluten that gives your bread its structure. If the dough feels too sticky, add flour 1 tablespoon at a time, but don't overdo it or your bread will be dense. Shape the dough into a ball, place it back in the bowl, cover with a clean kitchen towel, and let it rise in a warm place for 1 to 1.5 hours or until doubled in size.
Shape and Proof the Bread
Once the dough has risen, punch it down gently to release the air. Turn it out onto a lightly floured surface and shape it into a 9x5-inch loaf pan. The dough should be smooth on top—don't worry if it doesn't fill the pan completely. Brush the top with a little warm water and sprinkle with the remaining 0.25 cup granulated sugar. This creates that beautiful caramelized crust.
Cover the loaf pan with the kitchen towel and let it rise again for 30 to 45 minutes until it's puffy and just about reaches the top of the pan. Preheat your oven to 350°F while the bread proofs—you want everything ready to go when the time comes.
Bake to Golden Perfection
Bake the bread for 35 to 40 minutes until the top is deep golden brown and a toothpick inserted in the center comes out clean. The kitchen should smell like warm spices and caramelized sugar—pure comfort food aromas. If the top browns too quickly, tent the loaf with aluminum foil to prevent over-browning while it continues to bake.
Remove the bread from the oven and let it cool in the pan for 10 minutes before transferring it to a wire rack. This resting period allows the bread to set properly. Once cooled, slice it thickly—each piece should be packed with moist, spiced dough and plump raisins. Serve warm with butter or jam for the ultimate cozy experience.
Pro Tips For Making Grandma'S Raisin Bread
- Bloom the Yeast First: Skip mixing yeast straight into dry flour—it’s a rookie move. Instead, dissolve it in warm (not hot) water with a pinch of sugar first, then wait 5–10 minutes until it’s frothy. I used to rush this, and my bread always took twice as long to rise. Trust the bubbles—they’re your guarantee the yeast is alive and ready to work.
- Soften Butter Properly: Grandma’s recipe likely calls for softened butter, but "softened" isn’t "melted" or "rock-hard." Press your thumb into it—if it leaves a slight indent, you’re golden. Melted butter makes the dough greasy; cold butter won’t mix smoothly. I learned this after scrapping a batch where the butter had separated like a sad salad dressing.
- Don’t Overmix the Dough: Once you add the flour, stop mixing the second everything comes together. Overworking the dough develops too much gluten, and your bread turns out dense instead of tender. Two minutes max with a wooden spoon—yes, even if it looks shaggy. My grandmother’s bread had that perfect crumb because she swore by "just until combined."
- Proof the Dough Twice: Let the dough rise once, then punch it down and let it rise again—this second rise is non-negotiable. The first rise builds volume, but the second develops flavor and texture. I skipped it once and got a bread that tasted flat, like it was holding its breath. Give it 1–2 hours in a warm spot (top of the fridge works) until it’s puffy and springs back when poked.
Essential equipment for this recipe
Mixing Essentials
Start with a large mixing bowl—I recommend a stainless steel 5-quart bowl from OXO for durability and easy cleanup. This size gives you plenty of room to mix the dough without spills.
For measuring dry ingredients, a scale is ideal, but if you prefer cups, use a spoon-and-level method with your all-purpose flour to avoid packing. A medium-sized whisk helps distribute the spices evenly before adding wet ingredients. 🌾
Kneading Tools
For kneading, your hands work best, but a dough scraper like the Kitchy brand helps prevent sticking. If you prefer a stand mixer, use the paddle attachment on low speed to avoid overdeveloping the gluten.
I find a wooden dough whisk useful for mixing the raisins into the dough without overworking it. For shaping, a lightly floured surface (like a marble pastry mat) prevents sticking better than a regular countertop.
Proofing Setup
A proofing basket or loaf pan is essential for shaping. I use a 9x5-inch metal loaf pan from Wilton for even baking. For proofing, create a warm environment by placing the dough in a turned-off oven with a bowl of hot water (set to 80°F).
This mimics a professional proofing box. A digital thermometer ensures accuracy—aim for 78-82°F for optimal rise. Cover with a clean kitchen towel or plastic wrap to retain moisture.
Baking Gear
Your oven needs a reliable thermometer—I trust the Thermoworks Oven Thermometer to confirm 350°F accuracy. For baking, a light-colored metal loaf pan (like All-Clad) ensures even heat distribution. A pastry brush helps apply the sugar glaze before baking.
If your oven runs hot, use aluminum foil to tent the loaf during the last 10 minutes of baking. A wire cooling rack prevents soggy bottoms while cooling.
Optional Extras
For raisin soaking, a small glass bowl works best—it’s easy to see the liquid absorption. If you’re using citrus zest, a microplane ensures fine, even shreds. A spice grinder keeps cinnamon, nutmeg, and allspice fresh.
For storage, an airtight container (like Rubbermaid or Le Creuset) preserves freshness. A serrated bread knife gives clean slices—essential for thick raisin bread. 💡
Nutrition facts
Frequently asked questions
Why do the raisins need to soak in rum or citrus?
Soaking the raisins in rum or citrus zest transforms them from dry to plump and flavorful! The liquid infuses them with moisture and warm aromatics, preventing them from sinking to the bottom of the loaf. For a non-alcoholic version, lemon or orange zest works beautifully—just mix it with warm water to mimic the rum's effect.
Can I make this bread without a stand mixer?
This recipe is designed for hand-mixing. Just use a wooden spoon or your hands to combine ingredients, then knead the dough on a lightly floured surface for 8-10 minutes. The key is patience—let the dough rest between kneading sessions if needed. A dough scraper helps keep things tidy while working by hand.
What if my dough doesn't rise properly?
Check your yeast first—it should be fresh and bubbly when mixed with warm milk. If the dough isn't rising, try these fixes: place the bowl in a warmer spot (like a turned-off oven with a bowl of hot water), cover it tightly, and wait another 30-60 minutes**. Cold kitchens or old yeast are the most common culprits. For next time, keep your yeast in the fridge to extend its shelf life.
How do I store leftovers to keep them fresh?
Wrap the cooled loaf tightly in plastic wrap or place it in an airtight container to lock in moisture. It stays fresh at room temperature for 3 days, or you can freeze slices for up to 3 months. To reheat, wrap slices in foil and warm at 350°F for 5 minutes—this restores that fresh-baked texture and aroma.
Can I substitute dark raisins for golden raisins?
Yes, but expect a slightly chewier texture and deeper flavor. Dark raisins absorb more liquid, so they may need an extra 5 minutes of soaking time. For balance, reduce the rum by 1 tablespoon if using dark raisins—they're naturally more intense. Golden raisins stay plump and sweet, but dark raisins add a sophisticated depth that many bakers love.