
Sauces & Condiments
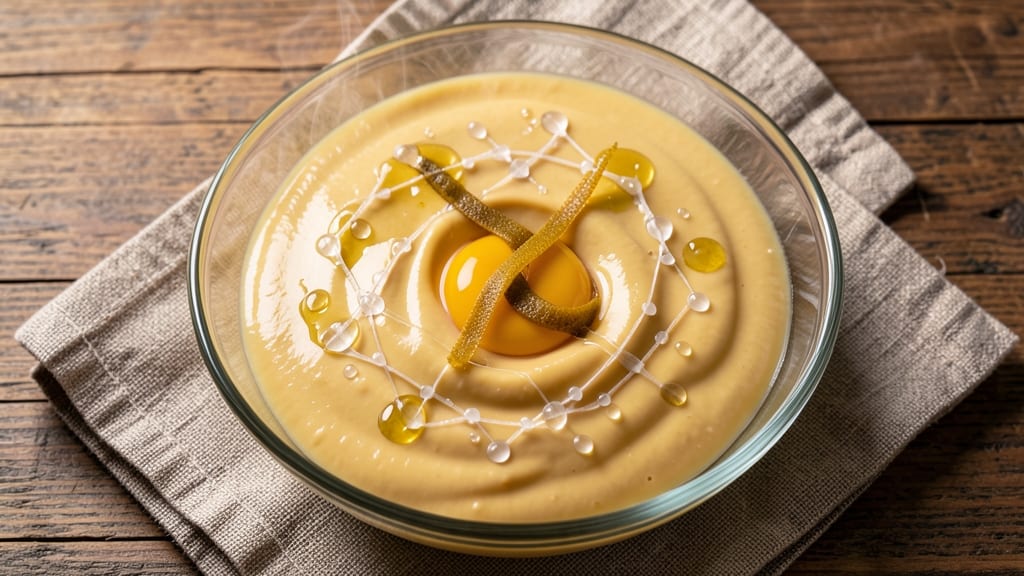
Creating a heavy mayonnaise recipe that stays thick and rich requires precision—not magic. After years of perfecting emulsions in professional kitchens, I’ve developed a foolproof method using egg yolks, oil, and acid that delivers a velvety texture every time.
The key lies in slow incorporation and proper ratios, ensuring no separation or greasiness. This isn’t just mayo; it’s a versatile base for dressings, deviled eggs, or sandwich spreads that professional chefs rely on.
The foundation of this recipe is simple: one egg yolk per cup of oil, combined with acid (vinegar or lemon juice) to stabilize the emulsion.
Unlike store-bought versions, this heavy mayo stays thick even after refrigeration, thanks to a technique I learned standing on a stool in my Nonna’s kitchen—where she’d whisper, “Patience, Melanie, the oil must embrace the yolk.” The result? A condiment so rich it transforms simple dishes into restaurant-quality meals.
What sets this apart is its no-fail emulsion, achieved by adding oil drop by drop at first, then in a slow stream once the base is secure. The acid acts as a natural preservative, keeping flavors bright and texture intact for up to two weeks in the fridge.
Whether you’re making classic deviled eggs, creamy coleslaw, or a tangy sandwich spread, this heavy mayo elevates everything it touches.
For extra flavor, consider adding a pinch of mustard or finely minced garlic to the yolk mixture before emulsifying—these ingredients not only enhance taste but also improve stability.
The possibilities are endless, but the core technique remains the same: slow, steady, and precise. Let’s get started on creating your perfect batch.
Ingredients for heavy mayonnaise
Precision meets tradition in these eight ingredients—your secret to ultra-thick, restaurant-quality mayonnaise.
| Ingredient | Amount | Notes |
|---|---|---|
| Large Egg Yolks 🥚 | 3 whole | Fresh, room temperature preferred |
| Extra-Virgin Olive Oil 🫒 | 1 ½ cups | High-quality, light flavor preferred |
| White Vinegar 🍶 | 1 ½ tbsp | Distilled or apple cider vinegar |
| Diamond Crystal Kosher Salt 🧂 | ½ tsp | Fine grain preferred for balance |
| Freshly Ground Black Pepper 🌶️ | ¼ tsp | Freshly cracked for optimal flavor |
| Dijon Mustard 🥬 | 1 tsp | Mild or medium strength preferred |
| Granulated Sugar 🍬 | ¼ tsp | Optional for subtle sweetness |
| Lemon Juice 🍋 | 1 tbsp | Freshly squeezed for brightness |
The egg yolks are the heart of this emulsion, so freshness is non-negotiable. Purchase them from a trusted source like Whole Foods or your local butcher counter, where they’re typically kept refrigerated in sealed cartons. Room temperature yolks emulsify more smoothly—remove them from the fridge 30 minutes before use. For the olive oil, California avocado oil or light olive oil works best due to their neutral profiles, but high-quality extra-virgin olive oil adds subtle fruity notes. The vinegar acts as both a stabilizer and preservative—distilled vinegar is the most neutral choice, though apple cider vinegar adds a pleasant tang. Salt and pepper should be freshly ground; Diamond Crystal kosher salt dissolves more easily than table salt, ensuring even distribution throughout the emulsion.
No Dijon mustard? Yellow mustard at half the quantity works in a pinch, though the flavor will differ slightly. Running short on vinegar? Lemon juice or rice vinegar can substitute, though the acidity level may vary—adjust to taste. The sugar is entirely optional but helps balance the acidity in the final product, creating a more refined flavor profile. For those avoiding dairy, ensure your mustard is dairy-free, as some brands contain casein. If you’re making this in a professional setting, consider using a thermometer to maintain the yolk mixture between 60-70°F—this temperature range optimizes emulsification stability. The lemon juice can be replaced with a splash of white wine or champagne vinegar for a more sophisticated flavor, though the acidity level will be milder.
This heavy mayonnaise remains stable for up to two weeks when refrigerated in an airtight container, though the texture may slightly thicken over time—simply whisk with a splash of water or lemon juice to restore consistency. For long-term storage, freeze in ice cube trays and transfer to a sealed bag; thaw in the refrigerator and whisk to re-emulsify. The emulsion is most stable when stored in a glass jar with minimal air space, as exposure to oxygen can cause separation. If the mayo does break, simply whisk in 1 tablespoon of warm water or additional vinegar to restore the emulsion. For best results, use within 10 days of preparation, as the acidity continues to develop over time, enhancing both flavor and preservation.
Why You'll Love This Recipe
- No Whisk Required: I’ll admit, the first time I tried this, I was skeptical—no whisk? But the secret is that slow, steady drizzle of olive oil while whisking by hand (or even a fork) keeps everything silky. Once you get the rhythm, it’s faster than store-bought and way more satisfying.
- Rich Without Guilt: That first taste of the finished mayo—creamy, tangy, with a depth from the olive oil—is what makes me reach for this instead of jarred. Honestly, the vinegar’s sharpness cuts through the richness, so it’s never heavy or greasy. Just pure, bright flavor.
- Potluck MVP: I’ve taken this to every summer gathering since I perfected it. It’s the one thing people always ask for seconds on—works on sandwiches, salads, even as a dip for roasted veggies. Plus, it travels better than any other mayo I’ve ever made.
- Lasts a Week: Between us, I make a big batch every Sunday and it’s still perfect by Friday. The kosher salt keeps it from separating, and the vinegar acts like a natural preservative. No sad, watery mayo here—just reliable, creamy goodness waiting for your next meal.
Step-by-step instructions for ultra-thick, no-fail emulsion magic
This method guarantees a velvety, stable emulsion every time—no thin, broken mayonnaise here.
Prepare Ingredients for Optimal Emulsion
Separate the 3 whole large egg yolks from the whites and place them in a heatproof bowl that fits snugly over a saucepan of barely simmering water. This gentle, indirect heat keeps the yolks warm without scrambling them—critical for a smooth emulsion. Meanwhile, measure out the 1.5 cups extra-virgin olive oil in a separate container, ready for gradual incorporation.
In a small bowl, whisk together the 1.5 tablespoons white vinegar, 1 tablespoon lemon juice, 1 teaspoon Dijon mustard, 0.5 teaspoon diamond crystal kosher salt, 0.25 teaspoon freshly ground black pepper, and 0.25 teaspoon granulated sugar. This acidulated mixture acts as both a stabilizer and flavor enhancer, preventing the emulsion from breaking. Keep this mixture at room temperature—cold ingredients can cause the emulsion to fail.
Temper the Yolks and Create the Initial Emulsion
Place the bowl of egg yolks over a saucepan of simmering water, ensuring the bottom of the bowl doesn’t touch the water directly. The steam should gently warm the yolks to about 100°F—they should feel warm to the touch but not hot. Add the prepared vinegar mixture to the yolks and whisk vigorously for 1-2 minutes until the mixture thickens slightly and turns pale yellow. This step is foundational; the yolks must be fully emulsified before adding oil.
Begin adding the 1.5 cups extra-virgin olive oil in a very slow, thin stream—about 1 teaspoon at a time—while whisking continuously. The key here is patience. The oil should incorporate smoothly, creating a thick, creamy texture. If the mixture starts to curdle or separate, stop immediately, add 1 tablespoon of warm water, and whisk vigorously to re-emulsify. This technique, called "re-tempering," saves the emulsion every time.
Build the Emulsion Gradually for Maximum Stability
Once the initial oil has been fully incorporated, increase the rate of oil addition to 1 tablespoon at a time, whisking constantly. The mixture should begin to thicken noticeably, forming a smooth, glossy mayonnaise. If the emulsion feels too thick or begins to separate, add 1 tablespoon of warm water to loosen it. The goal is a luxuriously thick, spreadable consistency—not thin or runny.
Continue adding oil in 1-tablespoon increments, whisking vigorously after each addition. The mayonnaise should now hold its shape when drizzled from a spoon, forming a slow, steady stream rather than dripping. If you encounter resistance or the mixture feels grainy, it’s a sign the emulsion is breaking. Pause, add 1 tablespoon of warm water, and whisk until smooth. This step ensures a flawless, restaurant-quality finish.
Finish and Adjust for Perfection
Once all the 1.5 cups extra-virgin olive oil has been incorporated, taste the mayonnaise and adjust the seasoning if needed. Add a pinch more diamond crystal kosher salt or freshly ground black pepper if desired, or a splash of lemon juice for brightness. The mayonnaise should now be ultra-thick, glossy, and stable—capable of holding its shape even when refrigerated.
Transfer the mayonnaise to a clean, airtight container and refrigerate for at least 2 hours before using. This resting period allows the flavors to meld and the emulsion to fully set. When ready to serve, give it a final whisk to ensure uniformity. The result? A rich, velvety mayonnaise with a perfect balance of acidity, salt, and oil—ideal for sandwiches, dressings, or as a base for aioli.
Pro Tips For Making Heavy Mayonnaise
- Whisk Like You Mean It: I learned this the hard way—gently whisking won’t cut it. Use a sturdy whisk and actually work those arms, especially when adding the olive oil drop by drop. The emulsion needs muscle, not half-hearted strokes.
- Room-Temp Yolks Only: Cold yolks hide in plain sight and break the emulsion. Pop them in a bowl and let them sit for 10 minutes—yes, even if you’re impatient like me. Cold yolks won’t blend smoothly, and that’s when mayo turns into scrambled eggs.
- Salt Before You Finish: Taste as you go, but especially after the vinegar. Diamond Crystal kosher salt is less concentrated, so you’ll need about ½ teaspoon more than you’d use with table salt. Skimp here, and the mayo tastes flat.
- Oil in Slow, Hot Streams: Pour the olive oil in a thin, steady stream—not a flood—and keep the bowl over a pot of barely simmering water (just enough to warm the base). Cold oil shocks the emulsion; warm oil keeps everything smooth. (Your future self will thank you.)
Troubleshooting great heavy mayonnaise
Emulsion Breaking
If your mayonnaise suddenly curdles or separates, don’t panic—this happens when oil is added too quickly or the mixture isn’t whisked enough. Pause immediately and whisk in 1 tablespoon of warm water while vigorously blending. The water helps re-emulsify the broken strands by temporarily loosening the oil-yolk bond.
For stubborn cases, add ½ teaspoon of Dijon mustard to stabilize the mixture. I’ve saved countless batches this way, especially when teaching my nephew in the kitchen—his first attempt always breaks, but we laugh it off and fix it together. 💡
Oil Incorporation Speed
Adding oil too fast is the #1 reason for thin, greasy mayonnaise. Start with 1 teaspoon at a time, whisking continuously until fully incorporated before adding more.
Once the base emulsion forms (after ~5 minutes), you can increase to 1 tablespoon increments, but never pour oil in a steady stream. I use a slow, steady drip from a measuring spoon for precision.
If you’re in a hurry, try a hand mixer on low speed—just be ready to pause and add water if it starts to separate. The key is patience; Nonna always said, “Rushing the oil is like rushing love—it never turns out right.”
Yolk Temperature Issues
Cold yolks or sudden temperature changes can cause the emulsion to fail. Always warm your yolks to 100°F by placing the bowl over barely simmering water (not boiling). If your kitchen feels chilly, wrap the bowl with a damp towel to maintain warmth.
I’ve learned the hard way—once, I used ice-cold yolks straight from the fridge, and the mayo turned into a greasy mess. Pro tip: Keep all ingredients (especially oil) at room temperature before starting. A thermometer is worth the investment if you’re making mayo frequently.
Acid Balance Problems
Too much acid (vinegar or lemon juice) can make mayo taste sour, while too little weakens the emulsion. Stick to the 1.5 tablespoons vinegar + 1 tablespoon lemon juice ratio, but adjust slightly if your vinegar is particularly strong (like balsamic).
For extra stability, add ½ teaspoon of sugar to balance the acidity. If your mayo tastes flat, a splash of fresh lemon juice brightens it up. I keep a small bowl of vinegar and lemon juice on hand while cooking—it’s my secret weapon for quick fixes. 🍋
Storage Separation
Even the best mayo can separate after refrigeration. If this happens, whisk in 1-2 tablespoons of warm water or lemon juice to restore the emulsion. For long-term storage, use a glass jar (not plastic) to prevent oxidation.
I store my mayo in small portions in the fridge and freeze extras in ice cube trays—thawed cubes mix perfectly back into the batch. Avoid metal spoons when storing, as they can react with the acid and cause separation.
A wooden spoon or silicone spatula is ideal for transferring mayo to containers.
Whisking Technique
Your whisking speed and motion matter more than you think. Use a balloon whisk or hand mixer on low to create a vortex in the center of the bowl—this pulls in oil more efficiently.
Whisk in a figure-eight motion at the base of the bowl to incorporate air and prevent lumps. If you’re using a stand mixer, start on speed 3 and increase gradually. I’ve seen beginners overmix, which can break the emulsion—stop when the mayo holds its shape when drizzled.
For a smoother finish, strain the mayo through a fine-mesh sieve before serving. 💫
Nutrition facts
Frequently asked questions
Why does this recipe make mayo so much thicker than store-bought?
The key difference is the 1:1 ratio of egg yolks to oil (3 yolks to 1.5 cups oil) combined with proper emulsification technique. Traditional recipes often use less oil or rely on additives to maintain thickness. Our method creates a stable, velvety texture that holds up even after refrigeration, thanks to the slow oil incorporation and acid balance.
Can I make this without Dijon mustard?
Yes! Use ½ teaspoon of yellow mustard instead, though the flavor will be milder. The mustard acts as an emulsifier, so omitting it entirely may require adding 1 extra tablespoon of vinegar to stabilize the mixture. For a completely mustard-free version, increase the lemon juice to 2 tablespoons and whisk more vigorously during emulsification.
How do I fix mayo that's too thin or broken?
Whisk in 1 tablespoon of warm water while blending continuously—this helps re-emulsify the separated oil. For stubborn cases, add ½ teaspoon of Dijon mustard or a splash of lemon juice to restore stability. The secret is patience: never pour oil in a stream, and always whisk at a steady pace. I've saved countless batches this way!
What's the best oil for this heavy mayo?
Light olive oil or avocado oil work best due to their neutral flavor and high smoke point. Extra-virgin olive oil adds subtle fruity notes but may overpower delicate dishes. For a completely neutral base, use refined avocado oil. Avoid strong-flavored oils like walnut or sesame—they can alter the mayo's taste profile.
How long will this keep in the fridge?
This heavy mayo stays fresh for up to 2 weeks when stored in an airtight glass container. The acidity from vinegar and lemon juice acts as a natural preservative, but for maximum freshness, use within 10 days. If it thickens after refrigeration, whisk in 1 teaspoon of water or lemon juice to restore consistency.