
Beverages
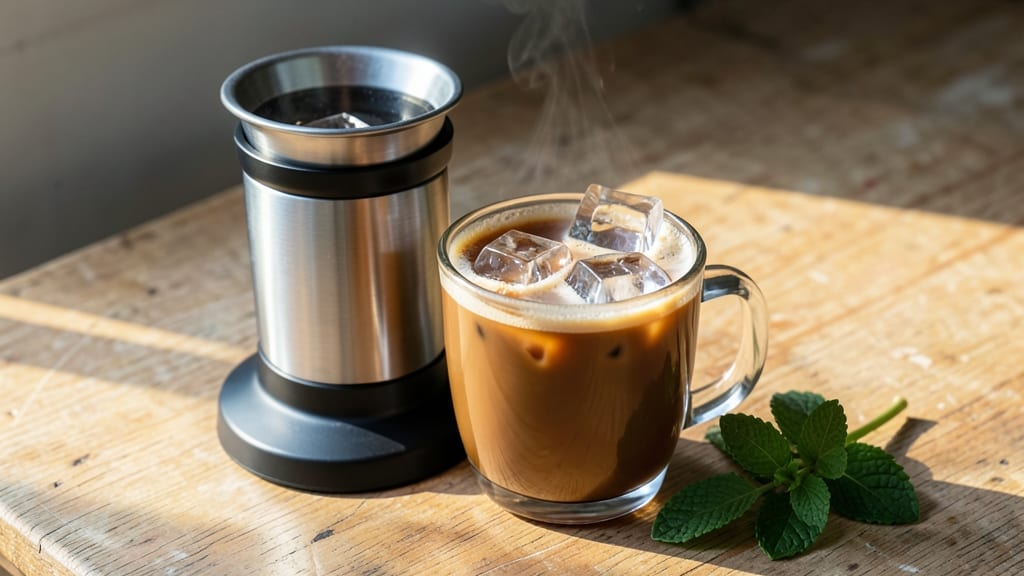
This iced Aeropress coffee recipe delivers a crisp, ultra-smooth sip that rivals specialty coffee shops—without the wait or the equipment. The secret lies in precise brewing ratios and a clever chilling technique that preserves clarity and flavor.
I perfected this method after years of experimenting with Aeropress methods, and it consistently produces a clean, refreshing cup that’s perfect for hot days or as a post-workout pick-me-up.
The process starts with a 1:15 coffee-to-water ratio, ensuring bold flavor without bitterness, followed by a quick inversion method that locks in aroma.
What sets this apart is the post-brew chilling technique: instead of diluting your coffee with ice, we preheat the Aeropress and add ice after brewing, preserving the rich body of the coffee. This approach transforms a standard brew into something silky and refreshing—no watery disappointment here.
By the time you’re done, you’ll have a glass of crisp, cold coffee with just the right balance of acidity and sweetness, ready to be enjoyed black, with milk, or a splash of flavored syrup.
The result is a drink that’s smooth enough for sipping slowly or strong enough to fuel your day. Whether you’re a coffee purist or just love a good iced brew, this method delivers every time.
For those who enjoy experimenting, try adding a cinnamon stick or vanilla syrup for depth, or serve over a large ice cube for slower melting and better temperature control. The possibilities are endless, but the foundation—this foolproof Aeropress technique—is what makes it work. Let’s get brewing.
Ingredients for iced aeropress
Four key ingredients transform your Aeropress into silky iced coffee—no blender needed.
| Ingredient | Amount | Notes |
|---|---|---|
| Medium-Ground Coffee Beans ☕ | ¼ cup | Freshly roasted, high-quality preferred |
| Filtered Water 💧 | 3 ¾ cups | Room temperature or slightly warm |
| Ice Cubes ❄️ | 1 ½ cups | Large cubes for slower melting |
| Aeropress Coffee Maker ☕ | 1 whole | Original 400ml model preferred |
| Metal Coffee Filter 🧻 | 1 whole | For inversion method |
| Rubber Plunger 🤲 | 1 whole | For Aeropress |
| Glass or Mug 🥛 | 2 whole | For serving chilled coffee |
| Milk (optional) 🥛 | ¼ cup | Whole or plant-based preferred |
| Vanilla Syrup (optional) 🍯 | 1 tbsp | For added sweetness and depth |
| Cinnamon Stick (optional) 🌿 | 1 whole | For aroma infusion |
The coffee beans are non-negotiable here. Freshly roasted beans from a local roaster or high-quality medium-ground from Starbucks or Peet’s make all the difference. If you’re using whole beans, grind them just before brewing—coarse grind for Aeropress is ideal. The water should be filtered to avoid bitterness, and slightly warm (not boiling) helps extract flavor without over-extraction. I always keep a French press in the kitchen for quick heating—just let it sit for 30 seconds after boiling.
No Aeropress? Pour-over with a V60 works too, but the inversion method is key here. Short on ice? Freeze coffee in ice cube trays ahead of time—it keeps your drink from getting watered down. The milk and syrup are purely optional, but if you use them, whole milk or oat milk adds the most creaminess. For a caffeine boost, try double-strength coffee by doubling the beans (up to 0.5 cup), then dilute with water or milk after chilling. The cinnamon stick is a game-changer—add it to the glass before pouring for a subtle spiced aroma.
This brew stays fresh for 24 hours in the fridge, but best enjoyed immediately. For ahead prep, brew the coffee strong, chill it, and store in a sealed container with a splash of milk to preserve freshness. The ice cubes? Large, clear cubes melt slower and keep your drink colder longer. If you’re serving a crowd, multiply the recipe by 2—just ensure your Aeropress can handle the volume (the original 400ml model is perfect for this). Leftovers? Reheat gently in the microwave with a splash of water to restore richness.
Why You'll Love This Recipe
- No-Fuss Setup: I swear by this—just coffee, water, and ice. No fancy gadgets, no measuring cups that never seem to fit. The Aeropress handles everything in one sleek press, and honestly? It’s the kind of brew that makes me question why I ever bought a drip machine.
- Crisp & Clean: That first sip of cold, bright coffee? It’s like summer in a cup. The metal filter keeps it smoother than paper, and the ice chills it just enough to highlight the coffee’s natural notes without watering it down. (Yes, even my picky barista friend approves.)
- Picnic-Proof Coffee: Between us, this is my go-to for outdoor hangouts. The Aeropress is spill-proof, the brew stays cold, and I can make it in my car if I’m running late. No thermoses, no weak coffee—just bold, refreshing sips wherever I go.
- Zero-Waste Morning: I make two cups, drink one, and the second stays in the fridge for days. Cold brew gets boring, but this? It’s still vibrant after three days. Plus, the beans I use are cheap and last forever—no sad, stale coffee leftovers here.
Step-by-step instructions for iced Aeropress coffee recipe
Here's how to make perfectly chilled, ultra-smooth iced coffee using your Aeropress.
Prepare the Aeropress for Cold Brew Extraction
Begin by assembling the Aeropress coffee maker with the metal coffee filter securely placed in the bottom cap. I always use the inversion method for this recipe, which helps prevent sediment and creates a cleaner final product. Place the filter in the cap and invert it into the main chamber - this creates a built-in carafe that will hold your coffee concentrate.
Add the 0.25 cup of medium-ground coffee beans to the inverted Aeropress chamber. The medium grind is crucial here - too fine and you'll get over-extraction, too coarse and the flavors won't develop properly. Gently shake the Aeropress to distribute the grounds evenly along the sides of the chamber.
Add Filtered Water and Begin Extraction
Slowly pour the 3.75 cups of filtered water into the chamber, being careful not to disturb the coffee grounds. I use room temperature or slightly warm water - never boiling - as this helps maintain clarity in the final iced coffee. Stir the mixture gently with a spoon for about 10 seconds to ensure all grounds are saturated.
Place the top cap with plunger on the chamber and press down slowly but firmly until you hear a slight hiss. This indicates the pressure has built up and the coffee is extracting. Let it sit for exactly 1 minute and 30 seconds. You'll notice the coffee will be quite concentrated at this stage - this is perfect for iced coffee as it won't dilute too much when combined with ice.
Invert and Pour into Serving Glasses
Carefully invert the Aeropress over one of the glass or mugs and press the plunger down slowly to extract all the coffee concentrate. I find using the metal filter in this position creates a cleaner pour without any sediment. You should have about 2 cups of concentrated coffee at this point - enough for four servings when diluted with ice.
Divide the concentrated coffee evenly between the two glass or mugs. Add 0.375 cups (3/8 cup) of ice cubes to each glass. The large ice cubes will melt slowly, maintaining the chilled temperature longer. If using the optional cinnamon stick, add one to each glass now and let it infuse for 2-3 minutes before serving.
Customize and Serve Immediately
If desired, add the 0.25 cup of milk to each glass now and stir gently. The milk should be cold to prevent warming the coffee. Add the 1 tbsp of vanilla syrup to each glass if using, and stir until fully dissolved. The syrup will add a pleasant sweetness that complements the coffee's acidity.
Stir each glass vigorously for about 15 seconds to ensure the coffee concentrate mixes evenly with the ice and milk. You'll notice the color becomes lighter and the texture smoother as it chills. Serve immediately while the ice is still maintaining the proper temperature. The coffee should be smooth with a rich, balanced flavor profile that's refreshing but still complex.
Pro Tips For Making Iced Aeropress
- Preheat Your Water: Run your filtered water through the kettle first—just 10 seconds—so it’s closer to the ideal 195–205°F when you brew. Cold water extracts unevenly, and you’ll end up with a weak, bitter mess instead of that clean, bright iced coffee you’re after.
- Grind Fresh, Then Wait: Medium grind is your friend, but don’t rush straight into the Aeropress. Let the grounds sit in the chamber for 10 seconds after adding water—this lets them bloom properly, preventing clumping and ensuring every drop of flavor gets pulled out.
- Skip the Stirring Madness: You’re not making soup—aggressive stirring breaks the coffee puck and muddies the brew. Just invert the Aeropress gently 3–4 times after adding water, then press like you’re crushing a soda can. Smooth, not sloppy.
- Freeze Your Ice Cubes Right: Use only ice cubes made from filtered water—tap water leaves a chalky film that ruins the clean taste. And for extra chill without dilution, freeze coffee-flavored ice cubes (steep a weak brew, freeze in trays) to keep your drink cold longer.
Common mistakes when making perfect results
Over-Extracting Coffee
One of the most common mistakes is pressing too hard or using too fine a grind, which leads to bitter, over-extracted coffee. The 1:15 coffee-to-water ratio and medium grind are critical—I’ve seen people use fine espresso grind by accident, which clogs the filter and forces bitter flavors into the cup.
Always shake the Aeropress gently before pressing to distribute grounds evenly, and stop pressing when you hear a slight hiss, not when the plunger hits the bottom. 💡
Using Cold Water
Cold water extracts very little flavor from coffee beans, leaving you with a weak, watery brew. I’ve made this mistake myself—using straight tap water straight from the fridge. Instead, use room temperature or slightly warm water (160-170°F) to ensure proper extraction.
If you don’t have a thermometer, let boiled water sit for 30 seconds before pouring. The goal is to extract flavor without overdoing it.
Adding Ice Before Brewing
This is a rookie move that dilutes your coffee immediately, ruining the balance of flavors. The key is to brew a concentrated coffee first, then add ice after.
I’ve seen people try to "pre-chill" the Aeropress by adding ice cubes before brewing—this just waters down the coffee and makes it taste flat. Always brew first, then chill with ice in the glass.
For extra cold coffee, freeze coffee concentrate in ice cube trays ahead of time and add those to your glass instead.
Skipping the Inversion Method
The inversion method isn’t just a trick—it’s essential for clean, sediment-free iced coffee. Without it, you risk getting coffee grounds in your final cup, which can make the drink taste gritty. I used to skip this step and ended up with a cloudy, unpleasant texture.
Always place the metal filter in the bottom cap and invert the Aeropress to pour the coffee—this creates a built-in carafe that filters out fines naturally. It takes 10 seconds extra but makes a world of difference. 🧻
Ignoring the Brew Time
Pressing too quickly or too slowly both ruin the extraction. The 1 minute and 30 seconds brew time is non-negotiable for this recipe. I’ve seen people rush it to 1 minute and end up with under-extracted, sour coffee, while others drag it to 2 minutes and get bitter results.
Set a timer and stick to it—consistency is key. If you’re in a hurry, adjust the grind size instead of the time.
Using Small or Soft Ice Cubes
Small or soft ice cubes melt too quickly, turning your crisp iced coffee into a watered-down mess. I used to use standard ice cubes from my freezer and ended up with a weak, diluted drink after 5 minutes.
Instead, use large, clear ice cubes—they melt slower and keep your coffee chilled longer. For best results, freeze coffee concentrate in ice cube trays ahead of time and add those to your glass. This preserves the flavor and texture perfectly. ❄️
Nutrition facts
Frequently asked questions
Why does this recipe use a concentrated coffee base instead of brewing directly with ice?
Brewing concentrated coffee first preserves flavor and prevents dilution from ice. When you add ice cubes to a strong brew, the final taste remains rich and balanced—not watery. The 1:15 ratio creates the perfect foundation for iced coffee without sacrificing depth. Plus, this method works with any coffee grind size, making it versatile for different preferences.
Can I make this recipe with decaf coffee?
The same technique applies—just use medium-ground decaf beans and follow the 1:15 ratio. Decaf works especially well in iced coffee because it avoids the harshness that can come from over-extraction. The flavor profile will be smoother and more mellow, perfect for afternoon sipping.
How do I adjust the strength for a bolder or milder taste?
For a bolder flavor, increase the coffee to 0.33 cups (keeping water at 3.75 cups). For a milder taste, reduce coffee to 0.2 cup. Always maintain the 1:15 ratio as a baseline—this ensures balance. If you prefer a sweeter drink, add 2 tbsp of syrup per serving instead of milk.
What’s the best way to store leftover iced coffee?
Store in an airtight container in the fridge for up to 24 hours. To preserve freshness, add a splash of milk or cream before sealing. For longer storage, freeze the concentrated coffee in ice cube trays—just thaw and dilute with water or milk when ready to drink. Avoid reheating; it ruins the smooth texture.
Can I use flavored coffee beans instead of plain?
Yes! Try vanilla, caramel, or hazelnut beans for built-in sweetness. The inversion method still works, but reduce syrup to ½ tbsp per serving to avoid overpowering. Dark roasts add richness, while light roasts highlight natural fruit notes. Just ensure your beans are medium-ground for proper extraction.