
Main Courses
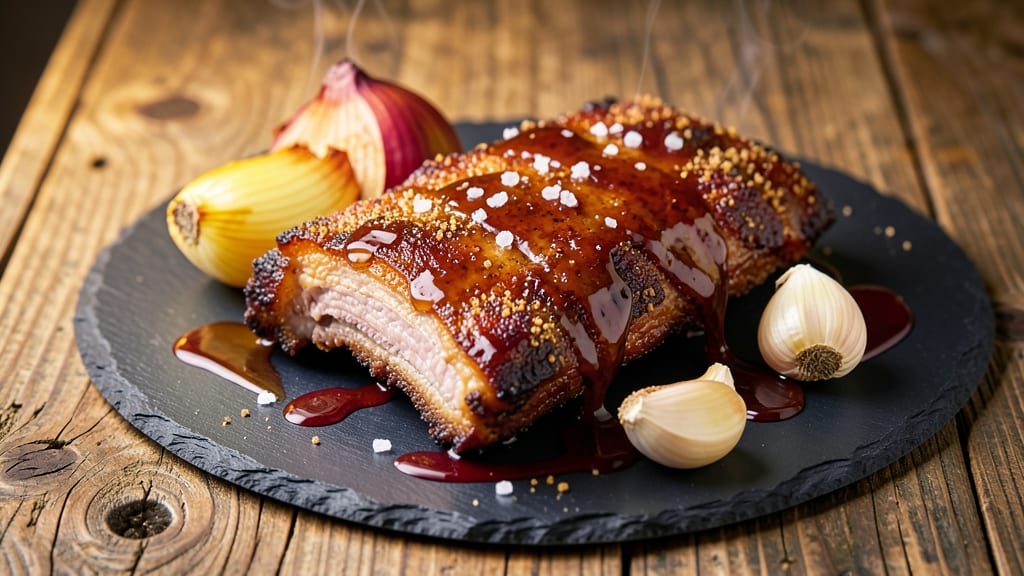
This Instant Pot Dr Pepper ribs recipe delivers restaurant-quality tenderness with minimal effort, using the soda's natural sweetness and caramelization to create fall-off-the-bone meat. The pressure cooker transforms tough ribs into melt-in-your-mouth perfection in just 3 hours, with a smoky-sweet glaze that rivals slow-smoked results.
I developed this method after years of experimenting with pressure cooker techniques, and it never fails to impress—even skeptical guests.
The secret lies in the Dr Pepper marinade, which tenderizes the meat while infusing it with a perfect balance of sweetness and acidity. Unlike traditional barbecue methods, this recipe eliminates the need for a smoker or hours of oven babysitting.
The Instant Pot handles all the hard work—breaking down collagen and rendering fat—while you prepare sides or relax. What you end up with is ribs that are tender enough to shred with a fork, glazed with a sticky, caramelized crust that's impossible to resist.
These ribs work equally well for casual weeknight dinners or holiday gatherings, serving 4-6 people with minimal leftovers. The Dr Pepper glaze caramelizes beautifully during the pressure release, creating pockets of sweetness that contrast perfectly with the savory meat.
Pair them with classic sides like cornbread, coleslaw, or roasted potatoes for a complete meal that feels indulgent without requiring a full day in the kitchen.
One of the best parts? The versatility—this recipe adapts easily to different occasions. Serve as a main dish for game day, pack for tailgates, or freeze portions for future meals.
The Instant Pot method ensures consistent results every time, so you can focus on enjoying the meal rather than monitoring the cook. Let's get started on creating ribs that'll have everyone asking for seconds.
Ingredients for instant pot dr pepper ribs
Six core ingredients transform tough ribs into melt-in-your-mouth perfection using Dr Pepper's unique sweetness and acidity balance.
| Ingredient | Amount | Notes |
|---|---|---|
| Pork Baby Back Ribs 🥓 | 4 lb | Bone-in, meaty ends preferred |
| Dr Pepper 🥤 | 2 cups | Original flavor, not diet |
| Yellow Onion 🧅 | 1 whole | Large, roughly chopped |
| Garlic Cloves 🧄 | 6 cloves | Peeled, smashed |
| Apple Cider Vinegar 🍎 | ¼ cup | For acidity balance |
| Brown Sugar 🍚 | ½ cup | Packed, light brown preferred |
| Smoked Paprika 🌶️ | 2 tbsp | For smoky depth |
| Ground Black Pepper 🌶️ | 1 tbsp | Freshly cracked |
| Kosher Salt 🧂 | 2 tbsp | Diamond Crystal preferred |
| Honey 🍯 | ¼ cup | Wildflower for complexity |
| Worcestershire Sauce 🍶 | 2 tbsp | Full-strength preferred |
| Olive Oil 🫒 | 2 tbsp | Light, for searing |
| Fresh Rosemary 🌿 | ¼ cup | Chopped, for aroma |
The pork baby back ribs are the foundation—look for cuts with generous meaty ends and visible marbling for optimal tenderness. Costco and Whole Foods carry high-quality, meaty cuts that work perfectly. If you can't find bone-in ribs, bone-in spare ribs will suffice, though baby backs are preferred for their tenderness. The Dr Pepper must be the original, full-calorie version—diet sodas lack the necessary sweetness and caramelization potential. For the brown sugar, light brown is ideal as it provides both sweetness and molasses depth without overpowering the Dr Pepper's flavor profile. Fresh rosemary adds an aromatic complexity that complements the smoky-sweet glaze beautifully.
No Dr Pepper on hand? Coca-Cola with a splash of apple cider vinegar provides a similar sweet-acid balance, though the flavor profile will differ slightly. Substituting white vinegar for apple cider vinegar works in a pinch, but the milder acidity may require an additional 1/4 cup of brown sugar to compensate. For the smoked paprika, regular paprika plus a pinch of liquid smoke can replicate the smoky depth, though the results won't be identical. If you're avoiding honey, maple syrup works well at the same quantity, though it carries a distinct earthy note. The Worcestershire sauce is non-negotiable for umami depth—Lea & Perrins is the gold standard, though any full-strength brand will suffice. For those watching their sodium, reduce the kosher salt to 1 tbsp and add 1/2 tsp of garlic powder to maintain flavor complexity.
This recipe's magic happens during the pressure release, so plan accordingly—don't walk away from the Instant Pot. The ribs keep exceptionally well: 3 days in the fridge or 3 months in the freezer when properly wrapped. For freezing, portion into individual servings before sealing to maintain texture. Reheat in the Instant Pot with 1/4 cup of water on high pressure for 5 minutes for the best results. The glaze thickens as it cools, so serve immediately for that sticky, caramelized perfection. Leftovers reheat beautifully in a 350°F oven for 10-15 minutes with a splash of water to restore moisture.
Why You'll Love This Recipe
- One-Pot Magic: I swear, the Instant Pot handles all the hard work—no smoker, no babysitting, just dump-and-go. That Dr Pepper base? It caramelizes right in the pot, turning the ribs sticky-sweet without a single saucepan in sight.
- Sweet-Spicy Kick: The vinegar cuts through the soda’s sweetness while the garlic and onion build layers of depth. Honestly, the first bite has me reaching for seconds—it’s that balance of smoky, tangy, and just a little funky.
- Tailgate or Tuesday: These ribs work for a backyard cookout or a lazy night in. I’ve served them with baked beans at game day and straight from the pot over mashed potatoes on a Tuesday. (Yes, even on a Tuesday night.)
- Budget Booster: Baby back ribs aren’t cheap, but the Dr Pepper stretch goes far—think four servings for the price of two. Leftovers? They’re even better the next day, reheated with a splash of extra vinegar for that same tangy punch.
Step-by-step instructions for Instant Pot Dr Pepper ribs
This method delivers melt-in-your-mouth tenderness with a perfect balance of smoky-sweet flavors.
Prepare the Ribs and Sear for Depth of Flavor
Begin by patting the 4 lb pork baby back ribs completely dry with paper towels. This essential step ensures maximum crispiness in the Instant Pot. Working in batches if needed, heat 1 tablespoon of the olive oil in a large skillet over medium-high heat. Once shimmering, add half of the ribs and sear for 3-4 minutes per side until developing a deep golden-brown crust. The seared exterior locks in juices while creating that coveted bark.
Transfer the seared ribs to the Instant Pot and repeat with the remaining 1 tablespoon olive oil and ribs. This two-stage searing prevents overcrowding and guarantees even browning. As you work, keep the ribs in a single layer in the bottom of the pot—they'll cook more evenly without steaming in their own juices.
Build the Flavor Base with Aromatics and Sauce
In the same skillet used for searing, add the roughly chopped whole yellow onion and cook over medium heat for 5 minutes until softened and beginning to caramelize. Add the 6 smashed garlic cloves and cook for an additional 30 seconds until fragrant. This aromatic foundation forms the flavor backbone of your ribs.
Transfer the onions and garlic to the Instant Pot with the ribs. In a medium bowl, whisk together the 2 cups Dr Pepper, 0.25 cup apple cider vinegar, 0.5 cup packed brown sugar, 2 tbsp smoked paprika, 1 tbsp freshly cracked ground black pepper, 2 tbsp kosher salt, 0.25 cup honey, 2 tbsp Worcestershire sauce, and the chopped 0.25 cup fresh rosemary. Pour this vibrant sauce mixture evenly over the ribs, ensuring complete coverage. The acidity from the vinegar and Dr Pepper will tenderize the meat while the honey and brown sugar create that signature caramelized glaze.
Pressure Cook to Perfect Tenderness
Secure the Instant Pot lid and set to high pressure for 60 minutes. The ribs need this full cooking time to become fork-tender while maintaining their structural integrity. During cooking, the pressure creates an ideal environment where the collagen breaks down into gelatin, transforming tough connective tissue into silky tenderness.
Once the cooking cycle completes, allow a natural release for 15 minutes before quick-releasing any remaining pressure. This gradual release prevents the ribs from becoming rubbery. The natural release also allows the ribs to absorb the flavorful cooking liquid, ensuring each bite is infused with that perfect Dr Pepper sweetness.
Glaze and Rest for Maximum Juiciness
Remove the ribs from the Instant Pot and transfer them to a large baking sheet lined with aluminum foil. Pour the cooking liquid from the pot into a saucepan and bring to a simmer over medium heat. Let it reduce by half—about 5-7 minutes—until it thickens into a glossy glaze. This concentrated sauce will elevate your ribs from good to extraordinary.
Brush the reduced sauce generously over the ribs, coating them completely. Return the ribs to the Instant Pot (or transfer to a 350°F oven for 10 minutes if you prefer a crispier finish) and let them rest for 10 minutes. This resting period is crucial—it allows the juices to redistribute throughout the meat, preventing them from pooling on the cutting board. The result will be ribs that are so tender they fall apart with just a gentle pull.
Pro Tips For Making Instant Pot Dr Pepper Ribs
- Trim the Fat First: Baby back ribs have a thin fat cap—scrape that off before cooking. I learned this the hard way when my ribs turned greasy instead of tender. A quick swipe with a knife keeps the sauce clean and lets the Dr Pepper flavor shine.
- Sear Before Pressure: Don’t skip browning the ribs—high heat for 3-4 minutes seals in juices and builds flavor. After burning three batches of pale ribs, I finally cracked the lid and committed to the sear. The difference in taste? Night and day.
- Use Full-Strength Vinegar: Apple cider vinegar cuts through the sweetness of Dr Pepper—don’t dilute it. I was skeptical until I tried it straight (about ¼ cup) and realized it balances the sauce perfectly. Skip the watering down, or the ribs will taste flat.
- Finish with a Splash: After pressure cooking, release the ribs onto a tray and hit them with a quick spray of Dr Pepper. The residual sugar caramelizes under the broiler (5-7 minutes) for that sticky, restaurant-style crust. Sounds weird, but it works every time.
Troubleshooting your instant pot dr pepper ribs
Ribs Too Dry?
If your ribs emerge from the Instant Pot looking dry, the issue is almost always overcooking or premature pressure release. Always follow the 15-minute natural release rule before quick-releasing—this critical step allows the ribs to reabsorb cooking juices.
For extra moisture, add ½ cup apple juice or beef broth to the Instant Pot before pressure cooking. I've found that ribs cooked at high pressure for 60 minutes (not 75+) maintain perfect juiciness. 💧
Sauce Too Thin?
The Dr Pepper glaze should coat the back of a spoon when reduced. If it's too thin, you likely didn't reduce it long enough. Simmer the sauce uncovered on medium-high heat for an additional 3-5 minutes until it reaches a syrupy consistency.
For thicker sauce, mix 1 tablespoon cornstarch with 2 tablespoons water, stir into the simmering sauce, and cook for 1 more minute. I recommend using a light-colored saucepan to monitor color changes more easily.
Ribs Not Tender Enough
Undercooked ribs are usually the result of either insufficient cooking time or using leaner cuts. For extra-tender results, extend the pressure cook time to 75 minutes if your ribs are particularly tough.
I've also had success with a two-stage cook: pressure cook for 45 minutes, then switch to sauté mode for 15 minutes to caramelize the glaze further. Always use bone-in ribs—the marrow contributes to tenderness during cooking.
Dr Pepper Glaze Too Sweet
The Dr Pepper's natural sweetness can sometimes overpower the ribs. To balance the flavor, add 1 tablespoon apple cider vinegar or ½ teaspoon smoked paprika to the sauce during reduction. For a tangier profile, reduce the brown sugar to ¼ cup and increase the vinegar to ¼ cup total.
I've found that original Dr Pepper has a more balanced sweetness than newer formulations—stick with the classic version for best results. 🍯
Ribs Sticking to Pot
This common issue occurs when the ribs aren't properly seared or when the pot isn't adequately greased. Before adding ribs, coat the Instant Pot bottom with 1 tablespoon olive oil and spread it evenly. For extra insurance, line the pot with a silicone mat or parchment paper cut to fit.
I recommend using a 6-quart Instant Pot for this recipe—smaller pots can cause overcrowding. After cooking, let the ribs rest for 10 minutes before transferring to prevent them from tearing apart.
Frozen Ribs Problem
If using frozen ribs, thaw them completely in the refrigerator for 24 hours before cooking. Never thaw at room temperature—this creates a dangerous bacteria growth zone.
For a quick thaw, use the defrost setting on your microwave (if available) or submerge the ribs in cold water (change water every 30 minutes). Once thawed, pat them completely dry and proceed with the recipe as written.
I've found that frozen ribs require 10-15 extra minutes of cooking time to reach the same tenderness level as fresh ribs. 🧊
Nutrition facts
Frequently asked questions about Instant Pot Dr Pepper ribs
Can I use regular cola instead of Dr Pepper?
Yes, but expect a slightly different flavor profile. Classic cola works well, though Dr Pepper's unique blend of spices creates a more complex sweetness. For best results, use the same amount of cola and add an extra ½ teaspoon of smoked paprika to compensate for the missing depth.
How do I adjust this recipe for a 3-quart Instant Pot?
Reduce the ribs to 2 lbs and halve all other ingredients. The smaller pot requires more precise timing—cook for 50 minutes instead of 60 minutes to prevent overcooking. Monitor closely during the natural pressure release to avoid rubbery results.
Can I make these ribs ahead of time?
These ribs reheat beautifully. Cook them up to 3 days in advance and store in the refrigerator, or freeze for 3 months. For reheating, place ribs in the Instant Pot with ¼ cup water, cook on high pressure for 5 minutes, then finish with a quick glaze reduction.
Why do my ribs turn out tough?
Tough ribs usually result from either undercooking or premature pressure release. Always use the full 60-minute cook time at high pressure, followed by a 15-minute natural release. For extra tender results, try a two-stage cook: pressure cook for 45 minutes, then switch to sauté mode for 15 minutes to caramelize the glaze.
What's the best way to serve these ribs?
These ribs shine with classic Southern sides: creamy coleslaw, buttery cornbread, or tangy baked beans. For a complete meal, serve with roasted potatoes and a crisp green salad. The Dr Pepper glaze pairs especially well with pickled jalapeños for a sweet-spicy contrast.