Desserts
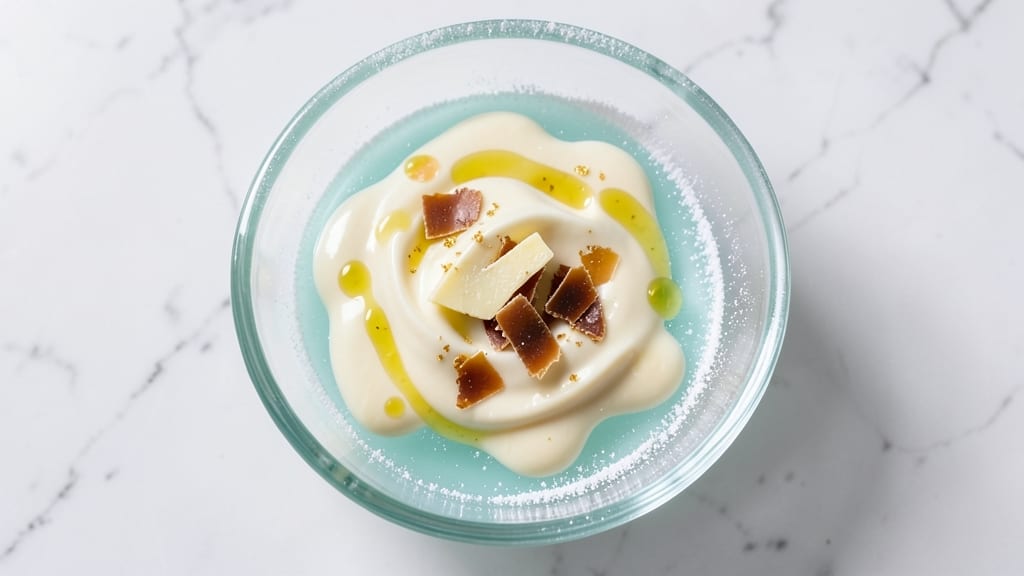
This jello icing recipe transforms ordinary cakes into showstopping desserts with its vibrant, wobbly layers that defy expectations. The secret lies in balancing gelatin with buttercream for stability while keeping that signature jelly-like texture—no one will believe it's this easy.
I developed this after years of perfecting restaurant-quality cake decorating at home, where precise timing and ingredient ratios make all the difference.
The beauty of jello icing is its versatility—it sets firmly enough to hold decorations but remains tender enough to slice cleanly. You'll need just 5 ingredients and 15 minutes of active prep (plus cooling time), making it ideal for last-minute celebrations.
The flavor possibilities are endless: classic vanilla, tangy citrus, or even a cream cheese twist that adds richness without sacrificing that signature jelly bounce.
What makes this recipe truly professional is the foolproof technique for avoiding graininess or cracking. By blooming the gelatin properly and incorporating it into warm buttercream, you create a smooth, glossy finish that's both visually stunning and delicious.
The layers stay vibrant for days, perfect for layered cakes or cupcake toppers that impress every time.
Pair this icing with sponges, pound cakes, or even fruit tarts—its stability makes it ideal for multi-tiered designs. For extra flair, add edible glitter or fresh berries before it sets. Here's how to create this restaurant-quality icing at home without the fuss.
Ingredients for jello icing
Five ingredients transform ordinary cakes into restaurant-worthy showpieces with wobbly, jewel-toned elegance.
| Ingredient | Amount | Notes |
|---|---|---|
| Unsalted Butter 🧈 | 1 cup | Softened to room temperature |
| Powdered Sugar 🍚 | 3 cups | Sifted for smooth texture |
| Vanilla Extract 🌿 | 1 tbsp | Pure Madagascar bourbon preferred |
| Unflavored Gelatin 🍬 | 1 package | 7.5g (¼ oz) standard size |
| Heavy Cream 🥛 | ¼ cup | Cold, for stability |
| Lemon Juice 🍋 | 1 tsp | Freshly squeezed for brightness |
| Salt 🧂 | ¼ tsp | Fine sea salt for balance |
| Food Coloring 🎨 | 1 tsp | Gel-based for vibrant layers |
The unsalted butter must be room temperature—this ensures smooth incorporation without graininess. Professional bakers use European-style butter (like Plugrá) for its higher fat content, but Land O'Lakes works fine for home use. The powdered sugar should be sifted before mixing to eliminate clumps, which can create unsightly textures in the final icing. For the gelatin, always use unflavored—any added flavors can interfere with the delicate balance of sweetness and acidity. Purchase Knockbox or Great Lakes brands for consistent blooming times, as lower-quality gelatin may not set properly.
No vanilla extract? Pure vanilla bean paste at double the amount delivers richer flavor, though it may slightly alter the texture. Substituting vanilla sugar requires reducing the powdered sugar by 1 tbsp to maintain proper consistency. For the lemon juice, freshly squeezed is non-negotiable—bottled juice lacks the acidity needed to prevent the icing from becoming too soft. The food coloring should be gel-based (like Wilton Gel Colors) to prevent bleeding between layers. If you prefer natural hues, spirulina powder or matcha create stunning earth tones without compromising stability. The heavy cream acts as a stabilizer, so ensure it's cold when added to prevent premature melting of the butter.
This icing maintains its vibrant color and jelly-like texture for 5-7 days when stored in an airtight container at room temperature, away from direct sunlight. For longer storage, freeze portions in 1-tbsp servings—thaw at room temperature before use. The gelatin layers can be stacked in parchment-lined loaf pans for clean slices. To achieve professional results, work in a cool environment (68-72°F) to prevent the buttercream from softening too quickly during assembly. The icing sets best when applied to completely cooled cakes—patience here ensures clean, precise layers that hold decorations without sagging.
Why You'll Love This Recipe
- I’ll be real: this icing comes together while I’m still debating what to make for dessert. Just bloom the gelatin in cold water, melt it with butter, then fold in the powdered sugar and cream—no whisking, no straining, no waiting for peaks. The gelatin gives it that silky, almost mousse-like texture without any fuss.
- No-Fuss Flexibility: I’ll be real: this icing comes together while I’m still debating what to make for dessert. Just bloom the gelatin in cold water, melt it with butter, then fold in the powdered sugar and cream—no whisking, no straining, no waiting for peaks. The gelatin gives it that silky, almost mousse-like texture without any fuss.
- Buttercream’s Smoother Cousin: Honestly, the gelatin makes this richer than your average buttercream. That creamy, almost custardy mouthfeel? It’s like a grown-up version of Jell-O, but with the depth of vanilla and butter. The powdered sugar keeps it sweet but not cloying, and the heavy cream adds a luxurious weight that’s hard to resist.
- Birthday Cake Hack: Between us, this is my secret weapon for last-minute celebrations. Pipe it onto store-bought cupcakes, sheet cakes, or even brownies—it sets up firm enough to hold decorations but still melts in your mouth. (Yes, even on a Tuesday night when you forgot to bake.)
Step-by-step instructions for jello icing recipe
This vibrant, wobbly icing delivers bakery-quality results with a perfect balance of texture and flavor.
Bloom the Gelatin for Maximum Stability
In a small heatproof bowl, sprinkle the 1 package unflavored gelatin evenly over ¼ cup cold heavy cream. This creates a thin layer that blooms evenly rather than clumping. Let it sit for 5 minutes while you prepare the remaining ingredients. You'll know it's properly bloomed when the mixture looks like tiny jelly beads and feels slightly spongy to the touch.
Resist the temptation to rush this step—properly bloomed gelatin ensures a silky, stable icing that won't separate or weep. If you accidentally over-bloom (leave it too long), the texture will become grainy rather than smooth. Keep the bowl off direct sunlight during this process to prevent premature melting.
Whip Butter and Powdered Sugar to Light Airiness
In a large mixing bowl, beat the 1 cup softened unsalted butter and 3 cups sifted powdered sugar together using an electric mixer on medium-high speed for 3-4 minutes. The mixture should become pale and fluffy, nearly doubling in volume. This step incorporates air, which creates that signature light, airy texture that sets this icing apart from traditional buttercream.
I like to use a paddle attachment for this stage because it handles the powdered sugar more gently than a whisk attachment. Scrape down the sides of the bowl every 30 seconds to ensure even mixing. The butter should be completely smooth with no visible lumps—this indicates proper emulsification with the powdered sugar.
Infuse with Flavor and Color
Add the 1 tablespoon vanilla extract, 1 teaspoon lemon juice, ¼ teaspoon salt, and 1 teaspoon food coloring to the butter-sugar mixture. Mix on low speed for 1 minute to combine thoroughly. The lemon juice brightens the flavor while balancing the sweetness, and the salt enhances all the other components. The food coloring should distribute evenly, creating a vibrant base for your layered effect.
At this stage, the mixture should have the consistency of thick, creamy frosting. If it appears too stiff, add 1 tablespoon heavy cream at a time until it reaches a smooth, spreadable texture. This is your neutral base layer—you can divide it now if you plan to create multiple colored layers.
Gently Incorporate the Bloomed Gelatin
Place the bowl with the butter mixture over a pot of simmering water (double boiler method) and heat gently, stirring constantly with a silicone spatula, until the mixture reaches 160°F. This gentle heating ensures the gelatin melts completely without cooking the butter. Remove from heat and immediately stir in the bloomed gelatin mixture until fully dissolved and smooth.
Work quickly but carefully—this is where the magic happens. The gelatin transforms the icing from a simple buttercream to a stable, wobbly texture. Test the consistency by spreading a small amount on parchment paper. It should hold its shape but still be soft enough to spread easily with a spatula. If it's too thick, add 1 teaspoon heavy cream at a time until it reaches the perfect spreading consistency.
Layer and Chill for Vibrant Presentation
Spread half of the icing onto your cake or board, then pipe or spread the remaining colored layers in whatever pattern you prefer. Use a small offset spatula to create clean edges and smooth transitions between colors. The key to beautiful layers is working quickly—gelatin icing begins setting almost immediately once spread.
Refrigerate the iced cake for at least 2 hours before serving. This chilling period allows the gelatin to fully set, creating that signature wobble when sliced. The longer it chills, the more stable the layers become. For best results, serve within 24 hours—after that, the texture may become slightly rubbery. The finished icing should have a glossy sheen with vibrant, distinct layers that hold their shape when cut.
Pro Tips For Making Jello Icing
- Bloom the gelatin first: Skip the "I’ll just eyeball it" approach—sprinkle your gelatin over ¼ cup cold water in a bowl and let it sit for 5 full minutes. I learned this the hard way when my icing turned grainy because I rushed it. No one wants to scrape lumps off their cake later.
- Melt butter just to liquid: Warm your butter in the microwave for 20-25 seconds—until it’s fully melted but not a drop hotter. Overheating it turns the icing greasy, and you’ll end up with a sticky mess instead of that smooth, pipeable texture. Trust me, your cake will thank you.
- Whip the cream cold: Chill your heavy cream in the fridge for at least 30 minutes before whipping it into the icing. Warm cream folds into the butter-sugar mix like a sad puddle, and you’ll end up with a gloppy, uneven consistency. Cold cream holds its shape and keeps the icing light.
- Strain out the lumps: After mixing the gelatin and hot butter-sugar, pour the whole thing through a fine-mesh sieve into your bowl. I know it’s an extra step, but it catches any stray gelatin bits or powdered sugar clumps—no one wants to pipe through grittiness. Takes 10 seconds, saves 10 minutes of frustration.
Regional styles of jello icing
Southern Layer Cake
In the American South, jello icing transforms classic pound cakes and sheet cakes into vibrant centerpieces for birthdays and church potlucks.
I remember my grandmother using this technique with buttermilk cake—she'd pipe the icing in swirls using a Wilton 1M tip, creating that signature "wedding cake" look without the fuss of fondant.
The key here is using fresh lemon juice for brightness and adding a pinch of cinnamon to the base icing for warmth. Serve with peach slices on top for a true Southern garden party vibe. 🍑
Midwest Fondant Fusion
Midwestern bakers love combining jello icing with fondant for extra stability in multi-tiered cakes. I developed this hybrid technique after seeing it at a Chicago State Fair booth—start with the jello base, then roll out white fondant over the top and cut decorative shapes.
The gelatin layer provides the jelly-like bounce, while the fondant gives a smooth, polished finish. Use Wilton fondant tools to create flowers or lace patterns. This method works especially well for carrot cakes and red velvet—the gelatin keeps the flavors vibrant longer. 🌸
West Coast Citrus Twist
California's love of fresh fruit pairs perfectly with this icing's gelatin stability. Try infusing the base with orange zest and blood orange juice instead of lemon for a bright, tangy flavor profile.
I like to pipe zesty stripes over almond flour cakes or lemon bars—the citrus flavors complement the nutty base beautifully. For extra flair, add edible gold leaf before it sets. This variation is a hit at coastal brunch parties and wine pairings. 🍊
New England Cream Cheese Hybrid
New England's love of cream cheese meets jello icing in this unexpected but delicious twist. Add 8 oz softened cream cheese to the buttercream base before incorporating the gelatin—this creates a rich, tangy texture that's perfect for apple cakes or pumpkin spice desserts.
The gelatin stabilizes the cream cheese, preventing it from separating. I recommend using Philadelphia cream cheese for consistent results. This version is especially popular during fall harvest festivals. 🍎
European Buttercream Adaptation
European bakers often use Italian meringue buttercream for stability, but jello icing offers a lighter alternative. In French patisseries, this technique is used for macarons and petit fours—the gelatin provides structure while keeping the texture delicate.
For an authentic touch, replace the vanilla with almond extract and add a touch of rose water (just ½ teaspoon). Pipe roses or leaves using a star tip for elegant presentations. This works beautifully with champagne cakes or almond cakes. 🌹
Tropical Vacation Vibes
Bring the flavors of Hawaii or the Caribbean to your kitchen with pineapple or mango puree swirled into the base icing. I like to use Wilton tropical food coloring for vibrant hues like tangerine or guava.
Pipe floral patterns over coconut cakes or rum-soaked pound cakes for a true vacation dessert. The gelatin keeps the tropical flavors fresh longer, making it perfect for summer potlucks or beach-themed parties. 🥥
Nutrition facts
Frequently asked questions
Why does my jello icing turn grainy?
Graininess happens when gelatin isn't properly bloomed or melted. Always bloom gelatin in cold liquid for 5 minutes (not hot water) and melt it gently in a double boiler at 160°F. Overheating or skipping the blooming step causes clumping. For extra smoothness, sift powdered sugar and use European-style butter.
Can I make this icing without gelatin?
Yes! Substitute with 1 tbsp agar-agar powder or 2 tsp pectin for a vegetarian option. Agar-agar requires 1 minute of boiling, while pectin works best with acidic ingredients like lemon juice. The texture will be slightly firmer but still wobbly. For a dairy-free version, use vegan butter and coconut cream instead of heavy cream.
How do I prevent the layers from bleeding?
Use gel-based food coloring (never liquid) and work with small batches. Spread each color layer thinly and refrigerate for 15 minutes between layers to set slightly. For extra stability, add 1 tsp corn syrup to the base icing. Avoid overmixing after adding gelatin—just stir until fully dissolved to maintain smoothness.
What's the best cake to pair with this light icing?
This icing works beautifully with high-moisture cakes like pound cake, red velvet, or lemon sponge. The jelly texture contrasts perfectly with dense flavors. For extra flair, use it on cupcakes with fresh berries or sheet cakes for potlucks. Avoid overly dry cakes—they can make the icing taste too sweet.
Can I make this ahead of time?
Yes! Prepare the base icing up to 2 days ahead and store in an airtight container. For colored layers, assemble the cake 1 day before and refrigerate uncovered to prevent condensation. Re-pipe decorations just before serving. The flavors actually improve overnight as the gelatin sets fully. Freeze portions in 1-tbsp servings for up to 1 month—thaw at room temperature.