Desserts
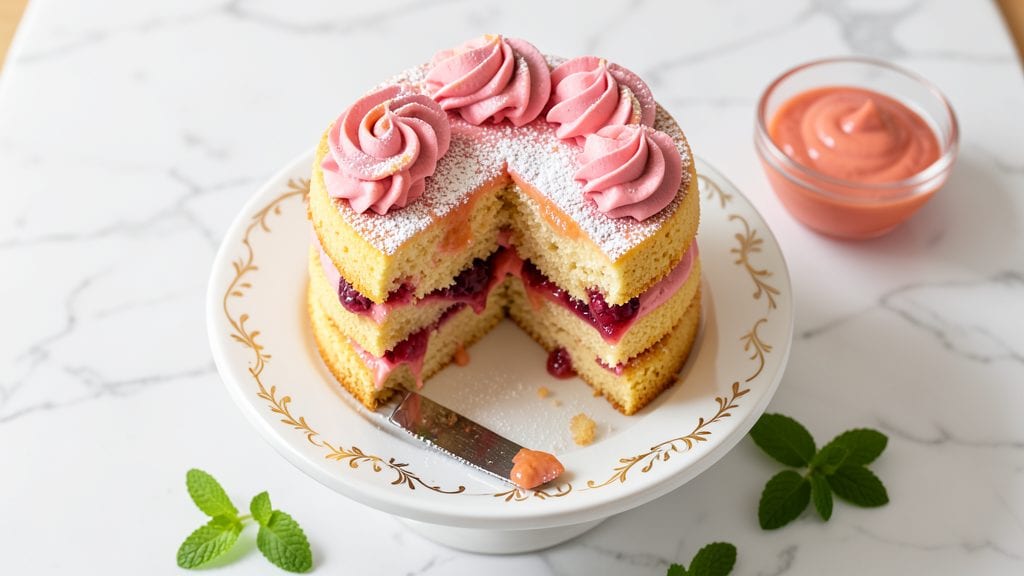
This Miracle Whip cake recipe brings back childhood memories with every creamy swirl and rich frosting layer. The secret lies in blending classic vanilla cake with the tangy, velvety texture of Miracle Whip—creating a dessert that's nostalgic yet perfectly indulgent.
I've perfected this recipe over years of baking, ensuring the frosting stays luscious and the layers stay tender.
The magic happens in the frosting, where Miracle Whip's signature tang complements the sweet vanilla cake beautifully. This recipe delivers a moist, fluffy cake with just the right amount of swirls, topped with a thick, creamy frosting that's impossible to resist.
The combination of warm spices and buttery richness makes every bite feel like a comfort hug.
What makes this cake truly special is how effortlessly it comes together—mixing the batter takes minutes, and the frosting requires just a few simple steps. The result is a dessert that's perfect for birthdays, potlucks, or whenever you crave something sweet that tastes like home. Let's get baking!
For those who love modern twists, try adding a hint of lemon zest to the frosting or swirling in a layer of raspberry jam between the cake layers.
The possibilities are endless, but the classic version remains a crowd-pleaser. This cake is your go-to recipe for bringing joy to any celebration.
Ingredients for miracle whip cake
Simple ingredients transform into a nostalgic cake with velvety frosting swirls.
| Ingredient | Amount | Notes |
|---|---|---|
| All-Purpose Flour 🌾 | 2 ½ cups | Sifted for light texture |
| Granulated Sugar 🍚 | 2 cups | White or light brown |
| Unsalted Butter 🧈 | 1 cup | Room temperature, full-fat |
| Large Eggs 🥚 | 4 whole | Room temperature for even mixing |
| Vanilla Extract 🌿 | 2 tsp | Pure, high-quality preferred |
| Baking Powder 🍞 | 2 tsp | Aluminum-free for best results |
| Salt 🧂 | ½ tsp | Fine sea salt preferred |
| Milk 🥛 | 1 cup | Whole milk for richness |
| Miracle Whip 🍦 | 1 cup | Original flavor, full-fat |
| Powdered Sugar 🍚 | 3 cups | For frosting, sifted |
| Ground Cinnamon 🌿 | ½ tsp | Freshly ground preferred |
| Lemon Zest 🍋 | 1 tbsp | Optional, for bright flavor |
| Raspberry Jam 🍓 | ½ cup | Optional, for swirls |
The Miracle Whip is the star here—original flavor, full-fat is non-negotiable for that signature tang. Kroger or Walmart stock it reliably, but check the expiration date since it thickens over time. For the butter, Land O'Lakes or Plugrá brands melt beautifully without graininess. The vanilla extract should be pure, not imitation—McCormick or Nielsen-Massey are solid choices. Sift your flour and powdered sugar to avoid dense cake layers, and if you're adding lemon zest, use organic lemons for the brightest flavor. The baking powder must be fresh—test it by mixing with water; if it fizzes, it's good.
No Miracle Whip? Substitute with equal parts mayonnaise and sour cream for a close tangy texture, though the color won’t match. Out of vanilla? Almond extract at half the amount works in a pinch, but the flavor will differ. For the butter, margarine in a bind loses some richness, but it’ll work. The raspberry jam can be swapped for strawberry or apricot if that’s what’s on hand—just adjust sweetness to taste. If your frosting turns out too thin, add 1 tbsp of powdered sugar at a time until it thickens. For extra fluffiness, fold in 1 tbsp of whipped cream to the frosting before spreading.
This cake keeps beautifully—covered at room temperature for 2 days or frosted and refrigerated for up to 5 days. The frosting will firm up in the fridge, so bring it to room temp before serving. Freeze unfrosted layers for up to 3 months—thaw overnight in the fridge before assembling. For make-ahead convenience, bake the cake a day ahead, wrap tightly, and frost just before serving. The flavors deepen overnight, making every bite even more indulgent. Store leftovers in an airtight container to maintain moisture.
Why You'll Love This Recipe
- No Mixer Needed: I swear by this one—just creaming butter and sugar by hand until fluffy (no electric mixer required). The eggs fold in like butter, and the vanilla ties everything together with zero fuss.
- Sweet-Tart Magic: That tangy Miracle Whip swirled into the vanilla cake? It’s like a grown-up dessert that somehow still feels nostalgic. The contrast of creamy, slightly sweet frosting with the buttery cake is ridiculously good.
- Birthday or Breakfast: Serve it as a showstopper for a kid’s party or slice it up for a lazy weekend brunch. Honestly, I’ve even packed it for lunch—yes, really—and no one judged me.
- Pantry Staples Only: You’re using flour, sugar, butter, and eggs—things you already own. No specialty ingredients, no last-minute grocery runs. And the leftovers? They stay moist for days, so you’re not scrambling to bake again.
Step-by-step instructions for Miracle Whip cake recipe
Here's how to create a perfectly moist cake with nostalgic swirls and velvety frosting.
Prepare the Cake Batter
Preheat your oven to 350°F and grease two 9-inch round cake pans, lining the bottoms with parchment paper. In a large mixing bowl, combine the 2.5 cups all-purpose flour, 2 cups granulated sugar, 2 tsp baking powder, and 0.5 tsp salt. Whisk these dry ingredients together until evenly distributed—this ensures a light, airy texture without lumps.
In a separate bowl, cream the 1 cup unsalted butter (softened) with the 4 whole large eggs until light and fluffy, about 3-4 minutes using an electric mixer. Gradually add the 1 cup milk and the 2 tsp vanilla extract, mixing until fully incorporated. The mixture should be smooth and slightly thickened.
With the mixer on low speed, gradually add the dry ingredients to the wet mixture, mixing just until combined. Avoid overmixing—stop as soon as the batter comes together. The goal is to maintain a tender crumb, not develop gluten. Divide the batter evenly between the two prepared pans.
Create the Swirls and Bake
For the classic swirl effect, drop spoonfuls of the 0.5 cup raspberry jam onto the batter in each pan, spacing them about 2 inches apart. Using a butter knife, gently swirl the jam into the batter, creating marbled patterns. The jam will add a subtle fruity note and beautiful color contrasts.
Bake the cakes for 25-30 minutes, or until a toothpick inserted into the center comes out clean. The edges should be golden brown, but the tops may still look slightly underdone—this is normal. Rotate the pans halfway through baking for even cooking. Let the cakes cool in the pans for 10 minutes before transferring them to a wire rack to cool completely.
Prepare the Creamy Frosting
While the cakes cool, prepare the frosting by beating the 1 cup Miracle Whip with the 3 cups powdered sugar until smooth and creamy. Add the 0.5 tsp ground cinnamon and 1 tbsp lemon zest (if using) and mix until fully incorporated. The frosting should have a thick, spreadable consistency—if it's too stiff, add 1-2 teaspoons of milk to loosen it.
This step is where the nostalgia comes to life. Miracle Whip's tangy, slightly sweet profile balances the cake's richness perfectly. The lemon zest adds a bright, citrusy note that cuts through the sweetness, while the cinnamon enhances the warm vanilla flavors from the cake.
Assemble and Frost the Cake
Once the cakes are completely cool, place one layer on a serving plate. Spread a generous layer of the frosting over the top, then place the second cake layer on top. Frost the entire cake, including the sides, with the remaining frosting. Use a spatula to create smooth sides, then pipe any remaining frosting around the edges for a finished look.
For an extra touch, dust the top with a light layer of powdered sugar using a fine-mesh sieve. This adds a professional finish and ensures no crumbs interfere with clean slices. Chill the cake in the refrigerator for 30 minutes before serving to help the frosting set slightly and make slicing easier.
Serve and Enjoy
Slice the cake into 4 equal servings and serve immediately. Each bite should deliver a moist, tender crumb with pockets of jam swirls, followed by the creamy, tangy frosting. The combination of textures—soft cake, fruity jam, and velvety frosting—makes this a truly nostalgic treat.
This cake holds up well for 2-3 days when stored in an airtight container in the refrigerator. For best results, bring it to room temperature before serving to enjoy that freshly baked texture. The frosting may soften slightly when the cake warms, but it will still be delicious.
Pro Tips For Making Miracle Whip Cake
- MEASURE BUTTER COLD: Take that butter straight from the fridge—no softening, no room-temperature nonsense. Cream it with sugar at medium speed until it’s light and fluffy, but still holds peaks. I used to rush this, and my cakes turned out dense. Cold butter creates air pockets that make the final texture light as a cloud.
- WHISK EGGS ROOM TEMP: Crack those eggs into a separate bowl first, then whisk them until the yolks and whites are fully blended. Room-temperature eggs mix better with the butter-sugar combo, giving you a smoother batter. I learned this the hard way—lumpy batter means a lumpy cake, and nobody wants that.
- DON’T OVERMIX THE DRYS: Once you add the flour, mix just until combined—no more. Overmixing develops gluten, and your cake will turn out tough instead of tender. Fold in the dry ingredients with a spatula in a gentle, sweeping motion. This isn’t a science project; it’s a delicate balance.
- LAYER THE WHIP LAST: Fold in the Miracle Whip after the dry ingredients are mixed in, but before the final stir. This keeps the dressing distributed evenly without breaking down the batter’s structure. Add it in thirds, swirling gently—like folding in a delicate meringue. Yes, it sounds fussy, but the payoff is worth it.
Perfect pairings for miracle whip cake
Classic Side Pairings
Serve your Miracle Whip cake with a scoop of vanilla ice cream—the cool creaminess contrasts perfectly with the warm, tangy frosting. I recommend Blue Bell Homemade Vanilla for its rich, creamy texture that melts beautifully.
For a lighter option, try vanilla bean gelato from Ben & Jerry's—its smooth consistency won’t overpower the cake. 🍦
Fresh strawberries or raspberries add a pop of color and freshness. Toss them in a light honey-lime dressing (mix 2 tbsp honey with 1 tbsp lime juice and a pinch of salt) to complement the cake’s sweet-tangy profile. The berries’ acidity cuts through the richness, balancing every bite.
Creamy Beverage Matchups
A glass of cold milk is a nostalgic classic—whole milk enhances the cake’s buttery richness. For a grown-up twist, try chilled vanilla chai latte from Starbucks (order it with 2% milk and a splash of vanilla syrup).
The warm spices in the latte harmonize with the cake’s cinnamon notes. ☕
For a refreshing contrast, serve sparkling lemonade—mix 1 cup lemonade with ½ cup sparkling water and a few ice cubes. The effervescence cleanses the palate between each decadent slice.
If you prefer something stronger, a light bourbon (like Maker’s Mark) poured over ice adds a smoky depth that pairs surprisingly well with the cake’s sweet-tangy balance.
Frosting Variations
Swap the classic frosting for chocolate Miracle Whip frosting by adding ½ cup melted chocolate chips (I use Ghirardelli Dark) to the powdered sugar mixture. The result is a decadent, fudgy twist that still keeps the signature tang.
For a peanut butter version, mix in ¼ cup creamy peanut butter (like Jif Natural) and a pinch of salt to enhance the flavors.
Add a citrus kick by folding in 2 tbsp orange marmalade or 1 tbsp orange zest to the frosting. The bright, fruity notes elevate the cake’s vanilla base, making it feel like a festive dessert.
For a spiced twist, stir in ¼ tsp ground nutmeg alongside the cinnamon—it adds warmth that pairs beautifully with the frosting’s tang.
Garnish Ideas
Top your cake with crushed graham crackers for a nostalgic crunch—sprinkle them lightly over the frosting before chilling. For a fancy touch, pipe rosettes of frosting around the edges using a Wilton 1M tip. A few chopped candied pecans add a buttery crunch that complements the cake’s richness.
Fresh mint leaves or edible flowers (like violets) add a pop of color and freshness. If you’re feeling playful, drizzle the top with white chocolate ganache (melt ½ cup white chocolate chips with 2 tbsp heavy cream) for a glossy finish.
The contrast of textures makes every slice feel special. ✨
Nutrition facts
Frequently asked questions
Can I substitute Miracle Whip with regular mayonnaise in this cake?
The texture will be slightly different—mayonnaise is less tangy and thicker, so your frosting may turn out denser. Use 1 cup mayonnaise plus 1 tablespoon sour cream for a closer match, but expect a milder flavor. For best results, stick with Miracle Whip's signature tang!
Why does my cake turn out dry instead of moist?
Overmixing the batter develops gluten, making the cake tough. Mix just until combined, and ensure your butter and eggs are at room temperature. Also, don't overbake—remove the cake when a toothpick comes out clean (even if the top looks slightly underdone). The frosting adds moisture, so don't skip that step!
How can I make this cake gluten-free?
Replace the all-purpose flour with a 1:1 gluten-free baking flour blend (like Bob's Red Mill). Add ½ teaspoon xanthan gum to help bind the batter. The cake will still be tender, but the texture may be slightly denser. Test with a small batch first to adjust consistency.
Can I bake this cake in a different pan size?
Yes! For a 9x13-inch pan, bake at 350°F for 25-30 minutes (no layers needed). For 8-inch pans, bake 30-35 minutes per layer. Adjust baking time based on toothpick test—smaller pans may need extra time. The frosting quantity should stay the same for a single-layer cake.
What’s the best way to store leftovers?
Keep the cake in an airtight container at room temperature for up to 2 days. For longer storage, refrigerate (up to 5 days) or freeze unfrosted layers (up to 3 months). Bring refrigerated cake to room temp before serving to restore texture. The frosting may soften slightly but remains delicious!