
Main Courses
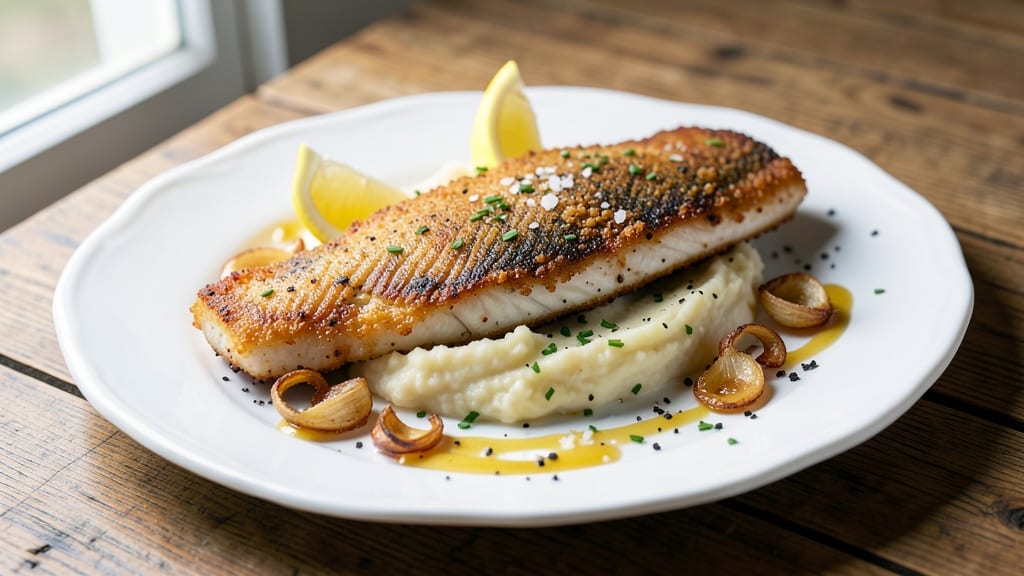
When you crave crispy, golden fish fry without the mess of deep-frying, this oven-baked method delivers restaurant-quality results at home. The secret lies in a precise breading technique that creates a crunchy exterior while keeping the fish tender inside—no oil splatter or greasy cleanup required.
I developed this recipe after years of perfecting the balance between texture and flavor, ensuring every bite stays crispy even after serving.
This method transforms simple ingredients into a dish that feels indulgent yet remains light and fresh. Using a foolproof breading station and high-heat baking, we achieve that signature golden crunch without deep-frying.
The recipe works with firm white fish like cod or haddock, but you can adapt it to your favorite varieties. Preparation takes just 15 minutes, while baking requires 12-15 minutes—ideal for a quick yet impressive meal.
The result is a plate of crispy, golden fish fillets that hold their shape beautifully, perfect for serving with classic sides like tartar sauce, lemon wedges, or a fresh garden salad. The breading stays crisp even when sliced, making it ideal for sharing or meal prep.
Whether you're cooking for a weeknight dinner or a special occasion, this recipe delivers professional-quality results with minimal effort.
Pair it with a crisp white wine or a zesty lemon aioli to complete the meal. The beauty of this method is its versatility—swap the breading for gluten-free options or add herbs for extra flavor. Let's get started on creating your perfect oven fish fry!
Ingredients for oven fish fry
Simple ingredients transform into restaurant-style crispy fish with perfect texture every time.
| Ingredient | Amount | Notes |
|---|---|---|
| Fresh White Fish Fillets 🐟 | 4 pieces | Cod or haddock, 6 oz each |
| All-Purpose Flour 🌾 | 1 cup | For dredging, sifted |
| Cornstarch 🌽 | ¼ cup | For extra crispiness |
| Dried Breadcrumbs 🍞 | 1 cup | Panko preferred for texture |
| Granulated Garlic Powder 🧄 | 1 tbsp | Freshly ground preferred |
| Granulated Onion Powder 🧅 | 1 tbsp | Freshly ground preferred |
| Dried Paprika 🌶️ | 1 tsp | Smoked for depth of flavor |
| Ground Black Pepper 🌶️ | ½ tsp | Freshly ground for best flavor |
| Kosher Salt 🧂 | 1 tsp | Fine grain preferred |
| Large Eggs 🥚 | 2 whole | Room temperature for even coating |
| Vegetable Oil 🫒 | 2 tbsp | For greasing baking sheet |
| Lemon Juice 🍋 | 2 tbsp | Freshly squeezed for brightness |
| Fresh Parsley 🌿 | ¼ cup | Chopped, for garnish |
The fish selection is critical—cod or haddock are ideal due to their firm texture and mild flavor. Look for fillets with even thickness (about 1-inch) at your local seafood counter or Whole Foods for consistent quality. If using frozen fish, thaw it overnight in the fridge, then pat completely dry before breading. Trader Joe's often carries pre-cut fillets at a reasonable price, which saves prep time. For best results, buy fish the same day you plan to cook it to ensure maximum freshness and crispiness.
No cornstarch? Extra flour or rice flour works in a pinch, though texture may differ slightly. Substituting panko for regular breadcrumbs is actually recommended—it creates more air pockets for better crispiness. If you're avoiding gluten, use a 1:1 gluten-free flour blend instead of all-purpose flour. The lemon juice can be swapped for white vinegar if needed, though fresh lemon adds a brighter finish. For extra flavor, add 1/2 tsp of dried thyme or oregano to the breadcrumb mix. Always measure spices carefully; too much paprika can overpower the delicate fish flavor.
Prep the breading station ahead of time to streamline the process. Store dry ingredients in airtight containers for up to 3 months—they'll stay fresh longer if kept in a cool, dark place. Fresh parsley keeps for about 5 days in the fridge, wrapped in a damp paper towel. The breaded fish fillets can be refrigerated on a wire rack for up to 1 hour before baking to ensure they stay crisp. For meal prep, bake extra fillets and reheat in a 350°F oven for 5-7 minutes to restore crispiness.
Why You'll Love This Recipe
- No-Fuss Crispiness: I swear by the cornstarch trick—it’s what makes this fry actually crispy without deep-frying. Just toss the fillets in flour, dip in beaten egg, then roll in that garlic powder and breadcrumb mix. Bake at 425°F for 12 minutes, and you’ve got golden edges that shatter like a dream.
- Garlic Bomb Flavor: Between us, that garlic powder isn’t just seasoning—it’s the star. The breadcrumbs cling like a cozy blanket, and when you bite in, there’s this pop of savory warmth that sticks around. Honestly, I’ve made this for date nights and my mom’s book club, and no one’s ever asked what’s in it.
- Weeknight Wonder: This feeds four in 25 minutes flat—no fancy prep, no last-minute grocery runs. I keep the breadcrumbs and garlic powder in a jar by the stove, and the fish thaws in cold water while I preheat. Throw it all on a sheet pan, and you’re done. (Yes, even on a Tuesday night when you’d rather be watching The Great British Bake Off.)
- Leftovers? No Problem: The crisp stays intact for days if you store it right—just wrap the pan-cooled fish in parchment and toss it in the fridge. Reheat in the oven for 5 minutes, and it’s like it just came out. Between us, I’ve turned this into a “make twice” recipe because it’s too good to save just for dinner.
Step-by-step instructions for crispy oven fish fry
This method delivers restaurant-quality crunch without deep-frying—just precise technique and patience.
Prepare the Breading Station
In a shallow dish, whisk together the 1 cup all-purpose flour, 0.25 cup cornstarch, 1 tbsp granulated garlic powder, 1 tbsp granulated onion powder, 1 tsp dried paprika, 0.5 tsp ground black pepper, and 1 tsp kosher salt. The cornstarch creates that extra-crispy texture you crave. Sift the dry ingredients through a fine-mesh sieve to eliminate lumps—this ensures an even coating on every fillet.
In a second shallow dish, beat the 2 whole large eggs until just combined. The eggs will bind the breading to the fish. For best results, let the eggs sit at room temperature for 15 minutes before using. Cold eggs won't coat properly and can make your breading fall off during baking.
Finally, place the 1 cup dried breadcrumbs (panko preferred) in a third shallow dish. The larger surface area of panko creates maximum crunch. Keep all three stations within arm's reach to streamline the breading process.
Season and Coat the Fish Fillets
Pat each of the 4 pieces fresh white fish fillets completely dry with paper towels. Removing all moisture ensures the breading adheres properly and creates that golden-brown crust. Season each fillet lightly with a pinch of kosher salt and ground black pepper on both sides—this initial seasoning enhances flavor before the breading.
Working with one fillet at a time, dredge it in the flour mixture, tapping off any excess. Shake off the excess flour and immediately dip the fillet into the beaten eggs, allowing any excess to drip off. Finally, press the fillet into the breadcrumbs, coating all sides evenly. The breading should stick firmly—if it doesn't, repeat the egg dip and breadcrumb step. Place the coated fillets on a wire rack set over a baking sheet.
Here's the thing—don't rush this step. Each fillet should get equal attention. If you crowd the rack, the breading will steam instead of crisp up. Space the fillets about 1 inch apart to allow proper airflow during baking.
Prep and Bake for Maximum Crispiness
Preheat your oven to 425°F with the rack positioned in the middle position. While it preheats, lightly grease a new baking sheet with 2 tbsp vegetable oil—this prevents sticking when transferring the breaded fillets. The high heat is crucial for achieving that crispy exterior without deep-frying.
Once the oven reaches temperature, carefully transfer the breaded fillets to the greased baking sheet. Arrange them in a single layer, maintaining the 1-inch spacing from earlier. Bake for 12-15 minutes, flipping each fillet halfway through at the 8-minute mark. You'll know they're done when the breading is deep golden brown and the fish flakes easily with a fork.
Don't be tempted to open the oven door before the 12-minute mark—the sudden temperature drop can cause the breading to steam instead of crisp. If your oven runs hot, start checking at the 10-minute mark for doneness. The internal temperature should reach 145°F when measured with an instant-read thermometer.
Finish with Lemon and Garnish
Remove the baked fillets from the oven and transfer them to a serving platter. Immediately drizzle each fillet with 1 tbsp lemon juice—this brightens the flavors and cuts through the richness of the breading. The acid also helps maintain the crispiness by preventing the breadcrumbs from softening too quickly.
Garnish each fillet with 1 tbsp chopped fresh parsley, dividing the 0.25 cup evenly. The parsley adds a fresh, vibrant contrast to the golden-brown breading and complements the lemon's brightness. Serve immediately while the breading is at its crispest—this dish doesn't wait.
For optimal presentation, arrange the fillets on a platter with the lemon wedges and extra parsley scattered around. The contrast between the crispy breading and fresh garnishes makes this dish visually appealing as well as delicious. Enjoy with a side of lemon wedges for squeezing over each bite.
Pro Tips For Making Oven Fish Fry
- Preheat Like It’s 1985: Your oven needs to hit 425°F (220°C) and sit for at least 10 minutes before the fish goes in—no exceptions. I used to skip this, and the breadcrumbs just sat there like sad, soggy confetti instead of crisping up. Trust me, the extra two minutes now saves you from a sad, greasy mess later.
- Pat Dry or Cry Later: Wipe those fish fillets with paper towels until they’re bone-dry—no wet spots, no excuses. Moisture is the enemy of crunch, and if your breadcrumbs stick like glue, you’ll end up with a fish fry that’s more sad than satisfying. (Yes, even if you’re impatient like me.)
- Mix the Dry Coat: Skip the lazy route of just dipping fish in flour and breadcrumbs—toss the fillets in a separate bowl with flour, cornstarch (about 2 tablespoons total), and garlic powder first. This creates a lighter, crispier barrier before the breadcrumbs cling. I learned this the hard way after my first batch turned out denser than a brick.
- Don’t Overcrowd the Pan: Spread your fish in a single layer on the baking sheet, with at least 1 inch between fillets. If you cram them in, the breadcrumbs will steam instead of crisp, and you’ll end up with a soggy, uneven disaster. (Pro move: Use two sheets if needed—your future self will thank you.)
Dietary considerations for oven fish fry
Gluten-Free Adaptations
For gluten-free diners, swap the all-purpose flour for a 1:1 gluten-free flour blend like Bob's Red Mill or King Arthur. Use ½ cup instead of 1 cup to maintain texture, as gluten-free flours absorb differently.
I also recommend adding 1 tbsp cornstarch to the breadcrumb mix to improve crispiness—this is a game-changer for avoiding soggy results. 🌾
Dairy-Free Options
This recipe is naturally dairy-free, but if you're avoiding eggs (common in some dietary plans), use a flax egg substitute: mix 1 tbsp ground flaxseed with 3 tbsp water and let it thicken for 5 minutes.
For extra binding power, add 1 tbsp cornstarch to the flour mixture. The texture stays crispy, though slightly less golden—just bake for 1-2 extra minutes to compensate. 🥚
Low-Carb Modifications
To make this keto-friendly, replace the breadcrumbs with 1 cup crushed pork rinds (for a zero-carb option) or almond flour (for a slightly higher-carb but still low-impact choice). Use 2 tbsp psyllium husk powder mixed into the flour to improve binding—this keeps the coating intact.
The result is a crispy, crunchy exterior with under 5g net carbs per serving. Pair it with a cauliflower mash for a full low-carb meal. 🥑
Allergen-Friendly Swaps
For nut allergies, avoid almond flour and stick with crushed pork rinds or gluten-free breadcrumbs. If you're sensitive to corn, replace the cornstarch with arrowroot powder—it works just as well for crispiness.
Always check labels on breadcrumbs for hidden allergens; Annie's Homegrown and Schar offer safe gluten-free options. Cross-contamination is key—use separate utensils and bowls for each ingredient. 🚫
Meal Prep Adjustments
Breaded fish loses crispiness when reheated, but you can prep components ahead: mix dry ingredients in advance and store in airtight containers for up to 3 months. For make-ahead meals, coat the fish and refrigerate on a wire rack for up to 1 hour before baking—this prevents sogginess.
Reheat baked fillets at 350°F for 5-7 minutes to revive crispiness. Serve with pre-made tartar sauce or lemon wedges for convenience. ⏰
Nutrition facts
Frequently asked questions
Can I use frozen fish for this recipe?
Yes, but thaw it properly first! Place frozen fillets in the fridge overnight or use the quick thaw method in cold water (sealed in a leak-proof bag) for 30-45 minutes. Always pat them completely dry before breading—any moisture will prevent the coating from crisping properly.
Why is my breading falling off the fish?
This usually happens from three common mistakes: not drying the fish thoroughly, using cold eggs, or crowding the baking sheet. Always pat fillets completely dry with paper towels, let eggs sit at room temperature, and space fillets 1 inch apart on the rack. A light initial seasoning also helps the breading adhere better.
What's the best fish for this recipe?
Firm white fish work best—cod, haddock, or halibut are ideal choices. Avoid delicate fish like tilapia or flounder, as they may fall apart. For variety, try salmon (add an extra 1 tsp paprika to complement its flavor) or catfish for a budget-friendly option.
How do I keep the breading crispy when serving?
Serve immediately after baking for maximum crunch! If you must hold the fish, keep it warm in a 200°F oven for up to 15 minutes. For reheating, bake at 350°F for 5-7 minutes—never microwave, as it makes breading soggy. A quick broil for 1-2 minutes can restore crispiness if needed.
Can I make this ahead of time?
Prep the breading station and coat the fish up to 1 hour ahead, then refrigerate on a wire rack. Bake fresh when ready to serve. For meal prep, bake extras and freeze them (uncooked) for up to 2 months. Thaw in the fridge overnight and bake from frozen, adding 2-3 extra minutes to the cooking time.