
Main Courses
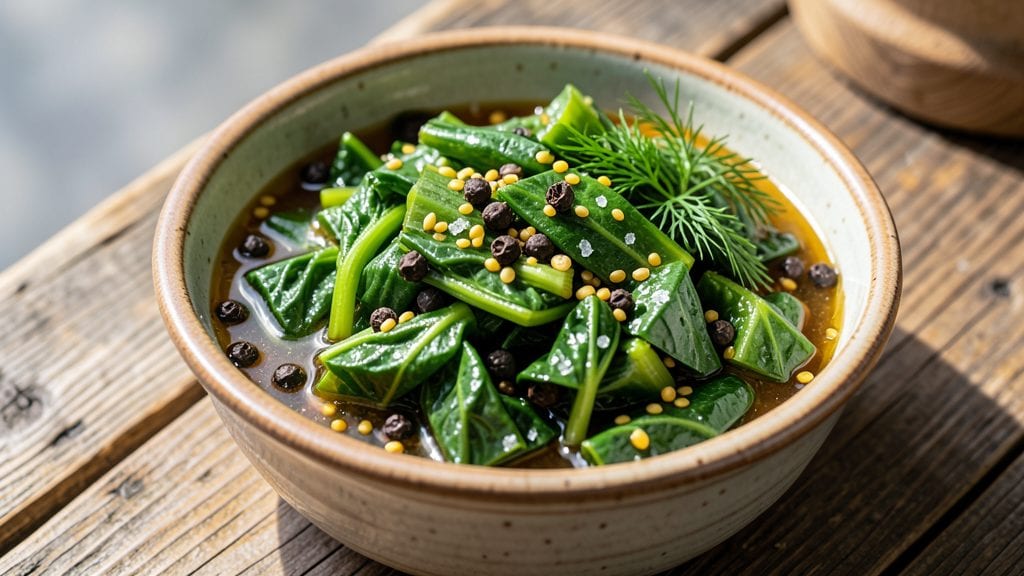
This pickled mustard greens recipe transforms bold, peppery greens into crisp, tangy bites that elevate sandwiches, salads, and charcuterie boards in just 15 minutes.
After years of experimenting with fermentation, I discovered the perfect balance of vinegar, salt, and spices to preserve their vibrant crunch while adding a bright, acidic contrast. The technique is simple but precise—no fancy equipment needed, just a jar and patience.
The key to success lies in the brine: a 1:3 ratio of vinegar to water, with just enough salt to draw out moisture without overpowering the greens.
I add a pinch of mustard seeds and black peppercorns for subtle depth, letting the flavors meld during the 15-minute prep and 24-hour resting period. This method ensures the greens stay crisp, not soggy, and develop that signature tangy bite.
What you’ll end up with is a jar of bright, vinegar-kissed greens that add texture and zing to any dish. Use them as a sandwich topping, salad garnish, or even a side with roasted meats.
The best part? They keep for up to 2 weeks in the fridge, making them a versatile pantry staple for weeknight meals.
Safety note: Always use food-grade vinegar and sterilized jars to prevent spoilage. This recipe is foolproof for beginners but delivers restaurant-quality results—perfect for home cooks who want bold flavors without the fuss. Let’s get started!
Ingredients for pickled mustard green
Grab these fresh ingredients and transform bold mustard greens into tangy, crunchy bites perfect for sandwiches and salads.
| Ingredient | Amount | Notes |
|---|---|---|
| Fresh Mustard Greens 🥬 | 12 oz | Stems trimmed, leaves chopped |
| White Vinegar 💧 | 1 cup | Food-grade, 5% acidity |
| Water 💧 | 3 cups | Filtered preferred |
| Diamond Crystal Kosher Salt 🧂 | 1 ½ tbsp | Fine grain preferred |
| Yellow Mustard Seeds 🌶️ | 1 tsp | Whole seeds, toasted |
| Black Peppercorns 🌶️ | 1 tsp | Crushed lightly |
| Garlic Cloves 🧄 | 2 cloves | Smashed, not minced |
| Granulated Sugar 🍯 | 1 tbsp | White or brown |
| Clean Quart-Sized Mason Jars 🥫 | 2 jar | With airtight lids |
| Fresh Dill Sprigs 🌿 | 4 whole | For garnish, optional |
The mustard greens are the star—look for bright green leaves with crisp stems at the farmers market or grocery store. Trader Joe's and Whole Foods carry excellent quality, but any fresh greens work. Trim the tough stems first—about an inch from the base—and chop the leaves into 1-inch pieces for even pickling. The vinegar needs to be food-grade, so skip the balsamic or apple cider vinegars here. I always use White Vinegar for its clean, sharp tang that doesn't overpower the greens' natural peppery bite.
No mustard seeds? Substitute with 1/2 tsp ground mustard, but the seeds add that lovely crunch. Running low on peppercorns? Crushed red pepper flakes work in a pinch, but toast them first for depth. The garlic is non-negotiable—it balances the vinegar's acidity beautifully. If you're using pre-minced garlic, drain it well to avoid watering down your brine. For the sugar, brown sugar adds a subtle caramel note, but white works just as well. The jars? Sterilize them first—boil lids and jars for 10 minutes to prevent spoilage.
These pickles taste even better after 24 hours of resting, but they're ready to eat immediately. Store in the fridge for up to 2 weeks—the flavor deepens over time, so make a big batch. I always keep one jar in the fridge and one in the pantry for quick sandwich toppings. The dill sprigs add a lovely aroma, but skip them if you're short—the greens will still shine. For extra crunch, pack the jars tightly with greens before adding the brine. Less space means more tangy bites!
Why You'll Love This Recipe
- No-Chop Necessary: I swear by this—just chop the stems, leave the leaves whole. The vinegar and salt do all the work while you sip your coffee. Honestly, my lazy Sundays just got a whole lot easier.
- Tangy Crunch Alert: That bright vinegar punch cuts through the greens’ natural peppery bite, leaving you with a crunchy, slightly sweet bite. The mustard seeds add a tiny pop—like a tiny, edible surprise in every mouthful.
- Meal Prep MVP: Stays crisp for weeks in the fridge, so I toss it into sandwiches, salads, or even scrambled eggs. My go-to for busy mornings when I need something fresh without the fuss.
- Budget Magic: Mustard greens are dirt cheap, and this recipe stretches them further than any other prep. Between us, I’ve fed a crowd for under $5 with these jars—no one ever guessed it was this simple.
Step-by-step instructions for pickled mustard greens
Here's how to create vibrant, crunchy pickled mustard greens that burst with tangy flavor in record time.
Prepare the Mustard Greens and Aromatics
Begin by thoroughly washing the 12 oz fresh mustard greens, then carefully separate the leaves from the stems. Trim away any thick or fibrous stems - these won't pickle well. Chop the tender leaves into 1-inch pieces using a sharp chef's knife. You want uniform bite-sized pieces that will soften beautifully during the pickling process.
In a small bowl, combine the 2 smashed garlic cloves, 1 tsp yellow mustard seeds, and 1 tsp lightly crushed black peppercorns. The garlic should be smashed rather than minced to release flavor without becoming mushy. Set this aromatic blend aside - we'll add it to the jars later. This combination creates a complex flavor profile that complements the mustard greens perfectly.
Create the Brine Solution
In a medium saucepan, combine the 3 cups water, 1 cup white vinegar, 1.5 tbsp diamond crystal kosher salt, and 1 tbsp granulated sugar. Bring to a gentle simmer over medium-low heat - you're looking for just enough heat to dissolve the salt and sugar completely, but not enough to create bubbles. Stir occasionally until the mixture becomes completely transparent and all ingredients are fully incorporated.
This balance of acidity from the vinegar, salt for preservation, and just a touch of sweetness creates the perfect environment for pickling. The 5% acidity in the white vinegar ensures safe preservation while maintaining vibrant color. Let the brine cool to room temperature before proceeding - this prevents shocking the greens when they're submerged.
Sterilize and Pack the Jars
While the brine cools, prepare your 2 clean quart-sized mason jars by sterilizing them. Place them in a 400°F oven for 10 minutes to kill any bacteria, then remove and let them cool slightly. This sterilization step is crucial for safe preservation and preventing mold growth during storage.
Divide the chopped mustard greens evenly between the jars, packing them down gently but firmly. Leave about 1-inch headspace at the top of each jar - this prevents the greens from expanding and causing the jars to burst during processing. The greens should be submerged completely when the brine is added, so pack them tightly but not so compacted that they bruise.
Assemble and Seal the Pickles
Once your brine has cooled completely, carefully ladle it over the mustard greens in each jar until they're completely submerged. Add the prepared garlic-peppercorn mixture to each jar, then place 2 fresh dill sprigs in each jar for an herbal touch. The dill adds a bright, aromatic note that pairs beautifully with the mustard greens.
Wipe the rims of the jars with a clean, damp cloth to ensure a perfect seal, then secure the lids tightly. The greens should remain completely submerged under the brine. Place the sealed jars on a cooling rack and let them sit at room temperature for 24 hours before refrigerating. This initial room-temperature period allows the flavors to meld and the greens to begin developing their signature tang.
Store and Enjoy Your Pickles
After the 24-hour resting period, transfer your pickled mustard greens to the refrigerator where they'll keep for up to 3 months. The greens will continue developing flavor as they sit, becoming more tender and developing a beautiful golden hue from the vinegar bath. The ideal time to eat them is after 1 week of refrigeration when they've developed their signature tangy crunch.
Use these vibrant pickles to add bright, peppery flavor to sandwiches, salads, or as a tangy topping for grilled meats. The combination of mustard greens and aromatic spices creates a complex flavor profile that's both refreshing and satisfying. Each bite delivers a perfect balance of crunch, heat, and vinegary tang that makes these pickles irresistible.
Pro Tips For Making Pickled Mustard Green
- Blanch First: Mustard greens need a quick 30-second blanch in boiling water before pickling—this softens them just enough to hold texture without turning mushy. Skip it, and you’ll end up with chewy, uneven greens that fight back when slicing.
- Use Less Salt: Diamond Crystal measures differently than table salt—use 1/4 cup per quart of liquid, not the 1/3 cup called for in recipes written for table salt. Too much salt makes the greens bitter and the brine unbalanced.
- Pack Tight, Then Weigh: Stuff greens into the jar as tightly as possible, then press down with a spoon to remove air pockets. This keeps them submerged in brine and prevents mold. If they float, they’ll ferment unevenly or spoil faster.
- Toast the Seeds: Dry-toast the mustard seeds in a skillet for 30 seconds until fragrant before adding them to the vinegar. This deepens their flavor and prevents them from floating like little flavorless ghosts in your brine.
Essential equipment for great pickled mustard green
Mason Jar Essentials
You’ll need quart-sized mason jars with airtight lids—these are the gold standard for pickling. I swear by Ball or Kerr brand jars because they seal tightly and handle acidity well.
Sterilize them in a 400°F oven for 10 minutes before use to prevent spoilage. For a budget-friendly alternative, glass canning jars from grocery stores work just as well. 🥫
Vinegar & Brine Tools
A food-grade white vinegar (5% acidity) is non-negotiable for safe pickling. Grab a liquid measuring cup for precise ratios and a small saucepan to heat the brine. I use a stainless steel spoon to stir the brine—it won’t react with the acid like aluminum.
A thermometer helps monitor the brine’s temperature, but it’s optional if you’re comfortable judging by eye.
Knife & Cutting Prep
A sharp chef’s knife is your best friend for chopping mustard greens into 1-inch pieces. I recommend an 8-inch Wüsthof or Victorinox for clean cuts. A cutting board (preferably plastic or wood) keeps your countertops safe.
For extra efficiency, a mandoline works if you’re prepping large batches, but it’s not essential. 🔪
Sterilization & Safety
Safety starts with sterilization. Beyond the oven method, you can boil jars and lids for 10 minutes in water or use a dishwasher’s sanitize cycle. A clean kitchen towel helps wipe jar rims before sealing.
For added peace of mind, I keep a pH strip test kit (around $10 on Amazon) to verify the brine’s acidity—it should register below 4.6 for safe preservation.
Optional Extras
Want to elevate your pickles? A garlic press makes smashing cloves easier, and a mortar and pestle crushes peppercorns perfectly. For presentation, glass jar labels (like Avery’s adhesive labels) help track flavors.
If you’re fermenting long-term, a fermentation weight keeps greens submerged, but it’s not needed for this quick-pickle method. 💡
Nutrition facts
Frequently asked questions
Can I use apple cider vinegar instead of white vinegar?
While apple cider vinegar adds a mild sweetness, it lacks the sharp acidity needed for proper preservation. Stick with white vinegar (5% acidity) to ensure safety and vibrant color. For a compromise, use a 50/50 mix with white vinegar, but expect slightly softer greens.
How do I know if my pickled greens are spoiled?
Watch for foul odors, mold growth, or slimy texture—these are red flags. If the greens smell off or the brine looks cloudy, discard immediately. Properly pickled greens should smell tangy and look crisp, even after 3 months of storage.
Can I make this recipe without sterilizing the jars?
Sterilizing is critical for safety. Unsterilized jars risk mold or bacteria growth. The 10-minute oven method is easiest, but boiling jars and lids for 10 minutes also works. Skip this step at your own risk—especially with acidic ingredients.
What are the best ways to use these pickled greens?
These tangy greens shine on sandwiches, charcuterie boards, or as a salad topping. Try them with grilled chicken, roasted potatoes, or even in tacos. The peppery crunch pairs perfectly with rich, fatty foods—think fried chicken or creamy cheeses.
Can I adjust the spice level for kids or sensitive eaters?
Reduce the mustard seeds to ½ tsp or omit them entirely. For extra mildness, skip the peppercorns and add a pinch of dried parsley instead. The vinegar’s tang will still shine through without overwhelming heat.