
Side Dishes
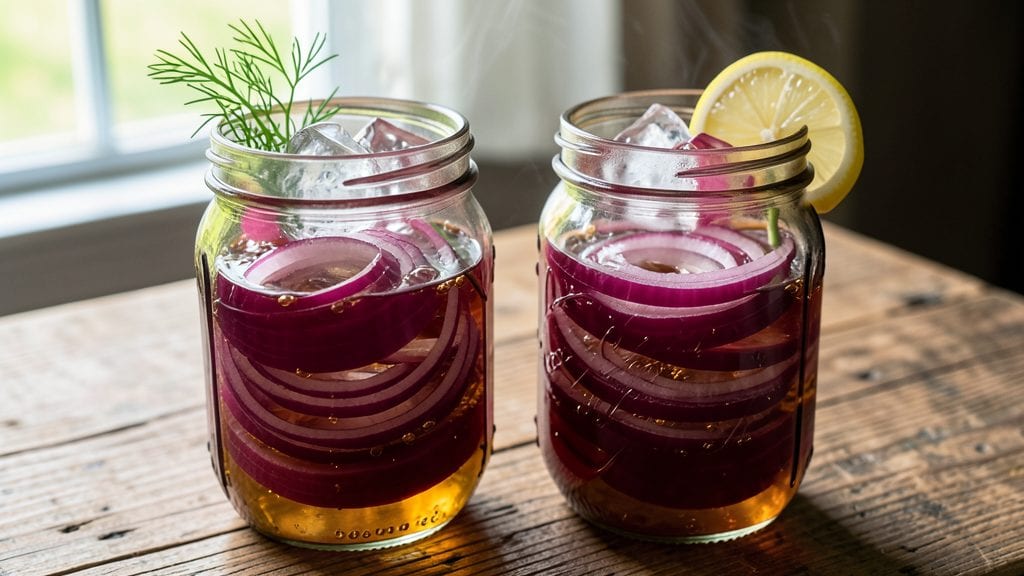
The Pioneer Woman pickled red onions recipe delivers that signature tangy crunch that elevates everything from burgers to tacos. This vinegar-bright condiment transforms simple meals into restaurant-worthy dishes with minimal effort. The key lies in precise slicing, a balanced brine, and proper storage—all designed to preserve flavor for weeks.
This recipe requires just five ingredients but delivers maximum impact: sharp red onions, white vinegar, salt, and a touch of sugar to balance the acidity. The process is straightforward—slice the onions evenly, pack them into jars, and pour the brine to cover completely.
Within 24 hours, you’ll have a batch of onions that stay crisp and tangy for up to two months in the fridge.
What makes these pickled onions special is their versatility. Use them as a topping for burgers, a garnish for tacos, or a bright addition to salads and sandwiches.
The tangy crunch cuts through rich flavors, making every bite more dynamic. Once you make this batch, you’ll never buy store-bought pickled onions again.
Perfect for meal prep, these onions keep well in airtight jars and can be doubled or halved to suit any occasion. The recipe is foolproof, ensuring consistent results every time. Let’s get started on creating your own vinegar-bright crunch.
Ingredients for pioneer woman pickled red onions
Five ingredients transform simple red onions into restaurant-worthy tangy crunch for burgers and tacos.
| Ingredient | Amount | Notes |
|---|---|---|
| Red Onions 🧅 | 2 large | Thinly sliced, evenly sized |
| White Vinegar 🍶 | 2 cups | Distilled white vinegar preferred |
| Granulated Sugar 🍚 | ½ cup | White or raw sugar works |
| Sea Salt 🧂 | 1 ½ tbsp | Fine grain preferred |
| Clean Mason Jars 🍶 | 2 pint | With airtight lids, sterilized |
The onions are non-negotiable—fresh, firm red onions with crisp layers ensure the best texture. Store-brand or organic both work, but avoid any with soft spots or sprouting. For even slicing, cut the onions in half from root to stem, then slice thinly into 1/8-inch strips—this ensures consistent pickling. Trader Joe's and Whole Foods often carry the sweetest red onions, but your local grocery store will do fine. If you're prepping ahead, store unpeeled onions in a cool, dark place for up to 2 weeks before pickling.
White vinegar is the secret to that signature tang—distilled white vinegar is the standard, but apple cider vinegar adds a subtle fruitiness if you prefer. No vinegar? Lemon juice works in a pinch, but the flavor will differ slightly. Sugar balances the acidity, so don’t skip it—brown sugar adds a caramel note, but white sugar keeps things classic. The salt is key for preservation; Diamond Crystal kosher salt dissolves best, but any fine sea salt will do. For storage, sterilize jars by boiling lids for 5 minutes or running them through a dishwasher cycle. If you don’t have pint jars, quart jars work too—just adjust the onion-to-brine ratio accordingly.
These pickled onions stay crisp and tangy for up to 2 months in the fridge, making them perfect for meal prep. Store in a cool, dark cabinet to preserve color and flavor. Once opened, transfer any unused portion to an airtight container and refrigerate for another week. Freezing isn’t recommended—they’ll turn mushy. For gifting, wrap jars tightly and they’ll keep for 3-4 weeks at room temperature, though flavor peaks after 24 hours of pickling. Double the batch and keep one jar in your fridge for quick tacos or burgers—you’ll never reach for store-bought again.
Why You'll Love This Recipe
- No-Chop Shortcut: I swear by the thin-sliced onions here—they soften just enough to bite through without losing that perfect crunch. Honestly, the vinegar and sugar balance makes it taste like you spent hours, but it’s really just 15 minutes of hands-off soaking.
- Sweet-Tangy Magic: That sugar and salt combo? It’s the kind of flavor that sticks with you—bright, sharp, and just sweet enough to make you want to eat them straight from the jar. (Yes, I’ve been guilty.)
- Pantry Staple Power: Three ingredients you already own. No fancy herbs, no specialty jars—just onions, vinegar, and a little patience. I keep a batch in my fridge for when I forget to buy pickles or need a quick topping.
- Months of Readiness: One jar lasts me forever—toss them on burgers, salads, or tacos. Between us, I’ve even used them as a snack when I’m too lazy to make anything else. (Don’t judge.)
Step-by-step instructions for vinegar-bright pickled red onions
This method delivers crisp, tangy onions perfect for topping burgers or tacos every time.
Sterilize Jars and Prepare Onions
First, sterilize the two pint clean mason jars and their lids by boiling them in water for 5 minutes. This prevents contamination and ensures your pickled onions stay fresh longer. While the jars are sterilizing, thinly slice the two large red onions into even, paper-thin rings. I use a mandoline for consistent slices, but a sharp knife works too—just be careful with your fingers.
The key here is even slicing. Uneven pieces won't pack tightly in the jars, which can lead to soggy onions. Arrange the sliced onions in the sterilized jars, pressing down gently but firmly to create tight layers. You should be able to see the layers clearly through the glass—this packing ensures maximum crunch and flavor absorption.
Create the Brine Solution
In a medium bowl, combine the 2 cups white vinegar, 0.5 cup granulated sugar, and 1.5 tablespoons sea salt. Stir until the sugar and salt dissolve completely. Here's the thing—don't rush this step. The sugar needs time to fully dissolve, and any undissolved crystals can make your pickled onions taste gritty. If you notice any remaining sugar at the bottom after stirring, give it another 30 seconds with a whisk to ensure everything integrates smoothly.
Once fully dissolved, pour the brine over the sliced onions in the jars, filling them to about ½ inch from the top. Tap the jars gently on the counter to release any air bubbles trapped between the onion slices. This ensures the brine fully covers the onions and prevents mold growth. Leave about ½ inch of headspace at the top—this allows for natural expansion during the pickling process.
Seal and Process the Jars
Place the lids on the jars and tighten the rings until they're finger-tight—don't over-tighten, or you risk cracking the jars. Then, process the jars in a boiling water bath for 10 minutes. This step is critical for safety, especially if you're storing the pickled onions for more than a few days. The boiling water drives out any remaining air and creates a vacuum seal when the jars cool.
During the 10-minute processing time, you'll hear a satisfying ping as the jars seal. If you don't hear this sound, don't worry—just check the seals after cooling. The lids should curve downward slightly, indicating a proper seal. If any jars don't seal, refrigerate them immediately and use the contents within 1 week. Properly sealed jars can last up to 6 months in a cool, dark pantry.
Cool and Store for Maximum Crunch
Remove the jars from the water bath and let them cool completely on a towel-lined counter. This cooling process allows the jars to seal fully and prevents condensation from forming on the lids. Once cooled, store the jars in a dark, cool place—like a pantry or cupboard—for at least 24 hours before using. This resting period lets the flavors meld and the onions absorb the brine fully.
After 24 hours, your pickled red onions should have a vibrant color and crisp texture. The vinegar will have mellowed slightly, creating a bright, tangy flavor that's perfect for topping burgers, tacos, or sandwiches. If you notice any softness after a few weeks, simply refrigerate the jars—they'll keep for another 2-3 months in the fridge. The longer they sit, the more flavorful they become, but the crunch will gradually diminish over time.
Pro Tips For Making Pioneer Woman Pickled Red Onions
- Slice Thin, Slice Even: Grab a sharp knife and slice those red onions paper-thin—about ⅛-inch thick. I learned this the hard way: thicker slices stay crunchy forever, while thinner ones soften just right in the brine. Use a mandoline if you’re impatient like me, but keep your fingers clear.
- Boil the Vinegar: Heat the white vinegar to a full boil before mixing with sugar and salt—this dissolves everything faster and prevents grainy sediment at the bottom of your jars. I used to skip this, and my pickled onions always had little sugar crystals floating around.
- Sterilize Jars Properly: Run your mason jars and lids through a quick 10-minute hot-water bath (or pop them in the oven at 200°F for 15 minutes). Cold jars sweat condensation, which dilutes the brine and risks mold. Trust me, the extra minute saves you from tossing a whole batch later.
- Pack Tight, But Not Brutal: Shove those sliced onions into jars until they’re snug, but don’t mash them—you want space for the brine to circulate. After a few days, they’ll plump up and soften naturally. I used to jam them in like sardines, and they’d turn mushy before the flavor even developed.
Serving suggestions for this recipe
Burger Topping Star
These pickled red onions transform any burger into a flavor powerhouse. I like to pile them high on a classic cheeseburger—about 2 tablespoons per patty—right alongside melted American cheese and crisp bacon.
The tangy crunch cuts through the richness of the beef, balancing every bite. For extra depth, add a smear of garlic aioli or spicy mayo before topping with onions. 🍔
Taco Game-Changer
Sprinkle 1-2 tablespoons of these onions over carnitas tacos or fish tacos for instant brightness. I often mix them with pickled jalapeños and cilantro for a Tex-Mex twist. The acidity in the onions helps balance the richness of creamy sauces like queso blanco or sour cream.
For a smoky kick, add a dash of chipotle powder to the onions before pickling.
Salad Brightener
Toss ¼ cup of these pickled onions into a hearty kale salad with crispy fried chicken, avocado slices, and a honey-mustard dressing. The onions add a sharp contrast to the creamy avocado and crispy chicken.
For a lighter option, mix them into a quinoa bowl with roasted veggies and a lemon-tahini dressing. The tangy crunch elevates any salad from basic to restaurant-worthy.
Sandwich Secret Weapon
Add a layer of these pickled onions to your next Reuben sandwich or grilled cheese. I love pairing them with thousand island dressing and pastrami for a tangy-sweet contrast.
For a vegetarian option, layer them in a grilled cheese with tomato soup—the acidity brightens the richness of the cheese. Use about 1 tablespoon per sandwich to avoid overwhelming the flavors.
Pasta Pairing
Stir 2 tablespoons of these onions into a creamy alfredo sauce just before tossing with fettuccine. The tang cuts through the richness of the sauce, making every bite more dynamic. For a lighter option, mix them into a pesto pasta with cherry tomatoes and mozzarella pearls.
The onions add a bright, acidic note that balances the richness of the cheese and nuts in the pesto.
Garnish for Grilled Meats
Use these pickled onions as a garnish for grilled steak or chicken breasts. I like to slice them thinly and fan them over the top of the meat just before serving.
The acidity helps cut through the richness of the meat, especially with dishes like garlic butter steak or honey-glazed chicken. For extra flair, drizzle with a little balsamic glaze before adding the onions.
Nutrition facts
Frequently asked questions
Can I use yellow or white onions instead of red?
While you can substitute yellow or white onions, red onions are ideal for this recipe because their vibrant color and mild sweetness create the perfect balance of tang and crunch. Yellow onions will work but may lack the visual pop and subtle sweetness that red onions provide. If you must use yellow, add a pinch of paprika to the brine for color and depth.
How long do these pickled onions last?
Properly sealed jars can last up to 6 months in a cool, dark pantry. Once opened, refrigerate and use within 2-3 months for maximum crunch. If stored in the fridge from day one, they'll keep for 2 months but may soften slightly over time. The flavor actually improves with age!
Can I make this recipe without sterilizing the jars?
For short-term storage (1 week), you can skip sterilization, but it's not recommended for safety. Always sterilize jars if you plan to store them longer than a week or in warm conditions. The 10-minute boiling water bath is the best way to ensure a proper seal and prevent spoilage. If you don't have time to sterilize, use clean jars and refrigerate immediately.
What if my onions turn soft or mushy?
Soft onions usually mean they absorbed too much liquid or weren't stored properly. To fix this, drain the onions and pat them dry before using. For future batches, ensure the brine fully covers the onions and leave ½ inch of headspace. If storing long-term, refrigerate opened jars to slow down texture breakdown. The tangy flavor will still be great—just the crunch may be compromised.
Can I adjust the spice level?
For extra heat, add ½ teaspoon of red pepper flakes or 1-2 thinly sliced jalapeños to the jars before pouring the brine. For a sweeter version, increase the sugar to ⅔ cup. The classic recipe balances perfectly, but feel free to customize—just remember that more vinegar or sugar will alter the flavor profile slightly.