
Main Courses
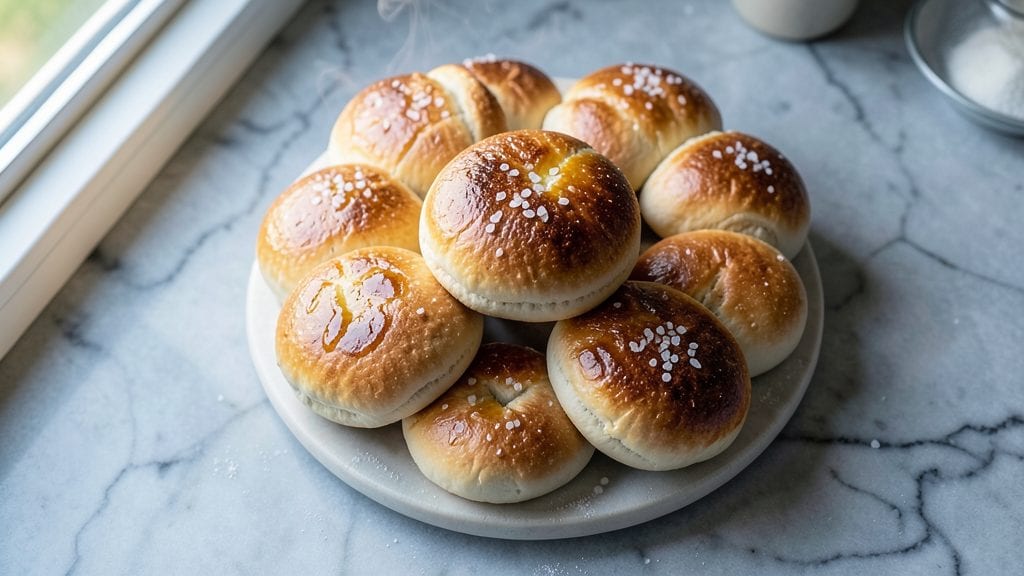
This pizza bun recipe delivers the ultimate soft, pillowy dough that transforms any pizza into an irresistible handheld experience. After years of testing, I’ve perfected a method that guarantees buns with a tender crumb and just enough structure to hold toppings without falling apart—no matter how heavy the load.
The secret lies in precise hydration and a slow fermentation that develops flavor while keeping the texture light.
What sets this recipe apart is its versatility—whether you’re making classic Neapolitan-style sliders, deep-dish pizza buns, or even stuffed pizza bites, this dough adapts perfectly. The recipe includes a foolproof shaping technique that ensures even proofing and a golden, slightly crispy exterior when baked.
For extra flavor, I recommend infusing the dough with garlic, herbs, or even a touch of cheese, though the basic version is already delicious on its own.
By the time you’re done, you’ll have buns that are impossibly soft inside with a satisfying chew, capable of hugging toppings without turning soggy. The aroma alone will have everyone gathering around the table, and the first bite delivers that perfect balance of airy texture and rich flavor.
This is the kind of dough that turns ordinary pizza night into a memorable experience—every time.
Use these buns for anything from classic pepperoni sliders to gourmet deep-dish creations. The recipe scales easily, so you can make a batch for a crowd or just enough for a cozy dinner. Let’s get started on dough that will change how you eat pizza forever.
Ingredients for pizza bun
Twelve ingredients, twelve perfect buns—this is your dough game-changer.
| Ingredient | Amount | Notes |
|---|---|---|
| All-Purpose Flour 🌾 | 5 cups | Plus 1 tbsp for dusting |
| Active Dry Yeast 🍞 | ¼ oz | Or 2 1/4 tsp (1 packet) |
| Granulated Sugar 🍚 | 1 tbsp | Feeds the yeast |
| Unsalted Butter 🧈 | ½ cup | Softened, not melted |
| Whole Milk 🥛 | 1 cup | Warmed to room temp |
| Large Egg 🥚 | 1 whole | Room temperature |
| Salt 🧂 | 1 ½ tsp | Kosher or sea salt |
| Garlic Powder 🧄 | ½ tsp | For subtle flavor boost |
| Dried Parsley Flakes 🌿 | ¼ tsp | Optional, for freshness |
| Olive Oil 🫒 | 1 tbsp | For greasing bowl |
| Cornmeal 🌽 | ½ cup | For dusting proofed buns |
The flour is non-negotiable here—King Arthur or Gold Medal are my go-tos for that perfect balance of protein and gluten. Yeast is the magic maker, so check the expiration date—nothing kills a recipe faster than dead yeast. The butter? Full-fat is a must—it gives those buns their signature richness. Warm the milk to about 100°F (just warm to the touch), and let the egg sit out for 10 minutes so it mixes in smoothly. Pro tip: if your kitchen runs cold, pop the egg in warm water for a minute to bring it to room temp faster.
No garlic powder? Fresh minced garlic at half the amount works wonders, but it’ll make your dough smell like a pizza shop—warning: you’ll want to eat it raw. Short on butter? Vegetable shortening keeps the texture but loses that buttery flavor. The parsley flakes are optional but add a subtle freshness that makes these buns feel next-level. For the yeast, if you’re in a pinch, instant yeast works 1:1—just skip the sugar since instant yeast doesn’t need it. And if you’re making a big batch, double the recipe and freeze half—they thaw beautifully for next-level pizza night.
This dough is a patient recipe—let it rise until it’s doubled in size, which could take 1-2 hours depending on your kitchen. Store shaped buns in the fridge for up to 24 hours before baking, or freeze them raw for up to 3 months. For the ultimate shortcut, bake them fresh and keep in an airtight container at room temp for 3 days. They reheat perfectly in a 350°F oven for 5-7 minutes—just wrap in foil to keep them soft. Trust me, the first bite out of the oven is worth every minute of waiting.
Why You'll Love This Recipe
- No-Knead Magic: I swear by this dough—just mix, let it sit, and boom. The yeast and warm milk do all the work while I’m scrolling or watching TV. No standing over a counter, no sore arms, just soft pillowy buns that taste like I put in effort.
- Buttery Soft Secret: That butter and milk combo? It’s what turns these into dangerously good pizza buns. The outside gets just crisp enough to hold toppings, while the inside stays tender—like a hug from your favorite carb.
- Game for Any Meal: Slap on garlic butter for breakfast, load ‘em with pepperoni for dinner, or freeze extras for game day. They reheat like a dream, whether you’re feeding your family or your book club.
- Budget-Friendly Staples: Five ingredients, zero specialty items. I’ve made these for under $2 a batch, and they keep for days in the fridge or freeze perfectly. Your wallet and your freezer will thank you.
Step-by-step instructions for soft, pillowy pizza buns
Here's how to craft dough so tender it'll make your favorite toppings feel like a perfect embrace.
Activate the Yeast for Maximum Rise
In a small bowl, combine the 1 cup whole milk with the 1 tbsp granulated sugar. Warm this mixture in the microwave for 20-30 seconds until it reaches about 105°F—it should feel warm to the touch but not hot. Sprinkle the 0.25 oz active dry yeast over the top and let it sit for 5-10 minutes until foamy. This step is non-negotiable for light, airy buns.
If the yeast doesn't foam, your milk was too hot and killed it. Start over with fresh yeast and cooler milk. The foam confirms your yeast is alive and ready to transform your dough into something extraordinary. I always do this first because it sets the foundation for that perfect rise.
Mix the Dough with Just the Right Texture
In the bowl of a stand mixer fitted with the dough hook, combine the 5 cups all-purpose flour, 1.5 tsp salt, 0.5 tsp garlic powder, and 0.25 tsp dried parsley flakes. Mix on low speed for 30 seconds to distribute the dry ingredients. Add the yeast-milk mixture, 0.5 cup softened unsalted butter, and 1 whole large egg to the bowl.
Let the mixer knead on medium speed for 5-7 minutes until the dough forms a smooth, elastic ball that pulls away from the sides of the bowl. You'll know it's ready when it passes the "windowpane test"—stretch a small piece between your fingers, and if it's thin enough to see light through, you're golden. This dough should be soft but not sticky.
Let the Dough Rest for Maximum Flavor
Lightly grease a large bowl with 1 tbsp olive oil and place the dough inside. Cover the bowl with a damp towel or plastic wrap and let it rise in a warm place for 1-2 hours, or until it has nearly doubled in size. This slow rise develops deep flavor and ensures those pillowy buns you crave.
Here's the thing—don't rush this step. Patience pays off with buns that are light as air. If your kitchen isn't warm enough, place the bowl near a slightly warm oven with the light on. You'll see the dough puff up dramatically, and that's when you'll know it's ready for the next step. Trust me, that extra time makes all the difference.
Shape and Proof for Perfect Buns
Punch down the risen dough to release air, then turn it out onto a lightly floured surface. Divide the dough into 12 equal pieces (about 2 ounces each). Roll each piece into a smooth ball, then place them on a baking sheet dusted with 0.5 cup cornmeal. Cover with a towel and let them proof for another 30-45 minutes until puffy and nearly doubled in size.
This second rise is crucial for that signature softness. The cornmeal prevents sticking and gives the buns a subtle texture. If your kitchen is chilly, extend the proofing time by 15-20 minutes. You'll know they're ready when they've expanded and look almost too tempting to wait. Resist the urge to bake them immediately—they need that final proof to reach their full potential.
Bake Until Golden and Perfectly Puffed
Preheat your oven to 375°F. Bake the buns for 12-15 minutes until they're golden brown on top and sound hollow when tapped on the bottom. The edges should be slightly crisp, but the centers should remain soft and pillowy. This balance is what makes these buns truly special.
If you're worried about burning, keep an eye on them after 10 minutes. The garlic powder and parsley flakes will give them a subtle, savory aroma that fills your kitchen—it's a sign they're baking perfectly. Let them cool on a wire rack for 5 minutes before serving. These buns are best enjoyed warm, straight from the oven, with your favorite pizza toppings piled high.
Pro Tips For Making Pizza Bun
- Warm the Milk First: Cold milk kills yeast faster than you’d think. Heat the whole milk to about 110°F (43°C)—warm to the touch but not steaming—before mixing it with yeast and sugar. I learned this the hard way after a batch failed to rise because I skipped it.
- Knead Until Silky: Pizza buns need that stretchy, smooth dough to hold up to toppings. Work the dough for at least 8–10 minutes by hand (or 5–6 minutes with a stand mixer) until it’s elastic and springs back when poked. Over-kneading? Stop when it looks like pulled-together cheese, not rubber.
- Skip the Crowding: Stuffing the bowl with dough slows fermentation and makes the buns dense. Use only 1/3 of the bowl’s capacity—leave room for the dough to puff. I used to jam it in tight, and the result was always chewy instead of light.
- Butter at Room Temp: Cold butter creates pockets of fat that won’t melt into the dough, leaving you with dry, crumbly buns. Let the unsalted butter sit out for 30–45 minutes before mixing it in. Sounds simple, but it makes a real difference in texture.
Dietary considerations for this pizza bun
Gluten-Free Adaptation
For a gluten-free version, replace the 5 cups all-purpose flour with a 1:1 gluten-free flour blend like King Arthur Measure for Measure. Add 1 tsp xanthan gum to help bind the dough.
The dough will be stickier, so wet your hands when shaping and reduce the milk to ¾ cup to avoid excess moisture. Proofing time may extend to 2-3 hours due to the different gluten structure. 🌱
Dairy-Free Options
Swap the ½ cup butter for ½ cup dairy-free butter like Miyoko’s or Earth Balance, and use 1 cup unsweetened almond milk instead of whole milk. The texture remains tender, though the flavor will be slightly less rich.
For extra richness, add 1 tbsp olive oil to the dough. These buns work perfectly for vegan pizza lovers!
Low-Carb Keto Version
Transform this into a keto-friendly bun by replacing flour with 2 cups almond flour and 1 cup shredded mozzarella cheese. Add 1 tbsp psyllium husk powder to help with structure. The dough will be firmer, so knead for 3-5 minutes by hand.
Proof for 1 hour and bake at 375°F for 10-12 minutes—these buns are crispier but still delicious with pizza toppings. 🥑
Nut-Free Allergy-Friendly
For nut-free buns, use a gluten-free oat flour blend like Bob’s Red Mill instead of almond flour. Add 1 tbsp ground flaxseed for binding and ¼ cup melted coconut oil for moisture.
The texture will be denser but still soft. Always check labels to ensure no cross-contamination with nuts if allergies are a concern.
Egg-Free Substitution
Replace the 1 large egg with 1 tbsp ground flaxseed mixed with 3 tbsp water—let it sit for 5 minutes to thicken. This works surprisingly well, though the buns may be slightly less tender.
For extra richness, add 1 tbsp olive oil to the dough. The flavor remains delicious, and the texture stays close to the original.
Nutrition facts
Frequently asked questions
Why does your recipe use warm milk instead of cold?
Warm milk activates the yeast faster and creates a more consistent rise. The 105°F temperature is perfect—it wakes up the yeast without killing it. Cold milk would slow fermentation, while hot milk would cook the yeast. This ensures your buns rise evenly and develop that signature pillowy texture.
Can I make these buns without a stand mixer?
Mix the dough by hand in a large bowl, then knead for 8-10 minutes until smooth and elastic. Use your knuckles or a dough scraper to work the gluten. The windowpane test (stretching dough thin enough to see light) still applies. Just be prepared for slightly more effort—your arms will thank you for the workout!
How do I prevent my buns from tearing when adding toppings?
Shape them slightly larger than needed (about 2.5 ounces each) and proof until they're just puffy—not overproofed. This gives extra structure. When assembling, press toppings gently into the center rather than piling them on top. A light spray of water before baking helps seal the edges for a cleaner finish.
What's the best way to reheat leftover pizza buns?
Wrap them in foil and warm at 350°F for 5-7 minutes to maintain softness. For extra crispiness, broil for 1-2 minutes at the end. Never microwave—it turns them rubbery. If they've gone stale, brush with melted butter and reheat for a fresh taste. Perfect for reviving pizza night leftovers!
Can I make these buns ahead of time?
Yes! Shape the buns and refrigerate them for up to 24 hours before baking. For longer storage, freeze raw buns on a tray, then transfer to a bag for up to 3 months. Thaw overnight in the fridge before baking. This saves time and ensures you always have fresh buns ready for impromptu pizza parties.