
Sauces & Condiments
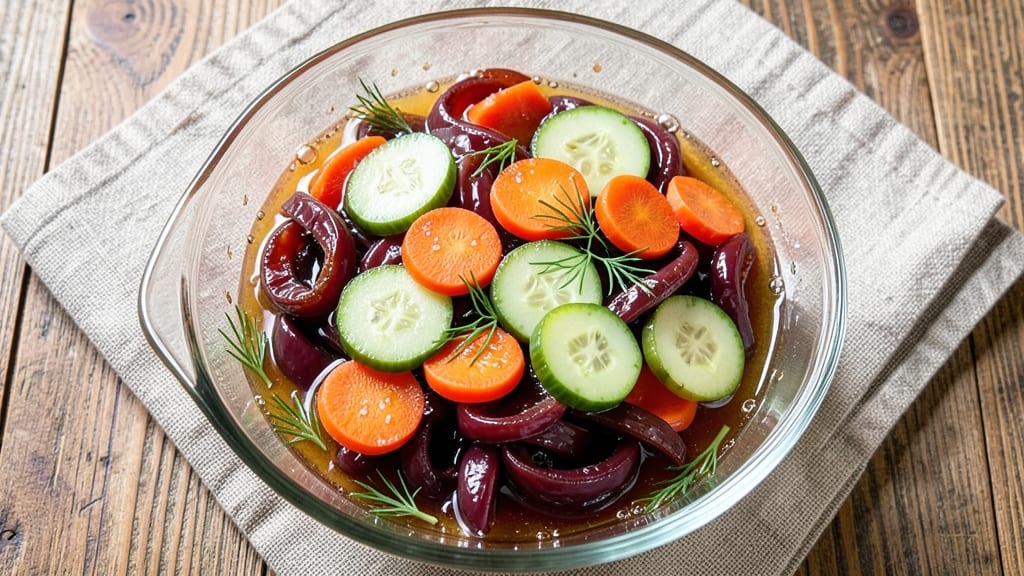
This sweet and sour pickle recipe transforms simple vegetables into a vibrant, tangy-sweet condiment that’s as satisfying as it is versatile.
Standing on a step stool in my grandmother’s Sicilian kitchen, I learned how vinegar and sugar could elevate humble ingredients—this recipe does the same with crisp cucumbers, carrots, and onions. The balance of sweet heat and bright acidity makes it perfect for snacking or pairing with grilled meats.
The process combines two methods: a quick-pickle brine for immediate results and a fermented option for deeper flavor development. You’ll need just 15 minutes of active prep, followed by either a 24-hour ferment (for tangy complexity) or a 4-hour quick-soak (for fast crunch).
The sauce—a simple blend of apple cider vinegar, sugar, and spices—infuses the vegetables with that signature sweet-sour punch.
What you’ll end up with is a batch of crisp-tender pickles with a glossy sheen and a bite that’s both refreshing and addictive. The sweetness of the sauce caramelizes slightly, while the vinegar keeps things bright and tangy.
These pickles shine as a snack, a side dish, or a topping for burgers and sandwiches—proof that homemade can outshine anything store-bought.
For those short on time, the quick-pickle method delivers in hours. Fermenting lovers can let flavors deepen over days, but either way, you’ll have a jar of restaurant-quality crunch that’s ready whenever you are. Let’s get started!
Ingredients for sweet and sour pickle
Crisp vegetables meet vinegar-bright sweetness—just 13 ingredients for restaurant-quality crunch.
| Ingredient | Amount | Notes |
|---|---|---|
| Cucumbers 🥒 | 2 lb | English or Persian, thinly sliced |
| Carrots 🥕 | 1 ½ lb | Baby or regular, thinly sliced |
| Yellow Onion 🧅 | 1 whole | Thinly sliced, white or yellow |
| Apple Cider Vinegar 🍏 | 2 cups | Raw, unfiltered preferred |
| Granulated Sugar 🍚 | 1 ½ cups | White or raw cane sugar |
| Water 💧 | 2 cups | Filtered or spring water |
| Fresh Ginger 🌿 | 2 tbsp | Finely grated, peeled |
| Garlic Cloves 🧄 | 4 cloves | Minced, peeled |
| Red Chili Flakes 🌶️ | 1 tsp | Adjust for heat preference |
| Salt 🧂 | 1 ½ tsp | Diamond Crystal preferred |
| Black Peppercorns 🌶️ | ½ tsp | Crushed, whole |
| Fresh Dill 🌿 | ¼ cup | Chopped, stems removed |
| Lemon Juice 🍋 | 1 tbsp | Freshly squeezed |
The vegetables are the foundation, so pick firm, fresh produce—no mealy carrots or soft cucumbers. Local farmers markets or the produce section at Whole Foods usually have the best quality. For the onions, I like yellow or white varieties because they hold their shape better than red. The cucumbers should be English or Persian types—they stay crunchier than regular slicing cucumbers. If you can’t find fresh ginger, substitute 1 tbsp of ground ginger, but fresh is always better. The garlic? Freshly minced makes all the difference—don’t use that pre-minced stuff in jars.
No apple cider vinegar? White vinegar or rice vinegar works in a pinch, but the flavor won’t be as complex. Running short on sugar? Honey or maple syrup at a 1:1 ratio adds depth, though it’ll be slightly thicker. The chili flakes can be swapped for cayenne pepper if you prefer a smoother heat. For the dill, dried dill at one-third the amount works, but fresh gives that bright, herby punch. If you’re fermenting, add 1 tbsp of sea salt per quart of water to the brine instead of the Diamond Crystal salt. The lemon juice is optional but adds a bright finish—skip it if you’re sensitive to acidity.
These pickles keep for 2 weeks in the fridge if quick-pickled, or up to 4 weeks if fermented. For quick-pickles, store in an airtight container with the liquid. For fermented versions, burp the jar daily for the first 3 days to release gases. I like to portion mine into small jars for snacks—glass mason jars are perfect and look great on the table. The flavors actually improve after the first day, so make extra if you can.
Why You'll Love This Recipe
- No-Chop Nightmare: I swear, the only knife work here is slicing cucumbers into thick half-moons—no dice, no julienne, just one easy cut. Carrots? Just chunk them. Onion? Roughly chop if you’re feeling fancy, or toss in whole if you’re lazy (I often do).
- Tangy-Sweet Magic: That apple cider vinegar and sugar combo? It’s like a flavor grenade in the best way—bright, crisp, and just sweet enough to make you forget pickles are “healthy.” The onions caramelize slightly in the vinegar, adding this deep, savory punch that’s weirdly addictive.
- Lunchbox Hero: Between us, this is my go-to for packed lunches. The crunch stays for days, and the sweet-sour balance means it never gets boring. Toss it with sandwiches, crackers, or even a simple yogurt dip—it’s the side dish that works everywhere.
- Pantry Goldmine: You’ve got cucumbers? Sugar? Vinegar? Boom, you’ve got a pickle. No fancy ingredients, no last-minute grocery runs. And the best part? It keeps for weeks in the fridge, so you’re always covered—whether you’re prepping for the week or just craving something tangy at 11 p.m.
Step-by-step instructions for sweet and sour pickles
Here's the method for vibrant, crunchy pickles with perfect sweet-spicy balance that'll elevate any meal.
Prepare and Sterilize the Vegetables
Start by cutting the 2 lb cucumbers and 1.5 lb carrots into ¼-inch thick slices using a sharp mandoline or knife. For the 1 whole yellow onion, separate into rings and slice thinly. This even thickness ensures consistent pickling and texture throughout.
Place all sliced vegetables in a large, non-reactive bowl. Add 2 tbsp finely grated fresh ginger and 4 minced garlic cloves, tossing gently to distribute evenly. The ginger and garlic will infuse their bold flavors into the vegetables as they pickle. Don't skip this step—it's what gives these pickles their signature depth.
Create the Sweet-Spicy Brine Solution
In a separate large bowl, combine the 2 cups apple cider vinegar, 1.5 cups granulated sugar, 2 cups water, 1 tsp red chili flakes, 1.5 tsp salt, and 0.5 tsp crushed black peppercorns. Stir until the sugar and salt dissolve completely, creating a syrupy liquid.
Add the 0.25 cup chopped fresh dill and 1 tbsp freshly squeezed lemon juice, mixing well. The lemon juice brightens the flavors while the dill adds that classic pickle aroma. This brine should have a rich amber color and a slightly gritty texture from the peppercorns—this is your flavor foundation.
Combine and Pack the Vegetables
Pour the prepared brine over the vegetable mixture in the bowl, ensuring every slice is well-coated. Transfer everything to a quart-sized mason jar, packing the vegetables tightly but not overly compressed. Leave about 1 inch of headspace at the top to prevent spillage during storage.
Use a wooden spoon to press down gently, removing any air pockets. The vegetables should float slightly in the brine, but they'll settle as they absorb the liquid. Seal the jar tightly with the lid, leaving it slightly ajar for 15 minutes to release any trapped gases before fully sealing.
Cure and Develop Flavor
Store the jar at room temperature for 24 hours, then refrigerate for at least 48 hours before consuming. This two-stage process allows the flavors to meld perfectly—the initial room-temperature phase helps the vegetables absorb the brine, while refrigeration preserves the crunch and intensifies the sweet-spicy balance.
After 72 hours, your pickles will be ready to enjoy. The cucumbers should remain crisp with a vibrant green hue, while the carrots and onions develop a satisfying crunch. The flavor profile will be bright and tangy with just the right amount of heat from the chili flakes, balanced by the sweetness of the sugar and acidity of the vinegar.
Pro Tips For Making Sweet And Sour Pickle
- Slice Evenly, Not Perfectly: Cut cucumbers and carrots into roughly ¼-inch thick slices—no need for precision, just consistency. I’ve wasted time chasing perfect uniformity, but jagged edges just soften faster and soak up the vinegar-sugar mix better.
- Simmer, Don’t Boil: Keep the heat at a gentle simmer—not a rolling boil—once the sugar dissolves. After burning the first batch, I learned this: too much heat turns the vinegar harsh and the sugar grainy. Let it bubble softly for 10 minutes, then turn off the heat and let it steep.
- Salt the Onions First: Toss sliced onions in ½ teaspoon salt and let them sit for 10 minutes before adding to the vinegar. My grandmother swore by this, and she was right: it mellows the bite and keeps them crisp longer. Skip this, and you’ll get a mouthful of sharpness.
- Use Warm Vinegar: Heat the apple cider vinegar to just warm (not hot) before mixing with sugar—it dissolves faster and prevents clumpy syrup. I used to eyeball it cold, and half the time I’d end up with a gritty mess. A quick 30-second zap in the microwave does the trick.
Pro cooking tips for this recipe
Vinegar Selection Matters
Apple cider vinegar gives these pickles that signature depth, but don’t stress if you only have white vinegar—it works just fine. The key is using raw, unfiltered vinegar (like Bragg Organic) for extra flavor complexity.
I’ve even used rice vinegar in a pinch, though it leans slightly sweeter. For fermented versions, white vinegar speeds up the process by preventing unwanted bacterial growth, while apple cider adds subtle fruitiness. 🍏
Sugar Caramelization Trick
To get that perfect sweet-spicy balance, dissolve the 1.5 cups sugar completely in the warm vinegar mixture—this prevents grainy texture. For extra depth, I like to gently heat the brine (without boiling) for 2-3 minutes to encourage slight caramelization.
This step intensifies the sweetness while keeping the heat from the chili flakes vibrant. The result? A glossy, syrupy coating on every slice. 🔥
Ferment vs. Quick-Pickle
For fermented pickles, add 1 tbsp sea salt per quart of water to the brine and let sit at room temperature for 24-48 hours before refrigerating. The flavors develop deeper tanginess over time.
For quick-pickles, skip fermentation entirely—just refrigerate immediately. I prefer fermenting for complexity, but quick-pickles are ready in 4 hours if you’re impatient. Both methods yield crisp results! ⏱️
Vegetable Prep Secrets
Use a sharp mandoline for even slices—this ensures consistent texture. For extra crunch, blanch cucumbers in boiling water for 30 seconds before pickling. The shock preserves their firmness.
Carrots and onions don’t need blanching—their natural sweetness shines through. Thinly sliced onions (about ⅛-inch) soften perfectly while keeping their structure. 🥕
Spice Balance Adjustments
Start with 1 tsp red chili flakes, but taste the brine before packing the jar. For milder heat, reduce to ½ tsp or swap for ½ tsp cayenne. If you love spice, add ½ tsp ground mustard—it enhances heat perception without overpowering.
The ½ tsp crushed black peppercorns add subtle earthiness, but omit them if you prefer smoother flavors. 🌶️
Storage and Crunch Preservation
Store quick-pickles in the fridge for up to 2 weeks—they’ll stay crisp if submerged in brine. For fermented pickles, refrigerate after 48 hours to halt fermentation and lock in crunch. I like to portion into small jars for snacks—they stay fresher longer.
If pickles soften, add 1 tsp vinegar to the jar and let sit for 1 hour before eating. The acidity often revives their texture! ❄️
Nutrition facts
Frequently asked questions
Can I use this sweet and sour pickle recipe with other vegetables?
While cucumbers, carrots, and onions work perfectly, you can also add radishes, bell peppers, or green beans for extra crunch. Just ensure they're cut to similar thickness so they pickle evenly. For best results, blanch harder veggies like green beans for 1 minute before pickling to maintain texture.
How do I know when my sweet and sour pickles are ready?
Quick-pickles are ready after 4 hours in the fridge, but flavors peak at 24 hours. Fermented versions develop deeper tanginess over 3-5 days at room temperature before refrigerating. The vegetables should remain crisp with a glossy sheen—if they feel soft, they've been pickling too long. Taste one slice: the sweet-spicy balance should be vibrant, not overpowering.
What's the difference between fermented and quick-pickled versions?
Fermented pickles develop complex, tangy flavors through natural bacterial action (like sauerkraut) and take 3-5 days. Quick-pickles use vinegar for immediate preservation and are ready in 4 hours. Fermented versions have deeper umami notes, while quick-pickles stay brighter and crunchier. For beginners, quick-pickling is foolproof—just no fermentation required!
Can I adjust the sweetness or heat level?
Yes! Reduce sugar by ½ cup for less sweetness or swap to honey/maple syrup for depth. For milder heat, cut chili flakes to ½ tsp or use ½ tsp cayenne. Love spice? Add ½ tsp ground mustard to enhance heat perception. Always taste the brine before packing—adjustments are easy at this stage!
Why did my pickles turn mushy?
Mushy pickles usually mean over-softening from too-long pickling or improper storage. Ensure vegetables are fully submerged in brine (add more vinegar if needed) and refrigerate after 48 hours for fermented versions. For quick-pickles, never exceed 2 weeks in the fridge. If they soften, revive them by adding 1 tsp vinegar and letting sit for 1 hour.