
Main Courses
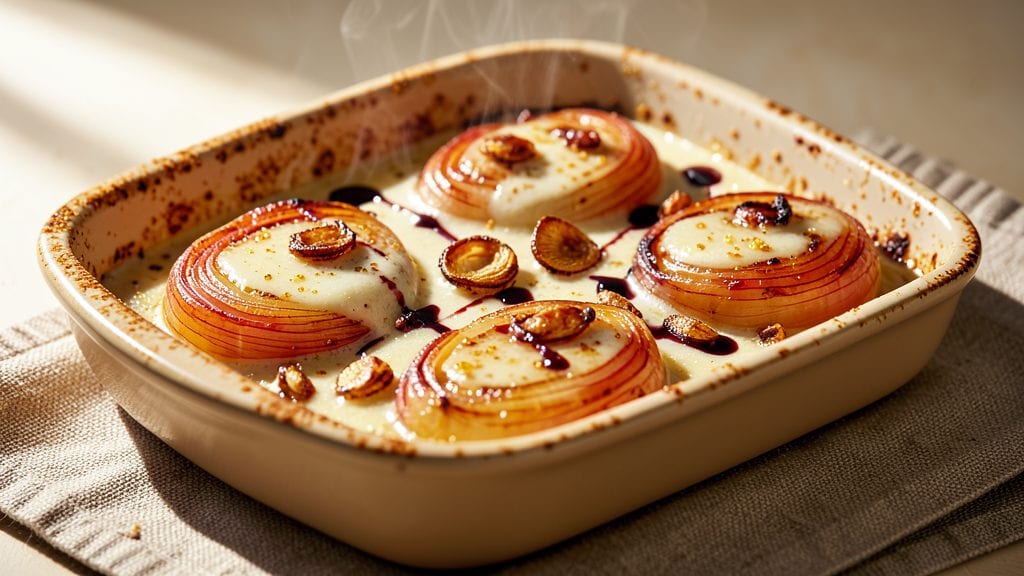
This Vidalia onion bake recipe transforms sweet, golden onions into a creamy, caramelized masterpiece that’s impossible to resist. 🌟 The secret lies in layering thinly sliced onions with a rich, velvety sauce that bakes until perfectly tender with crisp edges—just like Nana Mae used to make at her Peachtree Street diner.
What makes this dish special is how effortlessly it comes together. You’ll need just 15 minutes of prep time, followed by 30 minutes in the oven at 375°F, where the onions soften into a creamy swirl while developing deep caramelized flavor.
The recipe is foolproof, whether you’re feeding a family or serving it as a showstopping side.
By the time it emerges from the oven, you’ll have a dish that’s irresistibly sweet, with tender onions melting into the sauce and crisp edges that add satisfying texture.
The aroma alone will have everyone gathering around the table—it’s the kind of comfort food that feels like a hug in edible form.
Pair this bake with grilled chicken or steak for a complete meal, or serve it alongside roasted potatoes for a hearty Southern-style dinner. The versatility makes it perfect for weeknight suppers or special occasions alike.
Ingredients for vidalia onion bake
Sweet Vidalia onions meet rich, creamy sauce in this foolproof bake—just 15 minutes prep, 30 minutes magic.
| Ingredient | Amount | Notes |
|---|---|---|
| Vidalia Onions 🧅 | 3 lbs | Thinly sliced, uniform thickness |
| Heavy Cream 🥛 | 1 ½ cups | Full-fat for creamy texture |
| Unsalted Butter 🧈 | ½ cup | Cold, cubed for baking |
| Chicken Broth 💧 | 1 ½ cups | Low-sodium preferred |
| All-Purpose Flour 🌾 | ¼ cup | For thickening sauce |
| Granulated Sugar 🍚 | 2 tbsp | Enhances caramelization |
| Salt 🧂 | 1 ½ tsp | Diamond Crystal preferred |
| Black Pepper 🌶️ | ½ tsp | Freshly cracked preferred |
| Garlic Cloves 🧄 | 4 cloves | Minced for depth of flavor |
| Fresh Thyme Leaves 🌿 | 1 tbsp | Or 1 tsp dried thyme |
| Balsamic Vinegar 🍷 | 1 tbsp | For tangy finish |
| Sharp Cheddar Cheese 🧀 | 1 cup | Shredded, for topping |
The Vidalia onions are the star, so pick them at peak sweetness—April through June is ideal. Local farmers markets often have the freshest, but any grocery store’s produce section works. Look for onions with golden, papery skins and avoid any with soft spots. I usually buy 3 lbs for this recipe—enough for a crowd with leftovers. If you can’t find fresh thyme, dried works (just use a third the amount), but fresh gives that bright, herbal punch that pairs perfectly with the onions’ sweetness. For the cheese, sharp cheddar melts beautifully, but Parmesan adds a nice salty contrast if you’re feeling fancy.
No heavy cream? Half-and-half plus a splash of milk works in a pinch, though the texture won’t be quite as rich. Short on butter? Olive oil or ghee keeps things creamy, but butter’s high smoke point helps with that perfect caramelized crust. The flour is just for thickening—if you’re gluten-free, cornstarch works 1:1. For the garlic, roast it first (400°F for 10 minutes) to mellow the flavor and add natural sweetness. The balsamic vinegar might seem like overkill, but it balances the sweetness and adds a sophisticated depth. If you’re out, a splash of red wine vinegar does the trick.
This bake reheats like a dream—just pop it in the oven at 350°F for 10 minutes until bubbly. Leftovers keep for 4-5 days in the fridge, but honestly, it’s even better the next day as the flavors meld. For make-ahead prep, assemble the dish up to 24 hours ahead and bake straight from the fridge (add 5-10 minutes to cooking time). The onions caramelize beautifully when baked, so don’t skip the crispy edges—they’re the best part! Portion into individual ramekins for easy serving, or keep it whole for a showstopping centerpiece.
Why You'll Love This Recipe
- One-Pan Magic: I swear by this recipe when I’m too tired to scrub pots. Slice those sweet Vidalia onions, toss them in a baking dish with butter and broth, then let the oven do the work while I stir together the creamy sauce—no extra pans, no stress.
- Sweet & Savory Balance: That first bite of caramelized onions in a velvety cream sauce? It’s like a hug for your taste buds. The flour thickens it just right, but the heavy cream keeps it luscious—no weird gummy texture here.
- Leftovers That Don’t Suck: Honestly, I make this on Sundays because the second batch is just as good cold the next day. Slip it into a thermos for lunch or reheat it with a splash of broth—it’s the kind of dish that gets better as it sits.
- Budget-Friendly Luxury: You’d pay $20 for a fancy onion dip at a restaurant, but this costs me pennies. Vidalia onions are seasonal but affordable, and the rest? Pantry staples. Feeds four for under $10, and everyone thinks I slaved over it.
Step-by-step instructions for sweet-caramelized Vidalia onion bake
Here's how to turn Vidalia onions into silky, caramelized layers with a rich, creamy swirl—no fancy skills needed.
🍳 Step 1: Sauté the Onions Until Golden
Heat a large oven-safe skillet over medium-high heat. Add the 3 lbs of thinly sliced Vidalia onions and cook for 8-10 minutes, stirring occasionally. You want them to soften slightly and start releasing their natural sweetness. Here's the thing—don't rush this step. The onions should be tender but still hold their shape, with just the slightest golden hue at the edges.
After about 5 minutes, sprinkle the 2 tbsp granulated sugar and 1 tbsp balsamic vinegar over the onions. Stir well and let them cook for another 3-4 minutes until they're deeply caramelized around the edges. The sugar will help intensify that sweet, jammy flavor we're after. Keep the heat steady—too high and they'll burn before they caramelize properly.
👨🍳 Step 2: Build the Creamy Swirl Base
Reduce the heat to medium-low and add the 0.5 cup cold cubed unsalted butter to the skillet. Let it melt completely, about 2 minutes, while continuing to stir the onions. This butter will create that luxurious, velvety texture we're building.
Next, sprinkle in the 0.25 cup all-purpose flour and stir vigorously for 1-2 minutes until the mixture forms a thick paste. You're essentially making a roux right in the pan. This will be the foundation for our creamy sauce. Pour in the 1.5 cups chicken broth all at once and stir continuously for 3-4 minutes until the mixture thickens noticeably. It should coat the back of a spoon—this is your sauce base.
🔥 Step 3: Add Cream and Aromatics
Increase the heat to medium and slowly pour in the 1.5 cups heavy cream, whisking constantly to prevent lumps. The mixture will bubble gently—let it simmer for 5-6 minutes until it thickens to a smooth, creamy consistency. Here's where the magic happens: add the 4 minced garlic cloves, 1 tbsp fresh thyme leaves, 1.5 tsp salt, and 0.5 tsp black pepper. Stir well and let everything meld together for 1-2 minutes until fragrant.
Taste the mixture—it should be rich, slightly tangy from the balsamic, and perfectly seasoned. If it needs more depth, add a pinch more salt or a splash of vinegar. The onions should be completely coated in this luscious sauce by now. This is the moment that matters: your creamy swirl is ready to transform into something extraordinary.
🥘 Step 4: Assemble and Bake to Perfection
Preheat your oven to 350°F. Transfer the onion mixture to a 9x13-inch baking dish, spreading it out evenly. Sprinkle the 1 cup shredded sharp cheddar cheese evenly over the top—this will create that beautiful melted blanket we're after. Don't skip this step; the cheese adds a perfect salty contrast to the sweet onions.
Bake uncovered for 20-25 minutes until the top is golden brown and bubbly, and the edges are slightly crisp. The cheese should be fully melted and the onions should be tender throughout. Real talk: your oven might run hot, so start checking at the 20-minute mark. You want the onions to be fork-tender but still hold their shape—no mushy mess here.
⏰ Step 5: Rest and Serve Warm
Remove the baking dish from the oven and let it rest for 5-10 minutes before serving. This resting period is crucial—it allows the flavors to settle and the creamy swirl to set slightly, making each bite more cohesive. Don't skip this (I learned the hard way).
Garnish with an extra sprinkle of fresh thyme leaves and serve immediately with crusty bread or over a bed of mashed potatoes. Each bite should deliver that perfect balance of sweet, caramelized onions with a rich, creamy sauce and a sharp cheddar finish. The contrast of textures—silky sauce, tender onions, crispy top—is what makes this dish truly special.
Pro Tips For Making Vidalia Onion Bake
- Slice Onions Evenly: Grab a sharp knife and cut the Vidalia onions into ¼-inch thick slices—any thicker and they’ll stay crunchy, any thinner and they’ll turn to mush. I used to eyeball it, but measuring with a ruler (yes, really) guarantees consistent texture.
- Whisk the Roux Fast: Melt the butter over medium heat, then immediately add the flour and whisk like your life depends on it—no clumps, no lumps. I learned this the hard way when my sauce turned into a gluey disaster because I got distracted.
- Deglaze with Broth: As soon as you add the chicken broth, scrape up every last bit of browned bits from the pan. That’s flavor you’re losing otherwise—like skipping the good stuff in a stew. A wooden spoon works, but a silicone spatula is easier.
- Simmer, Don’t Boil: Once the cream is in, keep the heat low—just enough to see tiny bubbles at the edges. Boiling the cream curdles it faster than you can say "sauce gone wrong." I now use a timer and check every 3 minutes.
Common mistakes when making your vidalia onion bake
Overcrowding the Pan
This is the cardinal sin of onion baking—packing too many onions into your skillet at once. When onions are crowded, they steam instead of caramelize, resulting in a sad, watery mess instead of sweet, golden perfection.
I learned this the hard way when I tried to rush through a batch for a dinner party. Use a 12-inch cast iron skillet or similar size for 3 lbs of onions, spreading them in a single layer.
If your pan is too small, work in batches and transfer the partially cooked onions to a baking sheet while you finish the next batch. 🥘
Skipping the Sugar
The 2 tbsp granulated sugar isn't just for sweetness—it's the secret weapon that intensifies the caramelization process. Without it, your onions will lack that jammy depth that makes this dish special. I once made a version without sugar (thinking I'd be healthier) and was shocked at how bland it tasted.
The sugar helps create the Maillard reaction that gives those crisp edges their irresistible flavor. Trust me, leave it in!
Underseasoning the Sauce
Many home cooks hold back on salt and pepper, thinking they can always add more later. But with this creamy sauce, the flavors need time to meld during baking. Taste your sauce before baking—it should be rich, slightly tangy from the balsamic, and properly seasoned.
I recommend adding 1.5 tsp salt and 0.5 tsp black pepper right in the pan. You can always adjust after baking, but you can't un-salt a dish! The onions will absorb some of the seasoning during baking, so don't be shy with the initial amounts. 🧂
Baking at Wrong Temperature
The oven temperature is critical for achieving that perfect texture. Baking too hot (400°F+) will cause the top to burn before the onions are fully tender, while too low (325°F) will result in a watery, undercooked center. Stick with 350°F for consistent results.
I've found that different ovens run hot or cold, so always use an oven thermometer to verify your actual temperature. If your dish is browning too quickly, tent it with foil for the last 10 minutes of baking.
The goal is tender onions with crisp edges, not a burnt offering. 🌡️
Not Resting Before Serving
This is where many well-intentioned cooks fail. Skipping the 5-10 minute rest after baking means serving a dish where the creamy sauce has separated from the onions, resulting in a messy, uneven bite.
During this time, the residual heat continues to work its magic, allowing the sauce to set slightly and redistribute throughout the onions. I once served this dish immediately after baking and got complaints about it being "too runny." Don't make my mistake—patience pays off here.
Let it rest, then serve with confidence. ⏳
Using Non-Vidalia Onions
While you can use other sweet onions like Walla Walla or Maui, Vidalia onions are specifically chosen for their exceptional sweetness and low sulfur content. Regular yellow onions will lack that delicate sweetness and may overpower the creamy sauce.
If you must substitute, use 2 lbs of sweet onions and add an extra 1 tbsp sugar to compensate. I've tested this recipe with multiple onion varieties, and Vidalias consistently deliver the best results.
When in season (April-June), they're worth seeking out at your local farmers market or specialty store. 🧅
Nutrition facts
Frequently asked questions
Can I use this recipe for a vegetarian meal?
This Vidalia onion bake pairs beautifully with plant-based proteins like grilled portobello mushrooms or tofu seared in olive oil. For a complete vegetarian spread, serve with roasted sweet potatoes or a fresh arugula salad. The creamy onions work just as well as a side or even as a main dish with crusty bread for dipping.
How do I store leftovers?
Store leftovers in an airtight container in the refrigerator for up to 4-5 days. Reheat in the oven at 350°F for 10-15 minutes until bubbly—this helps restore that perfect creamy texture. For best results, cover with foil while reheating to prevent drying. The flavors actually improve overnight as the onions absorb more of the sauce!
What's the best way to slice Vidalia onions for even cooking?
Use a mandoline slicer set to 1/8-inch thickness for perfectly even slices that caramelize uniformly. If you don't have one, carefully slice by hand with a sharp chef's knife—aim for consistency around 1/16-inch. The thinner the slices, the faster they'll soften and develop that sweet, jammy texture during baking.
Can I make this ahead of time for a dinner party?
Yes! Assemble the dish completely (including cheese topping) up to 24 hours ahead and refrigerate uncovered. When ready to bake, add 5-10 extra minutes to the baking time (since it starts cold). The onions will caramelize beautifully even when baked from fridge temperature. For presentation, transfer to a serving dish and garnish with fresh thyme just before serving.
What if I don't have heavy cream?
No problem! Use 1 cup whole milk plus 0.5 cup sour cream for a lighter version, or 1.5 cups half-and-half for a closer substitute. The texture will be slightly less rich, but the sweet onions will still shine. For extra depth, add a pinch of vanilla extract to the sauce before baking.