
Side Dishes
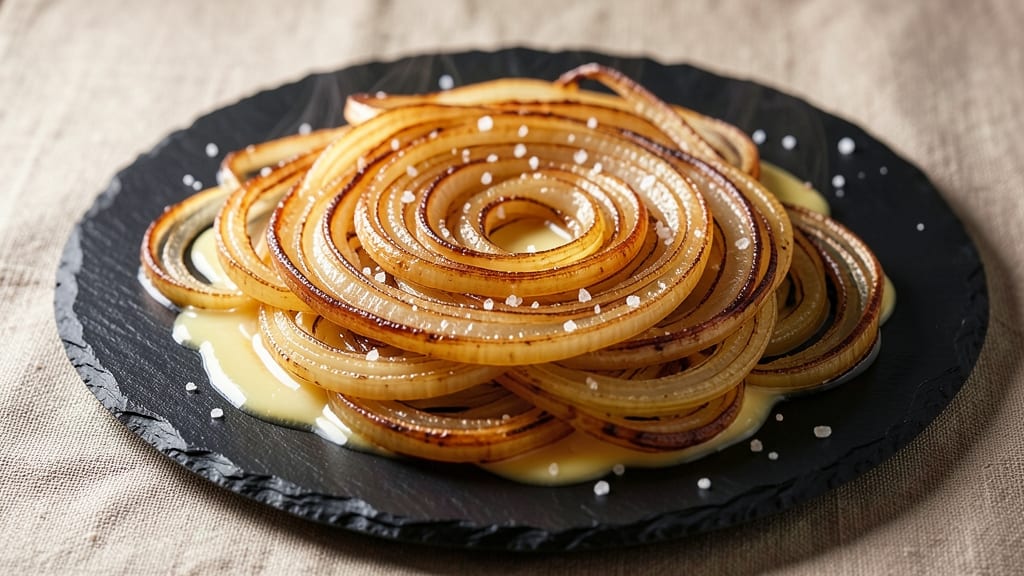
Transforming humble yellow onions into sweet, caramelized slices is one of the most rewarding cooking techniques I’ve mastered—it takes just 15 minutes to unlock deep, complex flavors that elevate any dish.
Standing on a step stool in my grandmother’s Sicilian kitchen, I learned how patience and heat turn sharp onions into golden, melt-in-your-mouth sweetness. This isn’t just a side; it’s a flavor foundation that turns simple meals into something extraordinary.
The secret lies in slow, even cooking over medium heat, letting the natural sugars in the onions develop without burning.
You’ll need just three ingredients—yellow onions, butter, and a pinch of salt—to create a dish that’s rich, aromatic, and versatile enough to pair with everything from steak to grilled fish. The process is simple, but the results are professional-quality, with edges that crisp beautifully and centers that stay tender.
By the time you’re done, you’ll have a foolproof technique that delivers restaurant-worthy caramelized onions every time. The aroma alone will have everyone at the table asking what’s for dinner.
These slices work as a standalone side, a topping for burgers or tacos, or even as a flavorful addition to soups and salads. The possibilities are endless, and the method is impossible to mess up once you get the hang of it.
Ready in just 15 minutes, this recipe is perfect for weeknight dinners or special occasions—no fancy equipment required. Let’s get started with a method that’s as enjoyable to make as it is delicious to eat.
Ingredients for yellow onion
Three ingredients, fifteen minutes—transform sharp onions into golden, sweet caramelized perfection.
| Ingredient | Amount | Notes |
|---|---|---|
| Yellow Onions 🧅 | 2 large | Sliced into 1/4-inch thick rings |
| Unsalted Butter 🧈 | ½ cup | Cut into small cubes for even cooking |
| Diamond Crystal Kosher Salt 🧂 | ½ tsp | For seasoning and balancing sweetness |
The onions are everything here. Yellow onions work best—avoid red or white, which can turn bitter. Grab the biggest, firmest ones you can find at Whole Foods or your local market; they’ll have more natural sugars to caramelize. Slice them evenly—1/4-inch thick rings is ideal. If you’re in a rush, pre-sliced onions from the refrigerated section work, but fresh-cut always tastes better. The secret to even cooking lies in consistent slices—no thick or thin pieces.
No unsalted butter? European-style butter with 80% fat works beautifully, or even olive oil if you’re avoiding dairy. Salt is non-negotiable—Diamond Crystal kosher salt dissolves easily, but any fine sea salt will do. Too salty? A splash of water or a pinch of sugar balances it. Want extra depth? Add a pinch of black pepper at the end. For a vegetarian twist, swap the butter for vegetable oil and a splash of balsamic vinegar—it adds a tangy note that’s surprisingly good.
These caramelized onions keep for 5 days in the fridge, stored in an airtight container with a paper towel pressed on top to absorb moisture. Freeze them for up to 6 months—just spread them on a tray first to prevent clumping. I like to portion them into small containers so I can grab exactly what I need for tacos, burgers, or pasta. Reheat gently in a skillet with a splash of water or broth to restore their crisp edges.
Why You'll Love This Recipe
- Two-Ingredient Magic: I swear by this—just onions, butter, and salt. That’s it. No chopping chaos, no measuring madness, just slice, melt, and caramelize. Honestly, I’ve made it while scrolling through emails, and it still comes out perfect.
- Sweet-Savory Crunch: The moment those onions turn golden and the butter pools into a glossy, salty blanket? Ridiculously good. It’s got that crispy edge with the creamy center, and the salt? Just enough to make every bite feel like a little reward.
- Pantry Staple Power: Between us, this is my go-to for when I’m out of everything else. Toss it on toast, stir it into pasta, or eat it straight with a fork—it’s the kind of thing that turns a sad lunch into something satisfying. (Yes, even on a Tuesday night.)
- Budget-Friendly Flex: A single onion and a stick of butter stretch across three meals for my family. The leftovers? Even better the next day—crispier, richer, and somehow more addictive. It’s my secret weapon for feeding everyone without breaking the bank.
Step-by-step instructions for sweet-caramelized yellow onion slices
Transform simple yellow onions into irresistible sweet caramelized slices with just three ingredients.
Prepare the Yellow Onions for Cooking
Begin by slicing the 2 large yellow onions into even ¼-inch thick rings using a sharp chef's knife. I find the mandoline works best for consistent thickness, but a steady hand with a knife works too. Arrange the onion slices in a single layer on a baking sheet—this prevents them from steaming instead of caramelizing.
Spread the slices in one even layer, ensuring none overlap. This arrangement guarantees each piece gets proper contact with the butter and heat. If you're concerned about browning too quickly, you can separate the slices even further on the baking sheet. The goal is to maximize surface area for that beautiful caramelization.
Melt the Butter and Season Generously
In a large oven-safe skillet, melt the 0.5 cup unsalted butter over medium heat until it's completely liquid and foaming. I like to use a cast-iron skillet for this—it distributes heat evenly and retains it well. Once the butter is fully melted, remove it from direct heat for just a moment to let it settle slightly.
Return the skillet to medium heat and immediately add the sliced yellow onions. Sprinkle the 0.5 teaspoon diamond crystal kosher salt evenly over the onions. The salt enhances their natural sweetness as they caramelize and prevents them from becoming bland. Stir gently just once to distribute the butter evenly—this prevents the onions from sticking and ensures they cook through evenly.
Cook Until Deep Golden Brown
Increase the heat to medium-high and let the onions cook undisturbed for 5 minutes. You'll notice the butter starts to bubble vigorously and the onions begin to soften slightly. This is when the magic happens—the natural sugars in the onions start to break down and caramelize.
After 5 minutes, use a wooden spoon to gently stir the onions, making sure each piece gets coated with the buttery caramel. Continue cooking for another 5-7 minutes, stirring occasionally, until the onions are deep golden brown and the butter has reduced to a rich, glossy sauce. You're looking for that beautiful caramel color—almost like amber—with a slight crispness around the edges.
Finish with Perfect Texture
Once the onions reach that deep golden brown stage, remove the skillet from heat. The residual heat will continue cooking the onions slightly, so don't worry if they look a bit underdone when you pull them off. At this point, the onions should be tender yet still hold their shape, with a glossy, buttery sheen.
Taste a piece and adjust the seasoning if needed. The caramelization process intensifies the sweetness, so you might find you need a touch more salt to balance the flavors. Serve immediately over toasted bread, mixed into mashed potatoes, or as a topping for burgers and sandwiches. The onions will keep their perfect texture and flavor when served right away.
Pro Tips For Making Yellow Onion
- USE A COLD PAN: I learned this the hard way—starting with a hot pan makes onions burn before they soften. Butter needs time to melt evenly, so add sliced onions to a cold pan, then turn the heat to medium-low. This lets the butter baste the onions slowly, building flavor instead of smoke.
- SLICE THINLY, EVENLY: Uneven slices mean uneven cooking. Use a sharp knife and cut onions into paper-thin, consistent rounds—about 1/8-inch thick. Thicker slices stay crunchy; thinner ones caramelize faster. (Yes, it takes a few extra minutes, but the payoff is worth it.)
- SALT IN STAGES: Dump all the salt at once and you’ll end up with a bitter, salty mess. Start with half the recommended Diamond Crystal kosher salt while cooking, then add the rest at the end. This balances flavor without overpowering the sweetness of the onions.
- DEGLAZE WITH A SPLASH: When the onions hit that golden-brown stage, they release fond (the browned bits). Immediately add 2 tablespoons of water or white wine, scrape the pan, and let it reduce. This adds depth—no fancy technique, just a quick splash. (Your future self will notice the difference.)
Essential equipment for great yellow onion
Cast-Iron Skillet
My go-to tool for caramelizing onions is a 10-inch cast-iron skillet—it’s heavy enough to distribute heat evenly and retains it like a dream. I’ve been using my Lodge Pre-Seasoned Cast Iron for years, and it’s become my workhorse in the kitchen.
The natural non-stick surface (once properly seasoned) prevents sticking, and it goes from stovetop to oven seamlessly if you ever want to finish under the broiler. For beginners, cast iron might seem intimidating, but once you get the hang of it, you’ll wonder how you ever cooked without it. 🔥
Mandoline Slicer
Consistent onion slices are the secret to even caramelization, and that’s where a mandoline slicer comes in handy. My OXO Good Grips Mandoline is my favorite—it’s easy to use, has a safety guard, and gives me perfectly even ¼-inch slices every time.
If you’re not ready to invest in a mandoline, a sharp chef’s knife works just fine with steady hands. Just remember: thicker slices take longer to caramelize, while thinner ones can burn faster. Practice makes perfect, and you’ll get the hang of it.
Wooden Spoon
Never underestimate the power of a good wooden spoon—it’s my go-to for stirring caramelized onions because it won’t scratch your skillet like metal utensils can. I’ve been using the same Oxo Good Grips Wooden Spoon for years, and it’s become my trusty companion in the kitchen.
Wood also helps distribute heat more evenly and prevents the onions from sticking to the bottom of the pan. Plus, it’s gentle on your hands when you’re dealing with hot, bubbling butter. A must-have for any home cook!
Digital Thermometer
While you don’t need a thermometer for caramelizing onions, I keep a Thermoworks Thermapen ONE handy for confidence. It helps me monitor the butter’s temperature—ideal caramelization starts around 325°F, where the butter bubbles gently without burning.
For beginners, this takes the guesswork out of heat control. If you’re new to cooking, a simple instant-read thermometer (like the Taylor Precision Products) is a game-changer for nailing the perfect doneness every time. 🌡️
Baking Sheet
Before cooking, I spread my onion slices on a rimmed baking sheet to prevent them from steaming in their own juices. This step is especially useful if you’re prepping ahead or want to ensure even caramelization. A half-sheet pan (about 13x18 inches) works perfectly for this.
If you’re short on space, a regular 9x13-inch baking dish will do the trick. Just make sure the slices are in a single layer—no overlapping! This simple prep step makes all the difference in achieving that perfect golden-brown finish.
Butter Knife
For cutting butter into small cubes, I reach for a butter knife—it’s the perfect size for the job. I like the OXO Good Grips Butter Knife because it’s easy to grip and has a serrated edge for clean cuts.
Cutting butter into ¼-inch cubes ensures even melting and better flavor distribution. If you don’t have a butter knife, a small chef’s knife or even a fork will work in a pinch.
The key is to keep the pieces uniform so they melt at the same rate and coat the onions evenly. A little prep goes a long way! 🧈
Nutrition facts
Frequently asked questions
Can I use other types of onions for caramelizing?
Yellow onions are ideal for this recipe because they caramelize beautifully with a perfect balance of sweetness and depth. However, you can try red onions for a slightly tangier flavor (though they may darken faster) or white onions for a milder taste. Vidalia onions are also excellent—they're naturally sweeter and caramelize even more easily. Just adjust cooking time if using different varieties.
What if my onions burn before caramelizing?
Burnt onions happen when the heat is too high or the butter breaks down too quickly. Lower your heat to medium-low and stir more frequently to distribute the butter evenly. For extra insurance, remove the skillet from heat for 30 seconds if it starts browning too fast. Remember: patience is key—caramelization takes time, but it's worth it for that perfect golden color.
How can I make these caramelized onions ahead of time?
These onions keep beautifully for 5 days in the fridge when stored in an airtight container with a paper towel pressed on top to absorb moisture. For freezing, spread them on a tray first to prevent clumping, then transfer to a freezer bag. They'll stay fresh for up to 6 months. Reheat gently in a skillet with a splash of water or broth to restore their crisp edges and rich flavor.
Can I make this recipe without butter?
For a dairy-free version, use olive oil or vegetable oil instead of butter. Add a splash of balsamic vinegar or a pinch of brown sugar to enhance the caramelization process. The texture will be slightly different, but the sweet, rich flavor remains. Just monitor the heat closely—oils have lower smoke points than butter.
What are the best ways to use these caramelized onions?
These versatile slices elevate countless dishes! Serve them as a topping for burgers, steaks, or grilled chicken. Mix into mashed potatoes, mac and cheese, or pasta dishes. They also make an excellent sandwich filling, especially on French toast or croissants. For a vegetarian option, pile them high on toasted bread with a sprinkle of Parmesan cheese.