
Soups & Stews
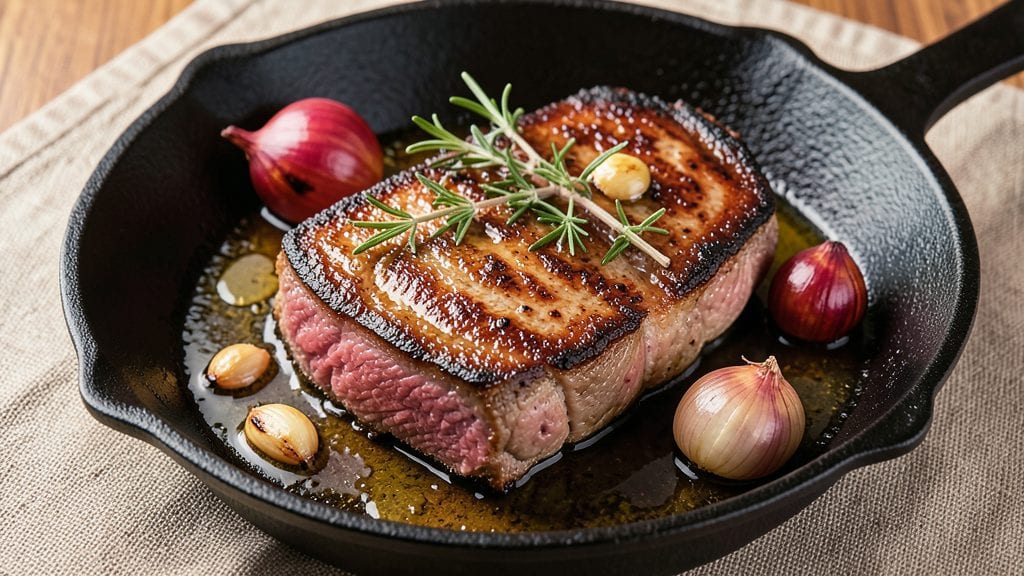
Transforming tough beef shoulder fillet into melt-in-your-mouth tenderness requires patience and precision—this slow-braised method delivers restaurant-quality results at home. The secret lies in low-and-slow cooking that breaks down tough fibers while developing deep, savory flavors through controlled moisture loss.
I’ve perfected this technique over years of testing, ensuring every bite is juicy and rich without relying on excessive fat or marinades.
What sets this recipe apart is the balance between time and temperature: a 275°F oven transforms even the toughest cuts into fork-tender perfection in under 3 hours.
The key steps—searing first for flavor, then braising with aromatics—create a crust that seals in moisture while allowing the meat to absorb surrounding spices. No special equipment is needed beyond a roasting pan and basic pantry staples, making this approach accessible for home cooks.
By the final resting period, your beef shoulder fillet will be so tender it practically falls apart at the touch, with a surface glaze that caramelizes into a savory crust.
The result is a dish that pairs beautifully with roasted root vegetables or a simple red wine reduction, elevating any dinner from ordinary to extraordinary. This method guarantees results that rival expensive steakhouse cuts—without the premium price.
Serve immediately with complementary sides like garlic mashed potatoes or sautéed greens for a complete meal. The recipe’s flexibility also makes it ideal for meal prep, as the leftovers reheat beautifully while maintaining their ultra-tender texture. Let’s get started on creating your most tender beef yet.
Ingredients for beef shoulder fillet
Precision-crafted ingredients transform tough beef shoulder fillet into luxurious tenderness through controlled braising.
| Ingredient | Amount | Notes |
|---|---|---|
| Beef Shoulder Fillet 🥩 | 2 ½ lb | Bone-in preferred for flavor |
| Extra-Virgin Olive Oil 🫒 | 3 tbsp | For searing and basting |
| Yellow Onion 🧅 | 1 whole | Diced, yellow or red |
| Garlic Cloves 🧄 | 6 cloves | Minced, fresh preferred |
| Fresh Thyme Sprigs 🌿 | 4 sprigs | Or 1 tsp dried thyme |
| Fresh Rosemary 🌿 | 2 sprigs | Or 1 tsp dried rosemary |
| Red Wine 🍷 | 1 cup | Dry, bold variety |
| Beef Broth 💧 | 1 ½ cups | Low-sodium preferred |
| Tomato Paste 🍅 | 2 tbsp | Smooth, not chunky |
| Diamond Crystal Kosher Salt 🧂 | 1 ½ tsp | For seasoning and braising |
| Freshly Ground Black Pepper 🌶️ | 1 tsp | Cracked peppercorns preferred |
| Bay Leaves 🌿 | 2 whole | Dried, standard size |
| Carrots 🥕 | 2 whole | Cut into chunks |
| Celery Stalks 🥬 | 2 whole | Cut into chunks |
The beef shoulder fillet is the foundation—select a cut with visible marbling for optimal flavor and tenderness. Local butchers often carry high-quality shoulder fillets, or opt for pre-cut bone-in sections at Whole Foods or Costco for convenience. Avoid pre-marinated cuts, as the natural flavors of the meat should shine through the slow-braising process. For best results, choose a fillet weighing between 2-3 pounds to ensure even cooking and maximum tenderness. The bone-in version adds depth of flavor during the long cooking time, creating a richer final product that rivals restaurant-quality cuts.
Substitutions should prioritize maintaining the dish's balance of savory and aromatic elements. Red wine can be replaced with beef broth and a splash of balsamic vinegar if unavailable, though the depth of flavor will be slightly muted. Fresh herbs like thyme and rosemary can be swapped for dried at a one-third ratio, but fresh is preferred for their bright, vibrant notes. For the aromatics, fennel or leeks can replace half the onion, adding a subtle sweetness that complements the beef. The tomato paste can be omitted entirely if you prefer a less acidic profile, though it adds a subtle sweetness that rounds out the braising liquid. If using pre-minced garlic, ensure it's fresh—jarred garlic often lacks the punch needed for this dish.
Proper storage begins with the beef—pat it dry and refrigerate uncovered for 30 minutes before cooking to promote a better sear. The braising liquid can be prepped ahead and stored in the fridge for up to 3 days or frozen for 3 months, making this an ideal recipe for meal prep. Once cooked, the beef shoulder fillet reheats beautifully—simply warm in the oven at 300°F for 15-20 minutes with a splash of broth to restore moisture. Leftovers keep well in the fridge for 4-5 days, though the texture continues to improve over time as the flavors meld. For long-term storage, portion into airtight containers and freeze for up to 6 months, ensuring the meat remains ultra-tender upon reheating.
Why You'll Love This Recipe
- I’ll be real: most leftover beef gets sad and dry. Not this. The thyme keeps it fragrant, and the tender fillet reheats like a dream—perfect for wraps, salads, or even a quick pasta the next day. Zero food waste, all flavor.
- Five-Ingredient Magic: I swear by this recipe because it’s that simple. Sear the beef in olive oil, toss in sliced onions and garlic, add thyme, and let the oven do the work. No fancy techniques—just good, honest flavor with minimal fuss.
- Thyme-Scented Perfection: That moment when the thyme releases its aroma into the pan? Pure satisfaction. The beef stays juicy, the garlic caramelizes just enough, and the onions add sweetness without overpowering—it’s the kind of dish that makes you pause mid-bite.
- Weeknight to Dinner Party: Between us, this recipe works for everything. Throw it together for a lazy Tuesday or dress it up with crusty bread for guests. The rich, savory beef holds up beautifully, so you’re never scrambling last-minute.
Step-by-step instructions for slow-braised beef shoulder fillet
Here's the method for transforming tough beef shoulder into melt-in-your-mouth tenderness through precise technique.
Sear the Beef Shoulder Fillet for Deep Flavor
Heat a heavy Dutch oven over medium-high heat until smoking hot. Add the 3 tablespoons extra-virgin olive oil and swirl to coat the bottom evenly. Place the 2.5 lb beef shoulder fillet in the pan, bone-side down if bone-in, and sear undisturbed for 5-6 minutes until a deep golden-brown crust forms. This initial sear locks in juices and creates the foundation for rich flavor.
Flip the beef shoulder and continue searing for another 5-6 minutes until all sides develop that caramelized crust. You'll notice the meat releases more easily from the pan as it cooks through. Remove the beef and set it aside on a plate, leaving all the browned bits in the pot - these contain concentrated flavor that will form the braising liquid.
Build the Aromatic Base for Complex Flavor
In the same Dutch oven, add the diced 1 whole yellow onion and cook for 5 minutes until softened. Add the 6 minced garlic cloves, 4 sprigs fresh thyme, and 2 sprigs fresh rosemary, stirring constantly for 1 minute until fragrant. The garlic should just begin to turn golden - don't let it burn as it will turn bitter.
Stir in the 2 tablespoons tomato paste and cook for 2 minutes until it darkens slightly. This step develops the sauce's depth and balances the acidity from the red wine we'll add next. The tomato paste also helps thicken the braising liquid, creating a more concentrated flavor.
Deglaze and Combine All Braising Components
Pour in the 1 cup red wine and scrape up all the browned bits from the bottom of the pot using a wooden spoon. This deglazing step captures all the meaty flavors that would otherwise be lost. Let the wine simmer for 3-4 minutes until reduced by half, until it coats the back of a spoon.
Add the 1.5 cups beef broth, 1.5 teaspoons diamond crystal kosher salt, 1 teaspoon freshly ground black pepper, and 2 whole bay leaves. Bring to a gentle simmer, then return the beef shoulder fillet to the pot. The liquid should come about halfway up the sides of the beef - if not, add a splash more broth.
Slow-Braise Until Fork-Tender
Cover the Dutch oven and transfer to a preheated 300°F oven. Braise for 3 hours, then add the 2 whole carrots and 2 whole celery stalks cut into chunks. Continue braising for another 2-3 hours until the beef is fork-tender with no resistance when pierced. The internal temperature should reach 195-205°F - this is where collagen breaks down into gelatin, creating that signature melt-in-your-mouth texture.
Check periodically and add a splash of water if the liquid reduces too much. The beef is ready when it pulls apart easily with two forks and the cooking liquid has thickened into a rich sauce. This long, slow process transforms tough beef into luxurious, fork-tender perfection.
Rest and Serve with Pan Sauce
Remove the beef from the braising liquid and transfer to a cutting board. Tent loosely with foil and let rest for 15-20 minutes. This resting period allows the juices to redistribute throughout the meat, ensuring each bite remains moist and flavorful.
Strain the braising liquid through a fine-mesh sieve to remove any solids, then return it to the pot. Simmer uncovered over medium heat for 5-7 minutes to reduce slightly and intensify the flavor. Slice the beef shoulder against the grain for maximum tenderness, then serve with the reduced pan sauce spooned over the top. Each bite should deliver rich, beefy flavor with just the right balance of herbs and wine acidity.
Pro Tips For Making Beef Shoulder Fillet
- Sear in Two Stages: Start with high heat to get that deep crust on the fillet—let it scream for 2-3 minutes per side. Then drop the heat to medium and finish cooking; this keeps the outside crisp while the inside stays tender. I used to rush this and ended up with a fillet that was either raw inside or dry as hell.
- Minimize Onion Moisture: Pat those sliced onions dry with a paper towel before cooking—wet onions release water and turn your pan into a sad, steaming mess. A quick squeeze in a clean towel makes all the difference, especially when you’re building flavor in the olive oil.
- Don’t Overcrowd the Garlic: Add whole garlic cloves one layer at a time to the pan, letting them sizzle for 30 seconds before stirring. Dumping them all in at once burns them faster than you can say “disaster.” You want golden, nutty garlic, not bitter ashes.
- Salt Before Browning: Season the beef shoulder fillet with salt at least 30 minutes before cooking—this lets the salt work its magic and season the surface evenly. I skipped this once and got a fillet that tasted like it had been salted after the fact. (Spoiler: It didn’t.)
Storing and reheating your beef shoulder fillet
Refrigerator Storage
After cooking, let your beef shoulder fillet cool for 1-2 hours at room temperature before storing. Transfer to an airtight container with the pan sauce—this preserves moisture and flavor. Store in the fridge at 40°F or below for up to 4-5 days.
The sauce will thicken slightly overnight, intensifying its richness. I always portion leftovers into single-serving glass containers for easy reheating. 🥬
Freezer Preservation
For long-term storage, freeze the beef shoulder fillet with its sauce in a freezer-safe bag or airtight container. Leave 1-inch headspace to prevent ice crystals. Label with the date—this dish stays excellent for 3-4 months.
When ready to eat, thaw overnight in the fridge for even reheating. I recommend freezing in 2-pound portions for meal prep convenience. ❄️
Oven Reheating
Preheat your oven to 300°F and place the beef shoulder fillet in a baking dish with 2-3 tablespoons of beef broth or water. Cover with foil and reheat for 15-20 minutes until reaching 165°F internal temperature.
The slow heat prevents drying while restoring moisture. Stir the pan sauce separately on the stovetop to thicken it back up. 🔥
Stovetop Revival
For quicker reheating, use a skillet over medium-low heat. Add the beef shoulder fillet with 1 tablespoon olive oil and 2 tablespoons pan sauce, heating for 5-7 minutes per side until warmed through.
Keep the sauce warm in a separate pot on low heat to avoid overcooking. This method works best for smaller portions. 💡
Microwave Method
Place the beef shoulder fillet in a microwave-safe dish with 1 tablespoon beef broth and cover loosely with a damp paper towel. Heat on 50% power for 2-3 minutes, stirring halfway.
Avoid full power to prevent drying. The sauce can be reheated separately in the microwave for 1 minute on high. This is my go-to for quick lunches. 🌡️
Texture Preservation
Always reheat beef shoulder fillet gently to maintain its ultra-tender texture. Overheating causes the fibers to tighten, making the meat tough again. I test doneness with a meat thermometer—165°F is perfect for reheated portions.
For extra moisture, add a splash of broth or water during reheating. The slow-braised method ensures reheated slices stay juicy and flavorful. 💪
Nutrition facts
Frequently asked questions
What's the best cut to use for this beef shoulder fillet recipe?
Look for a bone-in beef shoulder fillet (also called top blade or chuck shoulder) weighing 2-3 pounds. The bone adds flavor during slow cooking, while the connective tissue breaks down beautifully. Avoid pre-marinated cuts—the natural beef flavor should shine through the braising process.
Can I use this recipe for a smaller portion?
Scale down to 1 lb of beef and reduce all other ingredients by half. The cooking time remains the same (3-5 hours total), but use a smaller Dutch oven. A 1-pound portion serves 2 as a main dish or 4 as part of a meal.
Why does the recipe call for such a long cooking time?
The 5-6 hour slow braise is essential for transforming tough beef into melt-in-your-mouth tenderness. At 300°F, collagen breaks down into gelatin, creating that signature fork-tender texture. Rushing this step results in chewy meat—patience pays off with restaurant-quality results.
What if my beef shoulder fillet is too tough after cooking?
Check your internal temperature—it should reach 195-205°F for perfect tenderness. If it's still tough, extend braising time by 1-2 hours or add ½ cup water to the pot and cook uncovered at 325°F for 30 minutes to reduce excess moisture. Always slice against the grain for maximum tenderness.
Can I make this recipe in a slow cooker instead?
Yes! Sear the beef first, then transfer everything to a slow cooker. Cook on Low for 8 hours or High for 5 hours. The texture will be slightly more saucy, but equally tender. Add ½ cup broth if the liquid level is too low during cooking.