
Side Dishes
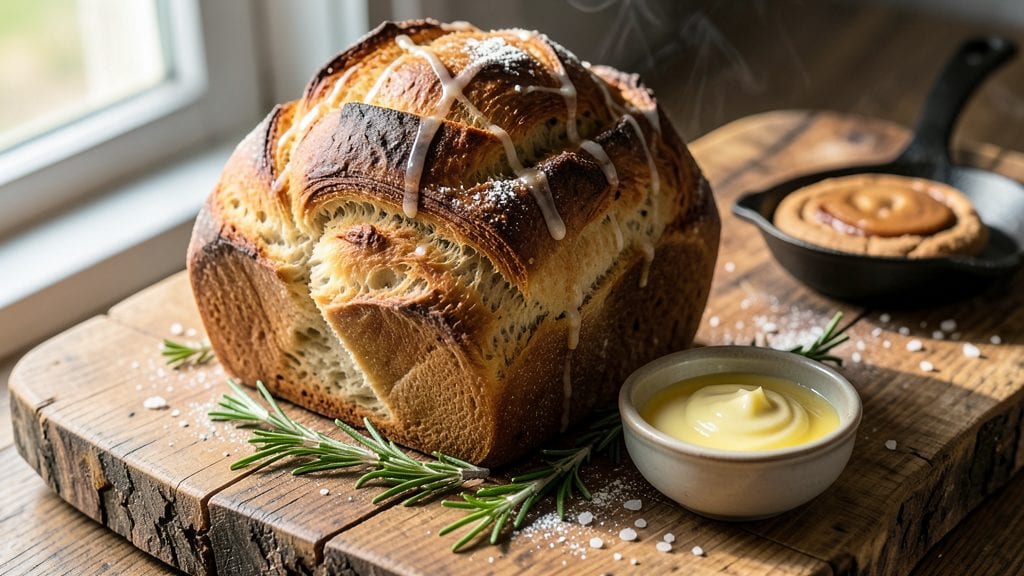
This honey-glazed cornucopia bread recipe transforms simple ingredients into a showstopping centerpiece with golden swirls and a buttery crust. 💛 I first baked this during Thanksgiving when my daughter Lily insisted we make something "pretty enough for the table"—and it became an instant family favorite.
The key lies in the swirled honey butter that caramelizes beautifully in the oven, creating those irresistible golden patterns.
The recipe combines the best of sweet and savory—soft, slightly sweet bread with a rich honey glaze and crispy edges. You'll work with a straightforward dough that requires just 15 minutes of prep before baking, making it perfect for holiday gatherings or special occasions.
The honey butter swirls create visual appeal while adding depth of flavor that pairs beautifully with any meal.
By the time it emerges from the oven, you'll have a loaf with a perfectly golden crust, tender crumb, and those signature honey swirls that make it look like it came from a bakery.
The aroma alone will have everyone gathering around the table, and the taste is equally impressive—sweet enough to satisfy dessert cravings but balanced enough to serve as a main dish.
This bread makes an excellent centerpiece for holiday feasts or a stunning addition to brunch spreads. The recipe scales easily, so you can make one large loaf or individual mini versions for parties. Let's get started on creating your own cornucopia of flavor and beauty!
Ingredients for cornucopia bread
Sweet swirls and golden crust—just 12 ingredients transform your kitchen into a bakery.
| Ingredient | Amount | Notes |
|---|---|---|
| All-Purpose Flour 🌾 | 4 cups | Sifted for light texture |
| Unsalted Butter 🧈 | ½ cup | Cold, cubed for dough |
| Granulated Sugar 🍚 | ¼ cup | For dough sweetness |
| Active Dry Yeast 🍞 | 1 package | 1 packet (2.25 tsp) |
| Warm Milk 🥛 | ½ cup | 110°F for yeast activation |
| Large Eggs 🥚 | 1 whole | Room temperature |
| Pure Honey 🍯 | ½ cup | Wildflower for depth |
| Vanilla Extract 🌸 | 1 tsp | Pure, not imitation |
| Salt 🧂 | 1 tsp | Kosher or sea salt |
| Cornmeal 🌽 | ¼ cup | For dusting bread pan |
| Coarse Sugar 🍚 | ¼ cup | For bread pan topping |
| Almond Slices 🌰 | ¼ cup | For decorative topping |
The butter and honey are the stars here. European-style butter like Plugrá or Land O'Lakes makes the dough richer, but any unsalted works. For honey, local wildflower adds complexity—avoid the cheap grocery store kind that tastes like syrup. The yeast? Fresh is best—check the date on the package, and if it's been sitting in your pantry for months, toss it. Warm the milk to 110°F (like a warm bath) to activate the yeast without killing it. I grab my flour from King Arthur or the bulk bins at Whole Foods—it bakes up lighter than the store brand stuff.
No honey? Maple syrup works in a pinch, but it's heavier and changes the flavor. Out of almond slices? Toasted pecans or walnuts give a similar crunch. For the sugar, I use turbinado or raw cane sugar for the topping—it caramelizes better than white. The dough needs to rest for at least 1 hour, so don't rush it. If you're short on time, chill it in the fridge for 20 minutes to make rolling easier. And trust me, measure the flour correctly—pack it lightly into the cup or you'll end up with a dense loaf.
This bread tastes even better the next day, so bake it a day ahead if you can. Store it wrapped in a clean kitchen towel at room temperature for 3 days, or freeze slices for up to 3 months. The honey butter swirls keep it moist, so it won't dry out like regular bread. For serving, brush warm slices with extra honey butter—game changer. And if you're feeling fancy, dust with powdered sugar or drizzle with melted chocolate. Leftovers? Toast them up for a sweet breakfast treat.
Why You'll Love This Recipe
- No-Knead Magic: This bread rises while you sleep—just mix the flour, yeast, warm milk, and butter, then let it puff up overnight. I swear by it on lazy Sundays when I don’t want to stand over a bowl.
- Buttery Sweet Crust: That caramelized sugar crust? It’s the star. The butter and sugar work together to give it a golden, crackly exterior that’s impossible to resist—like a hug from a bakery.
- Breakfast to Dessert: Same dough, endless uses. Toast it for breakfast with jam, slice it for sandwiches, or drizzle it with honey for a quick dessert. My kids beg for it at all hours.
- Pantry Staple Hero: Uses ingredients you already own, costs next to nothing, and keeps for days. Honestly, I make a double batch just to have it on hand—zero waste, maximum comfort.
Step-by-step instructions for honey-glazed swirl bread
Here's how to create that perfect golden crust with honey-kissed swirls inside.
👨🍳 Step 1: Activate the Yeast and Mix the Dough
In a large bowl, combine the 4 cups all-purpose flour and 1 teaspoon salt. Make a well in the center and add the 1 package active dry yeast, 0.25 cup granulated sugar, and 1 teaspoon vanilla extract. Pour in the 0.5 cup warm milk (110°F) and gently mix until combined.
Here's the thing—yeast loves warmth, so the milk should feel like bathwater to your wrist. Let this sit for 5 minutes until foamy. Then add the 1 whole large egg and 0.5 cup unsalted butter (cold, cubed), mixing until the butter starts to incorporate. The dough will be shaggy at first, but don't worry.
Knead on a lightly floured surface for 8-10 minutes until smooth and elastic. You'll know it's ready when it springs back when poked. Place the dough in a greased bowl, cover with a damp towel, and let rise in a warm place for 1-1.5 hours or until doubled in size. The kitchen should smell like warm, sweet bread heaven.
🥘 Step 2: Prepare the Honey Swirl Filling
While the dough rises, make the honey swirl filling. In a small bowl, whisk together the 0.5 cup pure honey and 1 tablespoon warm milk (from the 0.5 cup warm milk you used earlier). Set aside.
This is where the magic happens—when that honey swirl meets the buttery dough. The warmth of the dough will help the honey spread beautifully. Keep this mixture at room temperature until you're ready to use it.
🍳 Step 3: Shape and Swirl the Dough
Once the dough has risen, punch it down and divide it into two equal pieces. Roll each piece into a 12-inch rectangle on a floured surface, about ¼-inch thick. Spread the honey mixture evenly over one rectangle, leaving a ½-inch border around the edges.
Roll up the filled rectangle tightly from the long side, then pinch the seam to seal. Repeat with the second piece. Place the two rolls side by side in a greased 9x13-inch baking pan and twist them together like a pretzel. This creates those beautiful swirls you see in cornucopia bread.
Cover loosely with plastic wrap and let rise for another 30-45 minutes until puffy. The dough should feel springy when pressed gently. This second rise is crucial—it develops that light, airy texture we're after.
🔥 Step 4: Bake to Golden Perfection
Preheat your oven to 375°F. Sprinkle the bottom of the pan with 0.25 cup cornmeal and 0.25 cup coarse sugar, then arrange the 0.25 cup almond slices on top of the bread. Bake for 30-35 minutes until the top is deep golden brown and the internal temperature reaches 190°F.
Here's the moment that matters: the bread should pull away from the sides of the pan with a slight resistance. If the top browns too quickly, tent with foil for the last 10 minutes to prevent over-browning. The almonds should be toasted to a light golden color.
Let the bread cool in the pan for 10 minutes before transferring to a wire rack. This resting period prevents the honey from making the bread gummy. Serve warm with butter melting over those beautiful swirls and crunchy almonds on top.
Pro Tips For Making Cornucopia Bread
- Test Yeast First: Skip the guesswork—mix 1 packet of yeast with ¼ cup warm milk and 1 teaspoon sugar, then wait 5-10 minutes. If it doesn’t foam, toss it and start fresh. I’ve wasted dough waiting for sluggish yeast, and this check saves headaches.
- Cream Butter Cold: Take the unsalted butter straight from the fridge and beat it with the sugar until it’s just soft, not melted. This keeps the crumb tender and prevents a greasy texture. I used to rush this, and the bread turned out dense—don’t skip the chill.
- Don’t Overmix Dough: Mix the flour, yeast, and milk just until combined—lumpy is fine. Overworking it develops gluten too much, and your bread will turn out tough. Fold in the butter last, and stop when it’s evenly distributed. Trust me, your arms will thank you.
- Proof Until Doubled: Give the dough at least an hour to rise in a warm spot until it’s puffy and jiggly. Poking it should leave a slow bounce-back. I’ve pulled loaves too soon, and they collapsed in the oven—patience here guarantees height.
Pro cooking tips for this recipe
Yeast Activation Secrets
Your yeast is the foundation—get it wrong, and your bread flops. I swear by 110°F warm milk (test with your wrist—should feel like bathwater) to activate the yeast.
If your kitchen runs cold, pop the bowl in a 250°F oven for 5 minutes with the light on to create a warm environment. Never use hot water—it kills the yeast instantly. 🌡️
For extra insurance, I dissolve the yeast in the warm milk first, then let it foam for 5 minutes before adding to the flour. This ensures it's active and ready to work. Pro tip: If your yeast doesn't foam after 10 minutes, start over—it's expired or dead.
Dough Handling Tricks
The dough should be tacky but not sticky when kneaded—add flour 1 tablespoon at a time if needed. I use a stand mixer with a dough hook for 5-6 minutes on low speed to save my arms, but hand-kneading builds those gluten strands that make the bread light.
After kneading, let the dough rest in the bowl for 10 minutes before shaping—this relaxes the gluten for easier rolling.
If your dough springs back too aggressively when poked, it needs more kneading. But if it flattens immediately, it's overworked. The perfect dough should spring back slowly, like a bouncy ball. For sticky dough, wet your hands instead of adding more flour—it keeps the texture light.
Swirl Technique Mastery
Rolling the dough to ¼-inch thickness ensures even honey distribution. Spread the honey mixture within the ½-inch border—this prevents leaks during baking. When rolling up, keep the seam tight to avoid gaps.
The twist is key: place the two rolls side by side and gently twist them like a pretzel, then tuck the ends under. This creates those signature swirls while keeping the structure intact.
If your swirls look messy, don't panic—just reshape before the final rise. The dough is forgiving! For extra drama, add a drizzle of honey down the center before twisting. This creates a stunning golden pattern when baked.
Baking Precision
Preheat your oven for at least 30 minutes to ensure even heat distribution. The 375°F temperature is non-negotiable—too low, and the bread won't brown; too high, and it'll burn before cooking through. Use an oven thermometer to verify accuracy—many ovens run 25°F hotter or colder than set.
Sprinkle the cornmeal and sugar on the pan bottom right before baking—this creates that crispy crust and caramelized sugar crust. The almonds should go on top in the last 5 minutes of baking to prevent burning.
If the bread browns too quickly, tent with foil and check the internal temperature—it's done at 190°F.
Cooling and Serving
Let the bread cool in the pan for 10 minutes—this traps heat and finishes cooking the center. Then transfer to a wire rack to prevent sogginess. If you can't wait, slice it thickly and serve warm with extra honey butter.
For a restaurant-worthy touch, dust with powdered sugar or drizzle with melted dark chocolate.
Leftovers? Toast slices for a sweet breakfast treat or freeze for up to 3 months. The honey keeps it moist, so it reheats beautifully. I often make a double batch—this bread disappears faster than you can say "second slice." 💛
Nutrition facts
Frequently asked questions
Can I make this bread without honey?
For a similar flavor, substitute the honey with ½ cup maple syrup or ⅓ cup brown sugar mixed with 2 tablespoons warm water. Keep in mind the texture may be slightly denser, and the swirls won't caramelize as beautifully. The vanilla and butter will still create a delicious bread.
Why did my bread turn out dense instead of light and fluffy?
Dense bread usually means one of three things: under-kneaded dough (needs 8-10 minutes of kneading), expired yeast, or over-handling the dough during shaping. Make sure your yeast is fresh (it should foam within 5-10 minutes in warm milk), and don't press too hard when shaping. Let the dough rest between kneading and rolling for 10 minutes to relax the gluten.
How can I make individual portions instead of one large loaf?
Divide the dough into 8 equal portions (about ½ cup each) after the first rise. Shape each into a small log, roll up with a thin layer of honey mixture, and place in a greased mini loaf pan or muffin tin. Bake at 375°F for 18-20 minutes until golden. These mini loaves make perfect party favors or breakfast treats!
Can I add other flavors to this recipe?
Yes! For a citrus twist, add 1 teaspoon lemon zest to the dough. For a spiced version, mix ½ teaspoon cinnamon and ¼ teaspoon nutmeg into the honey mixture. If you love nuts, try swapping almonds for pecans or walnuts. Just remember to adjust the topping quantities to maintain the bread's balance.
How long can I store this bread, and how do I reheat slices?
Wrap cooled bread in a clean kitchen towel and store at room temperature for 3 days. For longer storage, freeze slices wrapped in plastic for up to 3 months. To reheat, wrap slices in foil and warm in a 350°F oven for 5-7 minutes or toast in a toaster until golden. The honey keeps it moist, so it reheats beautifully!