
Side Dishes
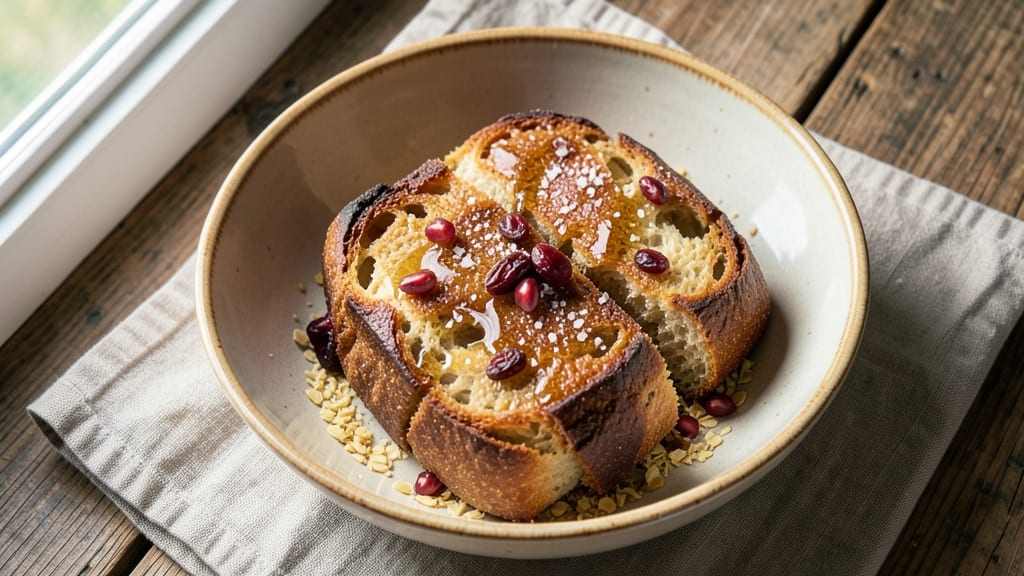
This farmers bread recipe delivers the rustic, artisanal quality of a wood-fired loaf with a no-knead method that works for even beginner bakers.
The secret lies in a simple dough of flour, yeast, water, and salt that develops its signature open crumb and crisp crust with minimal effort—just time and a hot Dutch oven.
I perfected this version after years of testing, ensuring the crust stays golden and shatteringly crisp while the interior remains soft and airy.
The beauty of this recipe is its versatility—you can shape it into a classic round loaf, a rustic batard, or even a free-form boule. The dough requires no kneading, just mixing and resting, which makes it ideal for busy schedules.
Baking in a Dutch oven captures steam, creating that coveted oven spring and crackly crust that defines authentic farmers bread. Every slice reveals an open crumb structure with those signature air pockets that make it irresistible.
What sets this apart is the balance of simplicity and professional results. You’ll achieve a loaf with a deep golden crust and a tender interior that’s perfect for sandwiches, dipping in olive oil, or serving alongside soups.
The recipe scales easily, so you can make a single loaf for two or bake a large batch for a crowd. Once you try this method, store-bought bread will never compare.
For those who want to experiment, try adding seeds or herbs to the dough before baking, or use a sourdough starter for a tangier flavor. The key is patience—letting the dough rest and the oven preheat properly makes all the difference. Let’s get started on your first perfect loaf.
Ingredients for farmers bread
Four cups flour, a pinch of yeast, and time create this legendary rustic loaf.
| Ingredient | Amount | Notes |
|---|---|---|
| All-Purpose Flour 🌾 | 4 cups | Unbleached preferred for rustic flavor |
| Active Dry Yeast 🍞 | ¼ tsp | Ensure it's fresh and active |
| Granulated Sugar 🍬 | ½ tsp | Helps activate yeast quickly |
| Instant Potato Flakes 🥔 | 1 tbsp | For steam and texture development |
| Kosher Salt 🧂 | 1 ½ tsp | Adjust to taste for crust |
| Warm Water 💧 | 1 ½ cups | 105-110°F for yeast activation |
| Extra-Virgin Olive Oil 🫒 | 1 tbsp | For dough handling and crust |
| Cornmeal 🌽 | ¼ cup | For dusting and steam |
| Ice Cubes ❄️ | ½ cup | For dough chilling |
The flour is non-negotiable—King Arthur or Caputo Tipo 00 if you want that signature open crumb. Regular all-purpose works in a pinch, but the texture won't be as dramatic. King Arthur is my go-to for home baking because it's consistent and reliable. For the yeast, always check the expiration date—old yeast means weak dough. Saf-Instant is my preferred brand because it activates faster without needing to dissolve first. Store your flour in an airtight container away from heat to prevent rancidity, which can kill the yeast and ruin your loaf.
No instant potato flakes? Substitute with 1 tbsp cornstarch, though you'll lose some of that signature steam. Running short on cornmeal? Semolina works just as well for dusting. The olive oil should be extra-virgin—California brands like Corto or Colavita have the right balance of fruitiness without overpowering. If your water isn't between 105-110°F, the yeast won't activate properly. I microwave my water for 40 seconds to hit that sweet spot. For the salt, Diamond Crystal is my favorite because it dissolves easily and doesn't leave a bitter aftertaste.
This dough needs time—at least 12 hours in the fridge for optimal flavor development. Store your shaped loaf in a paper bag at room temperature for up to 3 days, or freeze for 3 months wrapped in plastic. The crust stays crisp for about 24 hours after baking, so slice it fresh. For leftovers, reheat in a 350°F oven for 5-10 minutes to restore crispiness. The ice cubes trick is crucial—it prevents overproofing and helps create that signature oven spring.
Why You'll Love This Recipe
- No Yeast Drama: I swear by this recipe because it skips the fuss of waiting for yeast to proof. Just toss in the dry yeast with warm water, sugar, and potato flakes—no kneading, no second rise, no stress. The potato flakes give it a subtle chewiness that’s almost like sourdough, but without the guesswork.
- Crispy-Chewy Magic: That crispy crust with a pillowy center? The potato flakes are the secret. They add a savory depth while keeping it light—no dense, heavy loaf here. Honestly, it’s the kind of bread that makes you pause mid-slice just to admire the texture.
- Weeknight Wonder: Between us, this is my go-to when I’m too tired to bake. Toss it together in the morning, let it rise while I’m at work, and bake it after dinner. It’s the only bread that feels like a hug when you’re exhausted.
- Budget Loaf: All-purpose flour, yeast, and salt? This is bread for people who don’t want to break the bank. The potato flakes stretch the dough just enough to feel hearty, and a single batch feeds my family for days. Leftovers? Toast them, freeze them, or turn them into croutons—no waste.
Step-by-step instructions for rustic farmers bread
Here's how to craft a classic no-knead loaf with an artisanal crust and tender crumb.
Activate the Yeast and Mix the Dough
In a large mixing bowl, combine the 1.5 cups warm water, 0.5 tsp granulated sugar, and 0.25 tsp active dry yeast. Let this mixture sit for 5-10 minutes until it becomes frothy and bubbles form on the surface. This confirms the yeast is active and ready to work.
Next, add the 4 cups all-purpose flour and 1.5 tsp kosher salt to the bowl. Stir gently with a wooden spoon or silicone spatula until a shaggy dough begins to form. The dough will be sticky at this stage, but that's normal. Add the 1 tbsp extra-virgin olive oil and the 1 tbsp instant potato flakes, mixing just until incorporated. The potato flakes will help create steam during baking, giving your bread that signature open crumb structure.
Rest and Shape the Dough
Transfer the dough to a lightly greased bowl and cover it tightly with plastic wrap. Place the bowl in the refrigerator and let it rest for 12-18 hours. This long fermentation develops deep flavor and allows the gluten to relax, making the dough easier to shape. The dough should nearly double in size during this time, though it may not rise dramatically due to the no-knead method.
After resting, remove the dough from the refrigerator and turn it out onto a lightly floured surface. Gently shape it into a round boule by pulling the edges toward the center and tucking them under. The dough will be very soft and sticky, so work quickly to avoid over-handling. Dust your hands with more flour if needed, but don't add too much or the crust will become tough.
Prepare for Baking with Steam
Preheat your oven to 450°F with a Dutch oven inside for 30 minutes. The Dutch oven will create steam and help develop the bread's crust. While the oven preheats, place a baking sheet on the lowest rack and sprinkle it evenly with 0.25 cup cornmeal. This will catch any dough that sticks during the scoring step.
Once the oven is fully preheated, carefully remove the Dutch oven and place the shaped dough inside. Sprinkle 0.5 cup ice cubes over the top of the dough. The ice will melt and create steam, which is crucial for developing that signature open crumb and crisp crust. Bake the bread, covered, for 30 minutes. Then remove the lid and bake for another 15-20 minutes until the crust is deep golden brown and the internal temperature reaches 205-210°F.
Cool and Serve for Maximum Flavor
Remove the bread from the Dutch oven and transfer it to a wire rack to cool completely. This step is important—cooling allows the bread to set properly and prevents a gummy texture. While it cools, you'll notice the crust becomes even more crisp and the crumb develops its characteristic open texture.
Once fully cooled, slice the bread with a serrated knife and serve. The interior should be soft and slightly chewy, with a crisp exterior that's perfect for dipping in olive oil or butter. This rustic loaf pairs beautifully with soups, salads, or simply on its own with a spread of your favorite jam. Store any leftovers wrapped in a cloth bag at room temperature for up to 3 days, or freeze for longer storage.
Pro Tips For Making Farmers Bread
- Use Warm Water: DESCRIPTION: The yeast in this recipe wakes up faster in water that’s about 110°F—not boiling, not ice cold. I used to eyeball it and end up with sluggish dough. Grab a thermometer or test with your wrist: if it feels like bathwater, you’re golden.
- Mix the Potato Flakes: DESCRIPTION: Don’t just dump the instant potato flakes into the dry ingredients—they need to hydrate first. Sprinkle them over the flour and yeast, then stir in ¼ cup warm water before adding the rest. This prevents clumps and ensures they dissolve evenly into the dough.
- Skip the Over-Kneading: DESCRIPTION: This dough doesn’t need the kind of punishment sourdough gets. Once the yeast is active and the ingredients are combined, knead just until it clears the sides of the bowl—about 3-4 minutes. Overwork it, and the bread turns tough, even if it looks smooth.
- Steam the Loaf: DESCRIPTION: Farmers bread gets its signature crust from steam, not just heat. Place a metal bowl of boiling water in the oven before baking, then drop your shaped loaf in. The steam locks in moisture and gives that crispy exterior without drying out the crumb. (Yes, even if your oven isn’t fancy.)
Serving suggestions for leftovers
Classic Olive Oil Dip
This rustic bread shines when served with a simple yet elegant extra-virgin olive oil dip. I mix ½ cup high-quality olive oil (like Corto) with 1 tsp balsamic vinegar, ½ tsp flaky sea salt, and a pinch of red pepper flakes.
Drizzle generously over warm slices or serve in a small bowl for dipping. The bread's crisp crust soaks up the oil perfectly, creating a flavor explosion. 🫒
Soup Pairings
Farmers bread is a match made in heaven with hearty soups like tomato basil or French onion. The bread's open crumb structure soaks up broth beautifully, and the crust adds satisfying texture.
For a lighter option, try pairing with a chilled cucumber-dill soup—the contrast of warm bread and cool soup is refreshing. I often serve it with a garlic-parsley butter on the side for extra richness.
Sandwich Potential
This bread transforms into a gourmet sandwich base when sliced thickly. Toast the slices lightly to enhance crispiness, then layer with prosciutto, fresh mozzarella, and roasted red peppers for a Caprese-style sandwich.
For a heartier option, pile on shredded chicken, avocado mash, and arugula with a drizzle of chipotle mayo. The bread's sturdy structure holds up perfectly to all these fillings.
Cheese and Charcuterie
Use farmers bread as the foundation for an elevated charcuterie board. Serve thick slices alongside aged cheddar, brie, and smoked gouda, paired with salami, cornichons, and honeycomb. The bread's nutty flavor complements the cheeses beautifully, and its crisp crust adds texture contrast.
I like to arrange everything on a large wooden board with a few sprigs of fresh rosemary for garnish. 🧀
Breakfast Serving
Transform your breakfast with farmers bread as a toast base. Toast thick slices until golden, then top with ricotta cheese, honey, and sliced figs for a sweet option.
For savory, spread with garlic-herb butter and top with fried eggs and crispy bacon. The bread's sturdy structure holds up to all these toppings without getting soggy.
Garnish Ideas
Elevate your presentation with simple garnishes. Sprinkle flaky sea salt and fresh thyme leaves over warm slices before serving. For a pop of color, add edible flowers or microgreens.
A light drizzle of infused olive oil (like lemon or rosemary) adds an extra layer of flavor. These small touches make your bread look and taste restaurant-quality. ✨
Nutrition facts
Frequently asked questions
Why does this recipe call for instant potato flakes?
The potato flakes create steam during baking, which helps develop that signature open crumb structure and crisp crust. They're a secret ingredient in many artisanal bread recipes—think of them as nature's oven spring booster! Without them, your loaf might be denser.
Can I make this bread without a Dutch oven?
Yes, but your crust won't be as crisp. Use a heavy oven-safe pot with a lid or bake on a pizza stone. For extra steam, place a metal bowl of boiling water on the oven rack during the first 20 minutes of baking. The texture will be good, just not quite as professional.
How do I know when the dough is properly proofed?
Gently press your finger into the dough—if it springs back slowly (not immediately), it's ready. For this recipe, the dough should nearly double in size after 12-18 hours in the fridge. Overproofing is harder to fix than underproofing, so when in doubt, bake sooner rather than later.
What's the best way to reheat stale farmers bread?
Wrap the bread in foil and warm at 350°F for 5-10 minutes until crispy again. For individual slices, toast in a dry skillet over medium heat for 1-2 minutes per side. Avoid the microwave—it makes bread gummy. Freshly baked bread reheats best!
Can I add seeds or herbs to this dough?
Mix in 1-2 tablespoons of seeds (sesame, poppy, or flax) or chopped herbs (rosemary, thyme) with the flour. For visible toppings, sprinkle them on before baking. Just don't overdo it—too many seeds can make the dough too dense.