
Sauces & Condiments
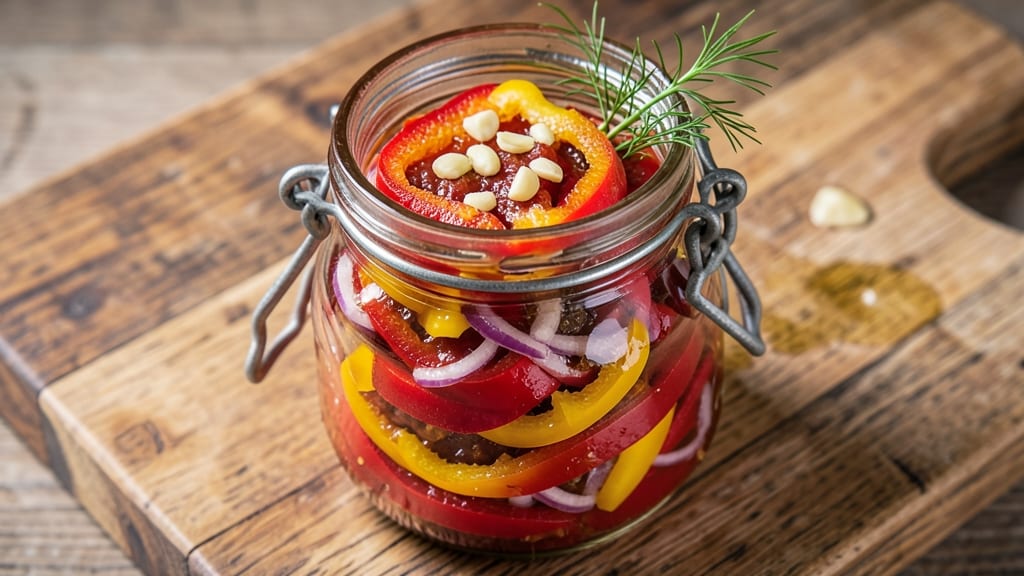
This Harry and David sweet pepper relish recipe transforms garden-fresh peppers into a sweet-and-sour jam with crunchy texture that pairs perfectly with charcuterie boards and sandwiches. The traditional method preserves vibrant colors while balancing sugar and vinegar for that signature tangy-sweet flavor profile.
I've perfected this recipe over years of canning, ensuring every jar delivers restaurant-quality condiment at home.
The process begins with sterilizing jars and peppers to maintain freshness, then simmering them with sugar, vinegar, and spices until tender yet still holding their shape. This isn't just any sweet pepper relish—it's a textural experience where each bite delivers crisp pepper pieces suspended in a glossy, slightly thickened sauce.
The key lies in precise cooking times to avoid mushiness while developing depth of flavor.
What makes this recipe special is its versatility—use it as a sandwich spread, charcuterie accent, or even a glaze for roasted meats. The sweetness mellows over time, making it even more complex after a few weeks in storage.
With proper canning techniques, you'll have jars that last for months, ready to elevate any meal with that signature Harry and David taste.
Whether you're a seasoned canner or trying this for the first time, the step-by-step instructions make it approachable while maintaining professional results. The traditional method ensures authenticity, but modern adaptations like quick-pickling variations are included for those short on time.
Let's get started on creating your homemade sweet pepper relish that will impress everyone at the table.
Ingredients for harry and david sweet pepper relish
Transforming fresh peppers into a restaurant-quality sweet-and-sour jam requires just ten precise ingredients.
| Ingredient | Amount | Notes |
|---|---|---|
| Fresh Red Bell Peppers 🌶️ | 4 whole | Medium size, seeds removed |
| Yellow Bell Peppers 🟡 | 2 whole | Medium size, seeds removed |
| White Vinegar 💧 | 2 cups | Distilled white preferred |
| Granulated Sugar 🍚 | 2 cups | White or raw preferred |
| Onion 🧅 | 1 whole | Yellow or white, diced |
| Garlic Cloves 🧄 | 4 cloves | Freshly minced |
| Mustard Seeds 🌾 | 1 tbsp | Yellow preferred |
| Ground Allspice 🌶️ | ½ tsp | Freshly ground preferred |
| Salt 🧂 | 1 tsp | Diamond Crystal preferred |
| Canning Salt 🧂 | 1 tsp | For processing jars |
The bell peppers form the heart of this relish, so select firm, vibrant varieties from a trusted source. Harry & David peppers deliver ideal sweetness and texture, but local farmers' markets often carry superior quality. Avoid any with soft spots or dull coloring—these indicate aging. For the vinegar, distilled white vinegar ensures consistent acidity, while sugar should be fine granulated to dissolve smoothly. The onion and garlic should be freshly diced and minced, respectively, to maximize aromatic impact during simmering. Mustard seeds add subtle complexity—yellow seeds provide a milder flavor than brown.
Substitutions are possible but may alter texture or flavor balance. Yellow bell peppers can replace reds at equal volume, though they'll yield a paler final product. For vinegar, apple cider vinegar adds fruity notes but may introduce cloudiness. If mustard seeds are unavailable, 1/4 tsp ground mustard suffices. The allspice can be omitted entirely without drastically changing the profile, though it contributes warmth. For sugar, honey or maple syrup work at 1:1 ratio, though they may create a thicker consistency. When processing jars, pickling salt or kosher salt can substitute canning salt at equal volume, though it may affect shelf stability.
This relish maintains peak quality for 12-18 months when properly canned using the hot water bath method. Store sealed jars in a cool, dark pantry to preserve vibrant colors and crisp texture. Once opened, refrigerate and consume within 3 months. The relish's texture improves with aging—after 3 weeks, the peppers develop deeper sweetness and the sauce achieves ideal thickness. For quick use, the relish can be refrigerated in airtight containers for up to 2 weeks without canning, though it won't last as long on the shelf.
Why You'll Love This Recipe
- No-Fuss Assembly: I swear, this takes less time than waiting for a podcast to load. Just slice peppers and onions, toss in vinegar and sugar, and let the magic happen in a jar. Honestly, I’ve made it while scrolling through my phone—no measuring cups, no fuss.
- Sweet-Tangy Magic: That balance of bright vinegar and caramelized sugar? It’s like summer in a jar. The red and yellow peppers add this gorgeous color and a subtle crunch, while the onion gives it depth—way better than store-bought, which tastes like sad, overcooked peppers.
- Party-Ready Sidekick: Slather it on hot dogs at a backyard BBQ, mix it into deviled eggs for a fancy brunch, or serve it with cheese and crackers when friends drop by. Between us, it’s my go-to for potlucks because it’s cheap to make and always a hit.
- Lasts All Week: Make a big batch, and you’ll still have it when you’re scrambling for a quick lunch. The vinegar keeps it fresh for ages, and the sugar preserves the peppers’ vibrancy—no sad, wilted relish here. Plus, it’s way cheaper than buying jars at the store.
Step-by-step instructions for Harry and David sweet pepper relish
Here's the method for crafting a vibrant, sweet-and-sour pepper relish with perfect texture and balance.
Sterilize Jars and Prepare Peppers
Begin by sterilizing your canning jars and lids in boiling water for 10 minutes. This ensures a safe seal and prevents spoilage. While the jars prepare, wash and dry the 4 whole fresh red bell peppers and 2 whole yellow bell peppers. Cut them in half lengthwise, remove seeds and membranes, then slice into ¼-inch strips. The peppers should be uniform in size for even cooking.
Place the sliced peppers in a large mixing bowl. Add the diced onion and minced garlic cloves, tossing gently to combine. The raw onion will soften during processing, but its sharpness will mellow into the relish's sweet-sour profile. Set this mixture aside while you prepare the remaining ingredients.
Combine Vinegar, Sugar, and Spices
In a separate large bowl, whisk together the 2 cups white vinegar and 2 cups granulated sugar until fully dissolved. The mixture should become syrupy and clear—this ensures even distribution of sweetness throughout the relish. Add the 1 tablespoon mustard seeds, ½ teaspoon ground allspice, and 1 teaspoon salt, stirring to incorporate.
Here's the thing—this step is where the relish's signature balance begins. The vinegar provides the necessary acidity to preserve the peppers while preventing the sugar from crystallizing. The mustard seeds add subtle heat, and the allspice contributes warmth that deepens as the relish sits. Taste the mixture now; it should be intensely sweet and tangy, with a hint of spice.
Pack Jars and Process for Preservation
Ladle the pepper mixture into the sterilized jars, filling each to within ½ inch of the rim. Then carefully ladle the vinegar-sugar mixture over the peppers, ensuring each jar is completely covered. The liquid should fully submerge the peppers to prevent mold growth. Remove any air bubbles by gently tapping the jars against the counter.
Wipe the jar rims with a clean, damp cloth to ensure a proper seal, then place the lids on the jars and screw on the bands until fingertip-tight. Place the filled jars in a large pot, ensuring they stand upright and are fully submerged in water. Add enough water to cover the jars by at least 1 inch. Bring to a boil over medium-high heat, then reduce to a gentle simmer and process for 30 minutes. This timing ensures the relish is properly sterilized and sealed for long-term storage.
Cool and Store for Maximum Flavor Development
Remove the jars from the pot using tongs and let them cool on a towel-lined counter for 12 hours. This gradual cooling allows the lids to seal properly. After cooling, check that the lids have sealed by pressing down on the center—they should not pop back up. If any jars fail to seal, refrigerate and use within 1 week. Properly sealed jars can be stored at room temperature for up to 1 year.
The relish will continue to develop its sweet-and-sour balance over time. After 2 weeks, the flavors will be fully harmonized, with the peppers retaining their vibrant color and slight crunch. The mustard seeds will have softened slightly, adding subtle texture without overpowering the sweetness. Serve chilled as a condiment with charcuterie, sandwiches, or grilled meats for a bright, refreshing contrast.
Pro Tips For Making Harry And David Sweet Pepper Relish
- CHAR THE PEPPERS: Roast the bell peppers whole over an open flame or under a broiler until the skin blackens and blisters—this isn’t just for flavor, it’s for texture. I used to peel them afterward, but the charred bits add depth, so I leave them in. Just make sure they’re fully collapsed and soft before chopping.
- COOK THE ONIONS LOW: Onions caramelize slow and steady—don’t rush them. Sauté in a little oil over medium-low heat until they’re deep golden, almost jammy, before adding the vinegar. I learned this the hard way: burnt onions taste like regret.
- BALANCE THE VINEGAR: Taste before fully committing—vinegar can sneak up on you. Start with 1/2 cup, then adjust after simmering. If it’s too sharp, add a splash of water or a pinch more sugar. The relish should taste bright but not pucker your lips.
- STRAIN THE SEEDS: Remove the seeds and membranes from the peppers before chopping—this keeps the relish clean and prevents bitterness. I skip this sometimes, but the texture is noticeably smoother when you don’t. Worth the extra 30 seconds.
Storing and reheating this dish
Refrigerator Storage
Once opened, transfer your sweet pepper relish to an airtight container with a lid—glass jars or plastic containers with tight seals work best. Store in the refrigerator where temperatures stay at 40°F or below.
The relish will maintain its vibrant texture and bright flavors for up to 3 months, though I recommend using it within 6-8 weeks for peak quality. The acidity from the vinegar helps preserve it longer than most fruit preserves, but the peppers may soften slightly over time. 💡
Freezer Preservation
For longer storage, portion the relish into freezer-safe containers or heavy-duty freezer bags, leaving ½-inch headspace to prevent expansion cracks. Seal tightly, label with the date, and freeze for up to 8 months.
When ready to use, thaw overnight in the refrigerator—never microwave directly from frozen, as this can break down the pepper texture. The relish may thicken slightly after freezing, so add a splash of water or vinegar when reheating if needed. ❄️
Room-Temperature Canning
Properly sealed jars stored in a cool, dark pantry (below 70°F) will keep for 12-18 months without refrigeration. The vinegar-sugar mixture creates an acidic environment that inhibits bacterial growth, making this relish shelf-stable.
Always check seals before opening—press the center of the lid; if it doesn’t pop back, the jar is safe. Once opened, though, it must move to the fridge immediately. I like to store my jars in a pantry organizer to keep them dust-free while maintaining easy access. 🌟
Reheating for Spreadability
If your relish thickens during storage, reheat gently to restore its glossy consistency. Pour into a saucepan and warm over low heat for 5-7 minutes, stirring occasionally. Avoid boiling, as this can make the peppers mushy.
For a quicker fix, microwave in 30-second bursts, stirring between each, until just heated through. The relish is best served at room temperature, so let it sit for 10 minutes after reheating before using. 🔥
Reviving Texture
If the peppers lose their crispness after storage, don’t toss the jar! Add 1-2 tablespoons of vinegar to the relish and heat gently for 3-5 minutes. The acidity helps restore some of the original crunch while balancing flavors.
For extra texture, sprinkle in ½ teaspoon of mustard seeds or a pinch of ground allspice before reheating. This trick works especially well with relish that’s been stored for 6 months or longer.
Shelf-Life Indicators
Watch for these signs that your relish has gone bad: a foul odor, mold growth, or an unusual color change (like darkening or cloudiness). If the lid starts to bulge or the relish develops a sour or fermented smell, discard it immediately—these are signs of spoilage.
Properly canned relish should maintain its bright color and pleasant tang throughout its shelf life. When in doubt, trust your nose—if it smells off, it’s time to make a fresh batch. 💪
Nutrition facts
Frequently asked questions
Can I substitute other peppers for the red and yellow bell peppers?
Yes, but with adjustments! For a milder flavor, use orange bell peppers at a 1:1 ratio. If you prefer heat, swap 2 red peppers for jalapeños or serranos, but reduce to ½ pepper and remove seeds first. The sweetness balance will shift—add 1 extra tablespoon of sugar if using hot peppers. Avoid waxy varieties like banana peppers, as they won't soften properly.
Why does my homemade relish turn cloudy after canning?
Cloudiness usually means the sugar didn't fully dissolve or the vinegar wasn't strong enough to clarify the mixture. To fix it, stir in 1 extra tablespoon of sugar per jar and reheat gently for 5 minutes, stirring constantly. For future batches, ensure the sugar is fully dissolved before packing jars, and use distilled white vinegar for best clarity.
How can I make this relish without canning for quick use?
For fridge-only storage, follow the same recipe but pack the relish into sterilized airtight containers (glass or plastic). Store in the fridge for up to 2 weeks. The texture will be slightly softer than canned versions, but the flavor remains vibrant. Add 1 extra tablespoon of vinegar per jar to extend shelf life. This method works well for small batches or gifts!
What's the best way to use up extra relish if I made too much?
This versatile condiment works in so many ways! Spread it on grilled cheese sandwiches, mix into deviled eggs, or drizzle over roasted pork tenderloin. Try it as a glaze for baked chicken thighs (brush on before roasting) or as a topping for burgers and hot dogs. For a sweet twist, pair with blue cheese or goat cheese on crackers. The possibilities are endless!
Can I adjust the sweetness level for a less sugary version?
For a lower-sugar option, reduce the sugar to 1½ cups and increase the vinegar to 2½ cups. This maintains the preservation while cutting sweetness by 25%. If you prefer a sweeter relish, add ½ cup honey or maple syrup and reduce vinegar by ¼ cup to balance the flavors. Always taste before canning!